• Scam Alert. Members are reminded to NOT send money to buy anything. Don't buy things remote and have it shipped - go get it yourself, pay in person, and take your equipment with you. Scammers have burned people on this forum. Urgency, secrecy, excuses, selling for friend, newish members, FUD, are RED FLAGS. A video conference call is not adequate assurance. Face to face interactions are required. Please report suspicions to the forum admins. Stay Safe - anyone can get scammed.

Lathe Storage

And here's a couple of pictures of the construction process.
First though the tale of woe. I decided because the cast piece someone gave me was very soft that I'd better use coolant on the band saw. Haven't used coolant for decades. Pump wouldn't pump. Pulled off the pump and emptied major gunk out of the reservoir.
BandSawGunk.jpg

Once I had the pump out I grabbed the shaft with pliers and twisted it. A full turn and after that I could spin it by hand. After that the motor could turn it.
Spent more than an hour cleaning the tank. Then a just under a litre of Princess Auto Powerfist Water Soluable cutting oil and about 25 litres of water.

Then it took over two hours to cut the 4 disks. After the first two were cut I could start on turning them. First face one side of all 4 pieces in the 4 jaw chuck and drill a 1/2" hole. Then flip the thinest one and surface until all the saw marks are gone. That worked out to 15.6mm. My saw blade probably needs replacing or there are some alignment issues as it had issues cutting perfectly square blanks.

Next flip each blank and with the carriage locked at that position and just use the compound to feed in until the dial reads the same as the first piece. Measure. 15.6mm. Rinse and repeat two more times.

SpacerFacing.jpg

The above photo is a screen grab of a really short video showing my ELS driving the Z axis lead screw but the south bend set for power cross feed. Setting up feed rates let me go quickly towards the middle for a rough cut and as it returned to start I fed the compound in 0.005" and the return pass was slower and did a nice cleaning job.

Finally, although not really needed, I decided I wanted all 4 pieces the same diameter and concentric to the drilled (not bored) hole. Once again my ELS to cut each pass to bring it down to the same diameter which saved having to hover over it and I could do other things. Like spray WD-40 and brush away chips.

Notice that it was easiest, for me anyway, to put the disk on an existing half inch mandrel and turn it between centers. I could also have chucked the head stock end into a collet instead of a drive dog since I didn't need to end for end the work.

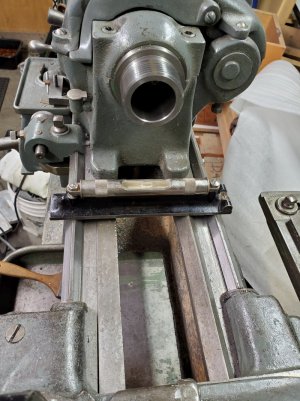
SpacerDiameterTurning.jpg
 
re: getting labels off...

The more common way is to use a heat gun. This will leave behind adhesive that you can dissolve in canola oil (or peanut oil if you are well off) I find oil will soak the label off and leave less residue, but on a vertical surface, it isn't practical.
 
re: getting labels off...

The more common way is to use a heat gun. This will leave behind adhesive that you can dissolve in canola oil (or peanut oil if you are well off) I find oil will soak the label off and leave less residue, but on a vertical surface, it isn't practical.
Thanks. I'll try that. I can pull the drawers out again and set the face horizontal.
 
Very well done!

Now if I could only figure out how to easily pull off that stupid label on the bottom drawer.


The best trick I can offer in addition to what @Dabbler suggested is to go slow. REALLY SLOW! By pulling very very slowly, the adhesive will stretch and then slowly let go. Just apply continuous tension below the point where the paper or plastic label tears and the adhesive will slowly release. Extreme patience is required especially for large labels.

Once in a while some Goo-gon applied at the separation point helps. So does a little heat applied from the backside.
 
We entirely missed the other way to keep the cabinet from falling over. Bolt a short beam to the top that comes to rest under the rear rail of the lathe.
 
We entirely missed the other way to keep the cabinet from falling over. Bolt a short beam to the top that comes to rest under the rear rail of the lathe.
Well now. :D We can start discussing my 20-20 hind sight which doesn't need the progressive lenses I wear for looking forward. :rolleyes:

I thought I'd measured correctly and I'd have room to slide the cabinet to the right and the top corner at the front would be captured by the leg without interfering with the drawers.
NOT! Measured where it was easy to get the tape in. Didn't see that the legs have a 1/2" flange behind the leg which makes that distance 1/2" less. Just like my 1mm over height that's enough to prevent it going any further sideways and now I don't have room for my power cabinet in between it and the motor.

Where it's sitting now, and I like that front to back position since it's out of the way of my feet, it turns out the back of the cabinet is flush with the back of the lathe stand. A simple strap between the two would prevent tipping. :rolleyes:

So now I could remove the $16 worth of Oak painstakingly (but with great CNC fun) drilled and tapped and just put T-Nuts into the softer plywood pieces bolted into the original castor locations and drill a hole through the metal cabinet for the feet to go. Of course if for some reason I later decide to move the cabinet out and use it elsewhere the tipping problem could return. :eek: But that means $2.69 T-Nuts which is why I tapped the Oak in the first place.

So for now, I'm going to leave it exactly as is while I figure out the mounts for the control and maybe finally put my ELS up there too instead of as a carry around box which is inconvenient at times. And then revisit this after I insulate and vapour barrier the rest of the concrete in the carport/shop. Perhaps ultimately build a custom cabinet that fits where I want and fits properly.

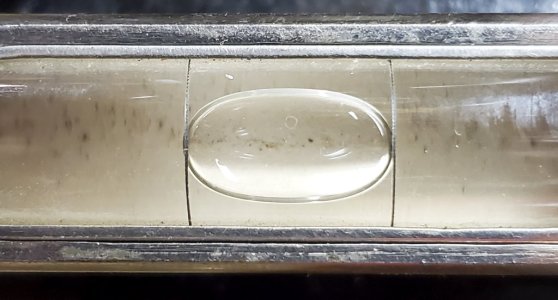
After all the protruding feet don't interfere. Ie. They aren't in the way. At least not yet. I have to wait a day or so before I fill it so I can pull it out to get easier access to the adjustment screws when I borrow the machinists level.

And with that 20-20 hindsight and now extra side space, I could have mounted castors completely on the side raised up so the cabinet clears but can still be rolled out. But I wanted the space which I don't have now anyway. :oops:
 
My biggest issue keeping dwarf out of the drawers.

Who is the dwarf? LMAO!

I assume you meant swarf!

That's why I don't want a cabinet there. But if I did, I'd just hang a cloth or canvas drop sheet over it.
 
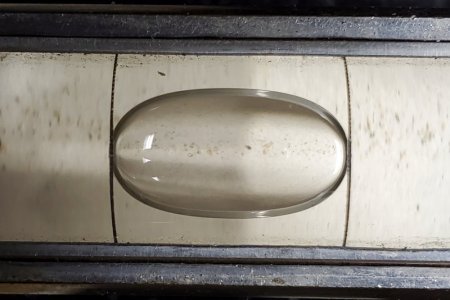
Oh ya, plenty good enough!

Unless the level isn't proofed and you swapped ends..... LOL!

But now you have to check the spindle and then the tailstock..... If you want to!
Level is proofed. Didn't swap ends.

I don't want to...

The South Bend alignment manual tells about turning a 1" piece with two of the same diameters a way apart. Then measuring to see if there is a taper. The problem is that's the area where the bed is worn so I'd see what appears like a taper but isn't.

When I turned the Gingery ACME lead screw with the following steady I found I had to tweak the depth of cut in the left to middle section as the carriage moved from left to right. That's because as the carriage dropped slightly it changed where the tool bit cut and that meant a larger diameter. A nut threaded at both ends but would jam in the middle so I tweaked until the nut turned with the same friction all along the screw.

The screw is nicer than the all thread ACME stuff I was using before.

1659742842545.webp
 
Level is proofed. Didn't swap ends.

I don't want to...

The South Bend alignment manual tells about turning a 1" piece with two of the same diameters a way apart. Then measuring to see if there is a taper. The problem is that's the area where the bed is worn so I'd see what appears like a taper but isn't.

When I turned the Gingery ACME lead screw with the following steady I found I had to tweak the depth of cut in the left to middle section as the carriage moved from left to right. That's because as the carriage dropped slightly it changed where the tool bit cut and that meant a larger diameter. A nut threaded at both ends but would jam in the middle so I tweaked until the nut turned with the same friction all along the screw.

The screw is nicer than the all thread ACME stuff I was using before.

View attachment 25390

Sounds to me like you know exactly what you are doing and why. So ya, it's all good!

I am interested in your situation. I had wanted to consider issues like that as I worked on an improved alignment test bar. Would you consider doing some measurements for me at some future date - assuming I don't croak before then?

Do you know how your lathe got saddled like that? Too much of the same work?
Thanks.

I'm not sure how I can help with measurements.

My lathe was bought by the Armed Forces in Edmonton in 1942. From there I believe it entered the Canadian Navy for a while. It came to me around 2006 or 2007 when I bought it from a guy in Saanichton who had cleaned it up, painted it and made it run. A few years later I replaced the 1 HP single phase motor with a 3 phase and VFD. The intention was to use the serial port of the ELS to send MODBUS messages for ON/OFF and speed control. Hasn't happened yet.

The wear and tear is pretty normal for a lathe of that vintage that may well have been used daily for years. It's in surprisingly good shape for a machine that is 80 years old.

My Delta 14" band saw that I rescued from the fire pit at the Bragg Creek Scout camp west of Calgary had a 1939 date painted on it which is the year it was donated to the Scouts. I restored that after it had sat outside behind a building for a few years. I still use it too. I like old tools.
 
Back
Top