• Scam Alert. Members are reminded to NOT send money to buy anything. Don't buy things remote and have it shipped - go get it yourself, pay in person, and take your equipment with you. Scammers have burned people on this forum. Urgency, secrecy, excuses, selling for friend, newish members, FUD, are RED FLAGS. A video conference call is not adequate assurance. Face to face interactions are required. Please report suspicions to the forum admins. Stay Safe - anyone can get scammed.

Zenair CH601HD

I worked on this plane as a teenager, many moons ago. It was in the basement of Centennial Planetarium.

For kicks I just had to check the price of aircraft ply & spruce (HOLY $HIT)
 
I worked on this plane as a teenager, many moons ago. It was in the basement of Centennial Planetarium.

For kicks I just had to check the price of aircraft ply & spruce (HOLY $HIT)

yea its absurd, I think that sitka spruce for spars, ribs, etc, is insane no matter where you buy it. I priced it out on various plans, cheaper to build an aluminum wing than a wood/rag or wood/wood wing by a large margin, unless there is a super secret source for spruce/fir with the requisite grain count and straightness.

Cool project to be a part of, like a big model airplane (wooden planes that is)
 
It will never see air, maybe for the best although it would be a sight. Personally I like it more in the bones, but maybe that's personal, sentimental value. Oh and it has a brand new matching rotary engine. It was apparently found in boxes wrapped in original oil paper tucked away in some barn. I'm pretty sure it has been (test stand) run but that came after me.
 
This may be a really stupid question. Does the build need to pass some sort of inspection? If so is it at different stages of the build or just when it's complete? I was wondering when I saw that other people started it, so I was wondering if when buying something that was started by others are you at the mercy of your own knowledge to inspect their work your self to make sure it doesn't come apart in the air. Or is there trained professionals who do an inspections along the way so that you have some piece of mind and know it was done right? Or for lack of a better expression you know it was done to code or standards of some kind? I have never built an air craft or ever worked on one but find the fabrication interesting.
 
it depends how you plan to register it. if you plan to register it as a "basic ultralight" there is only 1 inspection, a final inspection at the end, if you plan to build it under a "Special certificate of airworthiness" then you have a precover inspection and a final inspection, with a wooden or composite aircraft there can also be a "box spar inspection"

This one has had a pre-cover inspection, although the proper documentation is missing (it is noted in the builders log with names, corrections, etc), so as a result i have to drill everything out to get down to the wing spars for inspection as i intend to register it as a homebuilt and not an ultralight. I have the center section drilled out, but dont have the space to do the wings until summer, so i wont have that inspection for a while.

The real difference between an ultra light and a homebuilt is the ability to carry non pilot passengers, there are some other things (speeds, gross weight, etc), but the main consideration for this one is the ability to carry passengers, so i am going the more expensive route to register it as a normal aircraft (it also holds a higher value)
 
@phaxtris are there no records with MDRA on your aircraft? You’d think that if they had done the pre-closing they’d have it documented. Are there inspection stickers the inspector put on?

I’m a little in the dark on the details because we haven’t had an inspection yet but I did see the stickers on a friend’s project. That said, MDRA couldn’t find the Letter of Intent (to build) we filed so maybe it’s a paper trail thing.

To fill in a little for @Megar arc 5040dd this MDRA I spoke above is the Minister’s Delegate Recreational Aircraft who have the authority to inspect homebuilt aircraft projects on behalf of the Minister of Transport. The Minister’s Delegate is someone deemed to have sufficient knowledge to do the inspections which means Transport doesn’t have to do it.

D :cool:
 
MD-RA has a file, but doesnt have the records of inspection. I didnt ask when the earliest letter of intent they had, but i surmise the one they have may not be from the original construction

the inspections took place in 1993.....by several different "airworthiness" inspectors from transport Canada, i have notes on the spars, wing ribs, horizontal stab + vertical stab being inspected, and corrections made + "passed by xxx", but no supporting documents than what is written in the airframe log

i dont know what the documenting was like in the early 90's regarding this, it may even pre-date the current MD-RA, so who knows, a lot of things can get lost or misplaced in 30+ years

in either case, i need to get the pre-cover done, wich sucks, the only saving grace is that is appears it has all been inspected, and should pass without deficiencies, hopefully.

Im still way ahead, i have receipts for much more than i paid for the whole project, and thats not including any kind of inflation.
 
I think you are in the same boat as us, our LOI probably would have been sent to TC and likely got lost in the hand over. These days things would be electronic so we’d have copies to refer to.

If it was passed by a TC inspector I would imagine there should be no problem the second time around. At least it’s pulled rivets and not solid, easier to drill out. Presumably you already know about knocking the end of the mandrel back before drilling?

I just made a trip to town yesterday to pick up material for safety belt mount brackets. Next on the mill after the current job.

D :cool:
 
yea that would be terrible if it were all blind rivets *Edit bucked

i have a few techniques, i try to just drill the head off and pop out the stem with a punch or all, if i can get to the backside i usually try to drill the head off and pop the stem off with a pair of side cutters or pliers. Usually those two techniques work pretty well and don't enlarge the hole.

you still need all of your pre-cover inspections then as well ? im trying to get everything ready so that it can be done in one trip, save me the money of having a pile of inspections at 655$ a pop
 
Last edited:
Have you guys seen the modified side cutter for removing rivets? I have used it a few times. Sometimes, it is the perfect tool to speed a process, especially if you have a few to do. Just grind a set of diagonal pliers so they sit flush on the skin. After removing the factory head, use the modified cutter. It pops the rivet out nicely. I googled it to find an image or info but could not. I realized it is in the Van's manuals. Attached is the relevant page. Maybe it will be interesting for some.
Cheers,
 

Attachments

For those not familiar with the Avex style of rivet, when it is pulled the (steel) stem/mandrel pulls the (aluminum) barrel into a mushroom shape on the back side and traps the broken off part of the mandrel. It doesn’t just flare it out like a hardware store POP rivet. The mandrel breaks off just below the head side so that it contributes to the shear strength of the joint.

When I need to remove one of these rivets I knock back the stem from the head side with a few hits of an automatic centre punch so that all I have to drill out is the aluminum rivet. That keeps the drill from wandering. I find this works very well, sometimes when the head separates it leaves the barrel in the layer below and sometimes it all pops out in one shot. When the barrel remains I just pop it out with the automatic centre punch. I find this doesn’t enlarge the hole.

@phaxtris we’re almost at the point where we can have all the pre-closing inspections done at once, same thing we want to optimize the fees. We used to have an inspector literally in our neighbourhood but unfortunately he retired so one will have to come in out of the boonie$

D :cool:
 
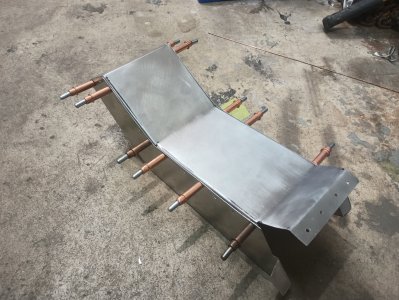
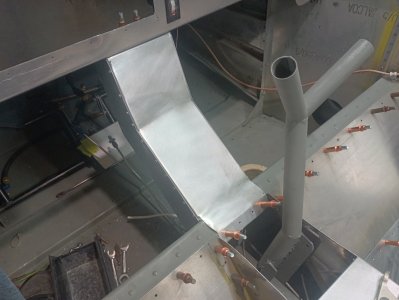
Made a few sheet metal pieces, did some welding, felt like i was getting my groove back with the aluminum welding, still not as good as i once was, but not to shabby


a center console, and the Y stick (re-used the original lower section)
IMG_20250206_184645296.jpgIMG_20250206_185911244_HDR.jpg

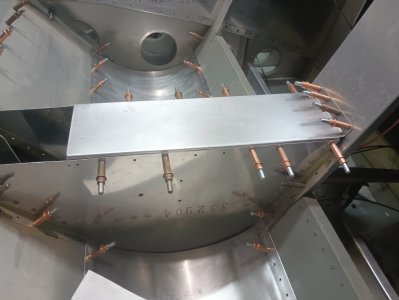
new arm rest top
IMG_20250206_190134016.jpg

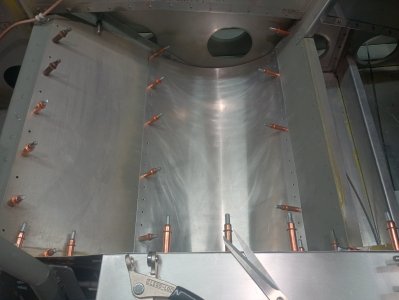
The seat pan bottoms....looks simple enough, until you realize the side were already drilled, i had to contort myself into the footwell and rear fuselage area to match drill the panels...not fun, but another thing checked off the list
IMG_20250206_185925701_HDR.jpg

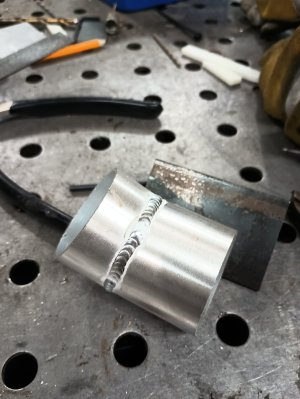
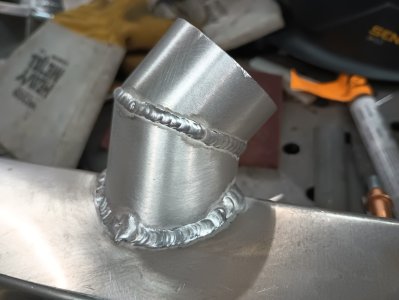
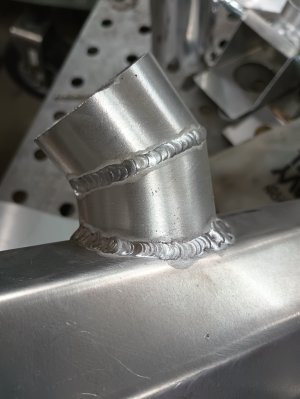
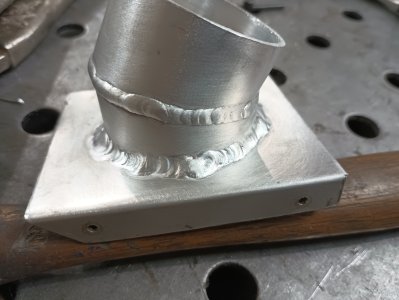
The heater muff outlets, .0625 pipe welded to .040, not perfect, but putting a fillet weld on 18g aluminum is tricky!

IMG_20250209_163731334.jpgIMG_20250209_170915765.jpgIMG_20250209_170952293.jpgIMG_20250209_174706219.jpg

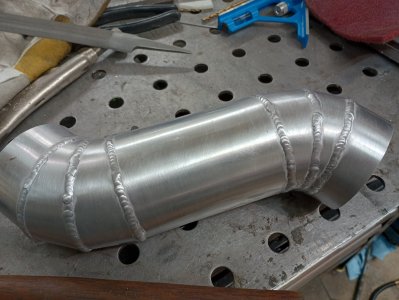
air intake tube

IMG_20250209_185211320_HDR.jpg

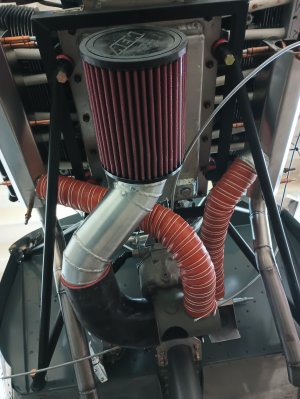
gettin busy under there! dont worry, a support bracket for the air filter is on the list

IMG_20250209_185434074.jpg
 
Way to go. That is pretty thin material & long bead lengths. What alloy is the pipes? Remind me, what type of TIG do you use? Do you use pulse at all?

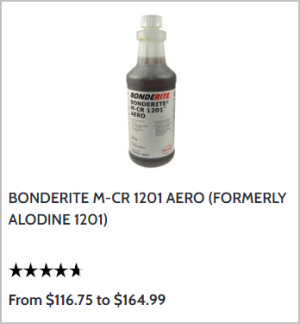
I have another question. Do you use any of these (apparently rebranded) products - what used to be called Alodine solutions? I've seen some nice (model engine) parts colored with it, but I'm not too sure about how long lasting or even minor scratch resistant they are. My understanding on FS planes is its more intended as sealer type undercoat to subsequent paint coatings, so possibly its never really out in the open exposed with just the Bonderite solution itself? Would this precede the (typical green color) zinc chromate primer, or is this kind of a substitute for that?

1739154781052.png
 

Attachments

  • 1739154750943.png
    1739154750943.png
    37.3 KB · Views: 2
The 2" is 6063 and the 3" is 6061, not sure why the one is 6063, it just what was available at the time. I have a thermal arc 186i, I dont use pulse.

I haven't used any of the Alodine type products, As I understand it the procedure used to be Alodine then primer, Im not sure if thats the current process, seems a lot of homebuilders just go with etch primer, or epoxy primer. I think paint processes have come a long way in the years. Ive just gone with the scotch brite and etch primer route.

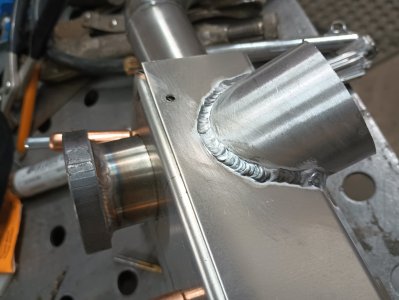
I did also weld one of the 2" pipes to the 20g (.032) cover on the cabin heat diverter box thing...i wasnt sure how that would go, but figured i could always just scrap it and make a new one. Turned out OK for a .0625 to .032 fillet weld

IMG_20250209_201752762.jpg

I still have to cut the holes out, i wasn't crazy enough to try and weld those on with a 2" hole in the middle, tomorrow, an aluminum carbide should make short work of it
 
Nice work @phaxtris as usual! I am still practicing with my TIG welding before attempting my oil cooler shroud, and now, have a cabin heat control that I need to do some filet welds on. Practice has not been good. Can I ask what size tungsten and filler did you use? Did you stop periodically to let the small parts cool? Or any other methods to keep them cool?
 
Thanks guys :D

1/16 filler and 1/16 tungsten, the 1/16 tungsten was a little on the small side for the tube, balled up pretty easily, 3/32 might have been better, it just happened to be in the torch at the time. Welding the tube to the sheet metal i did it in opposite 1/4's, i didn't have much problem with the heat running away. The machine was set pretty low, i think around 90 amps, so there was lots of fine control with the pedal.

Im thinking about getting a wp9 for that machine, it would be a lot more suited to light work. Its a lot easier to be smooth and steady with the smaller torch...or maybe i will go crazy and do a water cooler and 250a torch....then there would be no switching from a 9 to a 17
 
Back
Top