• Scam Alert. Members are reminded to NOT send money to buy anything. Don't buy things remote and have it shipped - go get it yourself, pay in person, and take your equipment with you. Scammers have burned people on this forum. Urgency, secrecy, excuses, selling for friend, newish members, FUD, are RED FLAGS. A video conference call is not adequate assurance. Face to face interactions are required. Please report suspicions to the forum admins. Stay Safe - anyone can get scammed.

Rifle Action Truing

thestelster

Ultra Member
Premium Member
Yesterday I machined 10 flutes onto a barrel. Today we start the action and bolt truing. To achieve maximum accuracy in a rifle, all the surfaces which make contact with the barrel have to be true. The internal action threads, the action face, the recess where the bolt lugs lock into, all have to be concentric to the bore of the action where the bolt slides. They seldom are. So first we have to put the action into the lathe so we can do the work.
 

Attachments

  • 20220207_111848.jpg
    20220207_111848.jpg
    116.1 KB · Views: 39
  • 20220207_114311.jpg
    20220207_114311.jpg
    480.3 KB · Views: 40
  • 20220207_115559.jpg
    20220207_115559.jpg
    312.4 KB · Views: 38
  • 20220207_120636.jpg
    20220207_120636.jpg
    398.3 KB · Views: 37
  • 20220207_121000.jpg
    20220207_121000.jpg
    382 KB · Views: 38
  • 20220207_124924.jpg
    20220207_124924.jpg
    441.5 KB · Views: 38
  • 20220207_130948.jpg
    20220207_130948.jpg
    460.5 KB · Views: 38
  • 20220207_134843.jpg
    20220207_134843.jpg
    285 KB · Views: 40
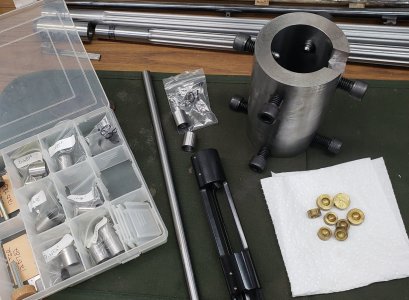
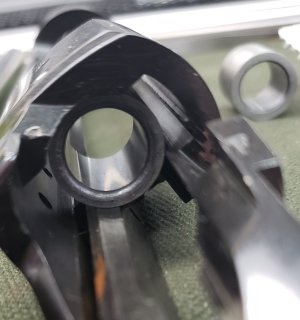
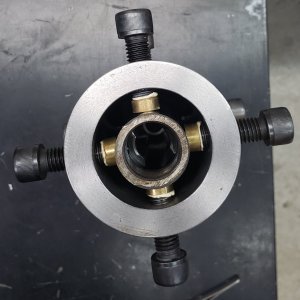
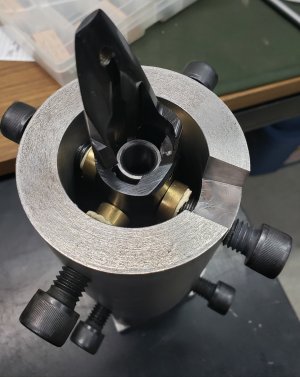
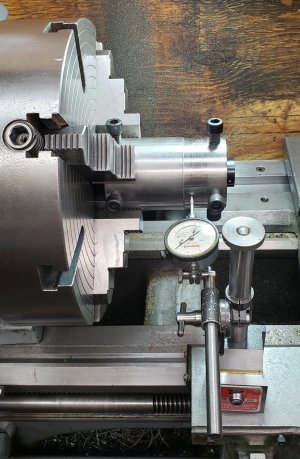
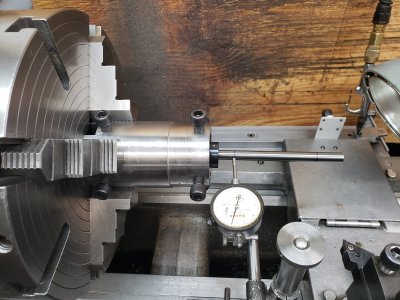
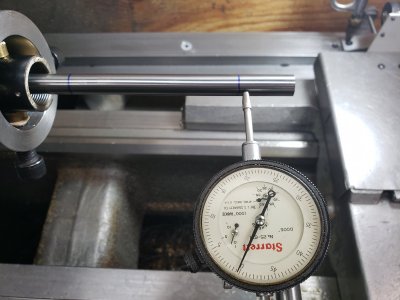
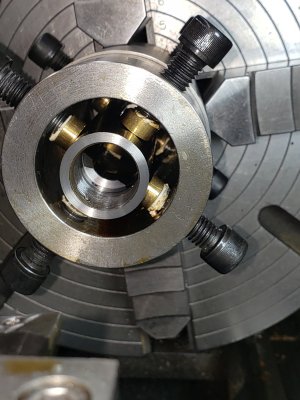
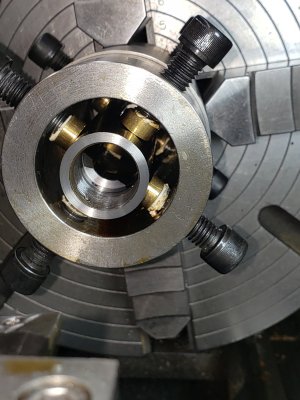
I purchased a number of 3/4" OD, 1/2" ID hardened bushings and using a mandrel, between centres on the lathe, turned them down to a number of different OD's. The bushings get positioned in the action, front and rear. The 1/2" dia. 12" long carbide rod goes through the bushings and sticks out past the action face. Then using a dial indicator you go back and forth zeroing front and rear using the spiders' 8 bolts. The spacing is 4". This takes a while! Once everything is is running true, pull out the rod, and now we can now start machining the required areas.
 

Attachments

  • 20220207_144247.jpg
    20220207_144247.jpg
    267.2 KB · Views: 19
  • 20220207_144353.jpg
    20220207_144353.jpg
    382.5 KB · Views: 19
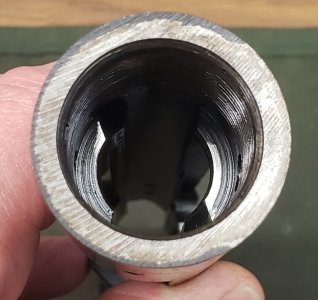
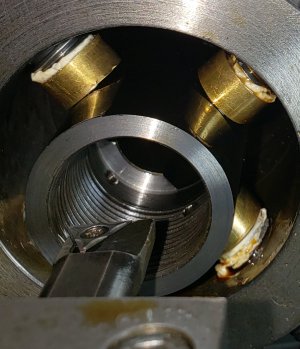
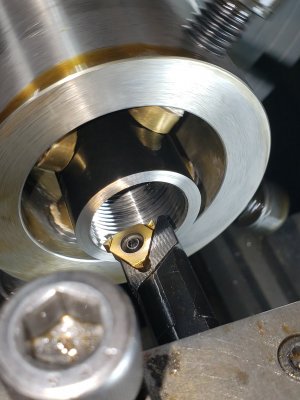
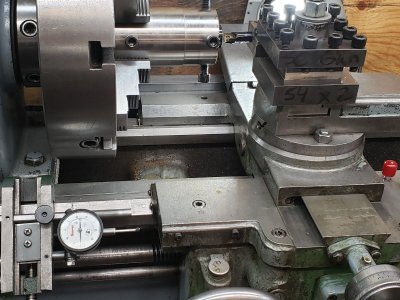
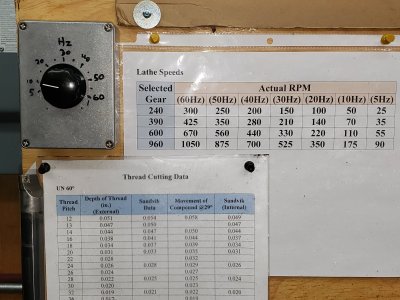
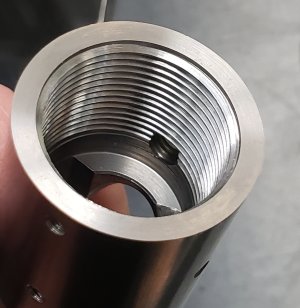
Once the locking lug recess, and action face is trued up, its time to chase the threads. If you thought cutting threads is tricky. Try doing internal, and virtually completely blind because the tools and holder and post is in the way. I am not cutting new threads. Just going deeper to get rid of any inconsistencies, which there are plenty, not concentric and not round! So we have to pick up the existing thread. Start the lathe, in slow, making sure that the cutter will not touch any part of the thread, engage the half nuts. As the cutter just enters switch off the lathe but don't disengage the half nuts. Now move the cross slide towards you, and with the compound (oh, which is parallel to the lathe axis) move the compound forward or back 0.001" at a time, and moving the cross slide towards you until you feel it bottom. Keep an eye on the dial number. You're at the bottom of the thread, when the cross slide is closest to you. Put your dials to zero. You can try that procedure a couple times but take note, that if the threads are oval or not concentric, you'll get different results depending on where the lathe stopped, so don't worry about it too much. Now you have to worry about the length of the treaded section. I set up the dial indicator on the carriage stop. I move the cutter in to the point that I want to end the thread. Then move the carriage stop so that the dial indicator compress 1 full turn, lock the carriage stop and zero the dial. Don't use a hard stop. So what will happen, is that as the cutter is moving into the action, the carriage will touch the indicator probe. You now have one full sweep of the needle to disengage the half nuts and move the cross slide away. This happens pretty quick, so you need to practice at a different section of the lathe. When you're ready to go. The compound is at zero, and we said that the bottom of the thread is zero, but start at say 5, or 10 on the dial. With every pass, move the cross slide towards you 0.002". You will keep going until you've cleaned up all the threads. You will hear when its cutting and not cutting, and when go to start another pass, examine it. There is more information I need to mention, ie. Thread root flat and crest flat.
 

Attachments

  • 20220207_171654.jpg
    20220207_171654.jpg
    340.8 KB · Views: 23
  • 20220207_144353.jpg
    20220207_144353.jpg
    382.5 KB · Views: 25
  • 20220207_172149.jpg
    20220207_172149.jpg
    455.2 KB · Views: 22
  • 20220207_172029.jpg
    20220207_172029.jpg
    410.2 KB · Views: 23
  • 20220207_174818.jpg
    20220207_174818.jpg
    277.5 KB · Views: 22
Nice. What is the cream colored stuff on the ends of cap screws? Is the threading tool a Vardex? What size thread are you cutting?
That's a lot of coordination to get exactly right within 1 dial sweep at the end of the dark tunnel, bravo.
 
Nice. What is the cream colored stuff on the ends of cap screws? Is the threading tool a Vardex? What size thread are you cutting?
That's a lot of coordination to get exactly right within 1 dial sweep at the end of the dark tunnel, bravo.
Hi Peter, that is just thick grease. The grease allows the brass pads to stick to the cap screws while I'm positioning the action in the spyder. The threading tool is a Sandvik. The Remington Model 700 action uses 1.062" x 16tpi. After single point cutting these threads, the new dimensions are 1.099" x 16tpi. This is the new dimensions I have to machine the barrel to fit. So, obviously, the old barrel would be loose as a goose in this action.
 
Nice. What is the cream colored stuff on the ends of cap screws? Is the threading tool a Vardex? What size thread are you cutting?
That's a lot of coordination to get exactly right within 1 dial sweep at the end of the dark tunnel, bravo.
I occasionally have to do that with metric threads, so you can't disengage the half-nuts. Adjectives describing that: trepidation; fear; worry; and hopefully never remorse. Though I have changed it up last year to run in reverse on the back side. But you still can't disengage the half nuts.
 
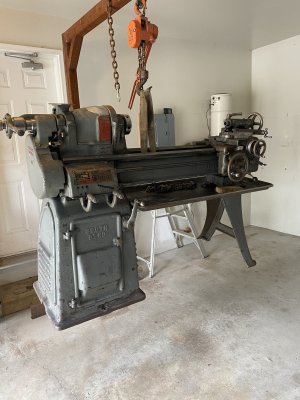
I never had a lathe that was large enough to work on rifles or barrels until I bought my South Bend. The work holder that you machined for the action, would it be considered a spider or just a work holding jig. It’s genius. I’m on a learning curve. I guess everything can’t always be held in a 3 or 4 jaw or faceplate.
 
If you have the room they are ideal for moving heavy things from a utility trailer. If it was a portable unit that I can be taken apart and stored, it would come in handy. Wish I had a gantry when I moved my Brother in Laws fireproof file safe.
The pictures below is the homemade gantry that was used to deliver my lathe. Thanks again Kevin.
 

Attachments

  • 42CCFA23-931B-4730-9A82-49E293453667.jpeg
    42CCFA23-931B-4730-9A82-49E293453667.jpeg
    476.4 KB · Views: 16
I never had a lathe that was large enough to work on rifles or barrels until I bought my South Bend. The work holder that you machined for the action, would it be considered a spider or just a work holding jig. It’s genius. I’m on a learning curve. I guess everything can’t always be held in a 3 or 4 jaw or faceplate.
Yes, its called a spider, I think it goes by some other names as well. And yes, it is quite ingenious. Solves a lot of alignment issues.
 
I never had a lathe that was large enough to work on rifles or barrels until I bought my South Bend. The work holder that you machined for the action, would it be considered a spider or just a work holding jig. It’s genius. I’m on a learning curve. I guess everything can’t always be held in a 3 or 4 jaw or faceplate.

Some call it a spider, some call it a double spider, and others call it a double cats eye. Mine is a triple.

It's actually easy to hold an action in a 3 or 4 jaw. But holding is not the problem. The problem as @thestelster explains, is positioning the internal raceway of the action across its entire length to be concentric with the rotating axis of the spindle. Only when it is fully concentric end to end can it be machining such that the threads, lugs, and face are all square and true to the rest of the final assembly.

If you think that is amazing, wait until you see how he does the chambering!
 
Thestelster, I apologize for post /picture and comment #11. I don’t know why but I tried to post this on another thread about Gantry cranes and somehow it ended up on your thread. I’m still fairly new to this website. I didn’t want to come across like I’m trying to hijack your thread.
I’m just “that Guy” sometimes that accounts the “reply all “ button

No worries, I think we all figured that out!
 
Sorry Degen, that one is already finished and gone. I have to do a couple more rebarrel jobs soon, so I will post how I chamber.
 
I have a question about mounting a barrel to a receiver, but I only know enough to be dangerous.

If I’m correct in how I understand this- the receiver is slightly tapered where the barrel registers. There are shims that go between the receiver and the barrel

So the goal is to get the shim pack the correct measurement before tightening the barrel nut

Too little of shims, results in barrel damage, too many shims, too loose of a barrel and not seated correctly

Am I sort of on the right track, on how I understand things?
Hi @Chicken lights , on virtually all rifles that have their barrels threaded on, there is no tapered thread section, and there are no shims. There are only a couple of rifles that I know of that have some sort of adjustment for headspace. 1, is the Lee Enfield which have several bolt heads to accommodate headspace variances through wear. 2. Savage 110 series rifles which have a collar which you would "clock" to get the proper headspace. (I'm sure there are other rifles with replaceable bolt heads which you might be able to get plus sizes.) (Maybe military rifles as well, but I am not versed on those firearms.) All the others, Remington, Winchester, Browning, Sako, Tikka, Weatherby, Mauser, Springfield, P17 & P14 Enfield, etc., you need to measure from the action face to the bolt face. This distance must them match up with the distance from the barrel face (where it contacts the action), to the "go" gauge base when inserted into the chamber, (minus app. 0.002" for crush factor). It's difficult to explain without pictures. I will provide in the near future.
 
Hi @Chicken lights , on virtually all rifles that have their barrels threaded on, there is no tapered thread section, and there are no shims. There are only a couple of rifles that I know of that have some sort of adjustment for headspace. 1, is the Lee Enfield which have several bolt heads to accommodate headspace variances through wear. 2. Savage 110 series rifles which have a collar which you would "clock" to get the proper headspace. (I'm sure there are other rifles with replaceable bolt heads which you might be able to get plus sizes.) (Maybe military rifles as well, but I am not versed on those firearms.) All the others, Remington, Winchester, Browning, Sako, Tikka, Weatherby, Mauser, Springfield, P17 & P14 Enfield, etc., you need to measure from the action face to the bolt face. This distance must them match up with the distance from the barrel face (where it contacts the action), to the "go" gauge base when inserted into the chamber, (minus app. 0.002" for crush factor). It's difficult to explain without pictures. I will provide in the near future.
I’ll wait patiently for pictures, no rush

So it’s possibly a “headspace” issue? I was warned it’s a one shot approach to get right, or you can ruin parts. The barrel isn’t threaded where it mounts to the receiver, the barrel nut attaches the barrel to the receiver
 
Back
Top