-
Scam Alert. Members are reminded to NOT send money to buy anything. Don't buy things remote and have it shipped - go get it yourself, pay in person, and take your equipment with you. Scammers have burned people on this forum. Urgency, secrecy, excuses, selling for friend, newish members, FUD, are RED FLAGS. A video conference call is not adequate assurance. Face to face interactions are required. Please report suspicions to the forum admins. Stay Safe - anyone can get scammed.
You are using an out of date browser. It may not display this or other websites correctly.
You should upgrade or use an alternative browser.
You should upgrade or use an alternative browser.
DavidR8's shop shenanigans
- Thread starter DavidR8
- Start date
140mower
Don
......... and there he goes.Made a stand for my bench top sandblast cabinet.
View attachment 52345
.... looks good by the way, and a little less open floor space staring you in the face every time you are out there......
If you look carefully you'll see he's neglected to paint the stand the same shade of blue as the cabinet. I'd say just plain sloppy work.Made a stand for my bench top sandblast cabinet.
View attachment 52345
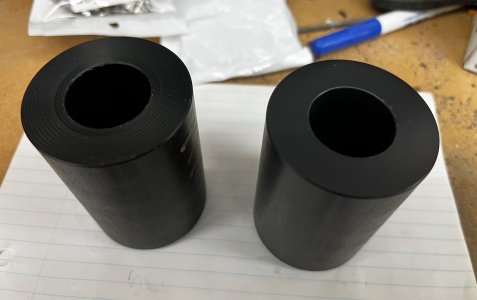
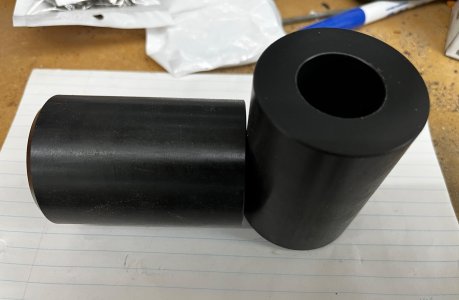
Did a quick job for a neighbour.
Delrin, 2" OD, ~3" long with 1" bore, 2-1/2" deep
Had a scant 6" length and needed two 3"ish long parts.
Faced one really crooked off square end, ended up with 5-7/8"
Sliced in half at 2-15/16"
Faced and chamfered the blank end.
Flipped in the chuck, faced and centre drilled .
Used a 15/16" Deming drill to remove the bulk of material.
Used boring bar to bring to 1" ID bore.
Eased the edges.
Done


Last edited:
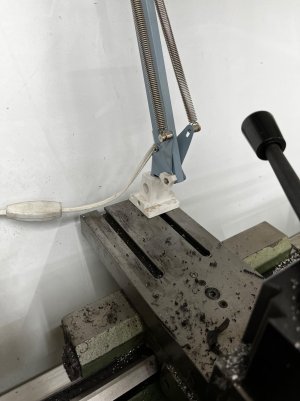
Ever since I got my 12x37 lathe the carriage has been snug near the chuck.
When @Dabbler was here for the meetup he had a look at it. Suggested that I remove the cross slide from the apron and check for bent axle on the carriage hand wheel. (Or at least that’s what I think John said). Also suggested that the gear rack looked to be a bit low near the headstock end.
Proceeded to dig into this today.
The rack is pinned but I did loosen the SHCSs and lift it up a tiny amount.
Apron was easy to detach from the carriage. Just two SHCSs and two roll pins.
Removed the gib strip and its holder at the rear and I was able to push the carriage away from the apron.
What I discovered was that the carriage was able to easily slide the full length of the bed without any binding. Likewise the apron could be cranked without restriction.
Stoned the rear gib strip and under the rear bed way and put it all back together. Gradually tightened the rear gib strip till there was light resistance when cranking the hand wheel.
Voila, problem solved. I think there was a high spot under the rear bed way combined with a low gear rack causing it to bind at the headstock.
Sorry for the lack of pictures but I was an oily mess!
What I did notice is that there’s no drain plug for the apron
Last edited:
Sorry folks, I tried to slow him down but he found my sabotage. LOL That was a nice, relatively easy fix, well done.
Nothing a drill, a tap and a brass pipe plug won't fix.What I did notice is that there’s no drain plug for the apron
Thanks John, I was pleasantly surprised that the inside of the apron was clean as a whistle. I do need to change that oil though...nice trouble shooting! Glad it is fixed...
Managed to get the air compressor and dust collector wired in over the past two days.
The compressor wiring is just run to the breaker for now. Need the motor switch to arrive so I can complete that.
Having them outside the shop makes a HUGE difference to the sound level inside the shop. Sound level outside is very low.
Just need to run the piping for the compressor and ducting for the collector.
I had the day off today so I spent some time in the shop clearing and cleaning so I have a clean slate for the CNC nill conversion.
Cleared off the bed of the CNC router, remounted the monitor to the wall and fired it up.
Started up in the wrong screenset. Hmmm that's odd I say to myself.
Went to home all axes and nothing happened. Looked in the control box, you all lights are green, software didn't throw any warnings.
Went into the software config panel and all the homing settings were gone and the soft limit settings was unchecked WTF?
And on closer inspection all the settings are wrong. Again, WTF?
Turns out the file that retains all the machine specific settings is corrupt.
I have to redo all of the setting so it will work again. Sigh.
140mower
Don
...... You just took everything out of the shop, enlarged the work space, doubled the storage, scrubbed every nook and cranny twice, painted the joint top to bottom and categorically itemized and inventoried everything down to the last paper clip....... What could have possibly needed cleaning?I had the day off today so I spent some time in the shop clearing and cleaning so I have a clean slate for the CNC nill conversion.
I'd like to see this when you do this, I've got to do something myself, preferably so it only runs when the shop lights are on.Managed to get the air compressor and dust collector wired in over the past two days.
The compressor wiring is just run to the breaker for now. Need the motor switch to arrive so I can complete that.
Having them outside the shop makes a HUGE difference to the sound level inside the shop. Sound level outside is very low.
Just need to run the piping for the compressor and ducting for the collector.
Doggggboy
Ultra Member
Plumb in a 1/4" feed to the nearest neighbour so he can fill a tire and you'll never have a complaint about the noiseManaged to get the air compressor and dust collector wired in over the past two days.
The compressor wiring is just run to the breaker for now. Need the motor switch to arrive so I can complete that.
Having them outside the shop makes a HUGE difference to the sound level inside the shop. Sound level outside is very low.
Just need to run the piping for the compressor and ducting for the collector.
Mine is simple at the extreme. Just a double pole switch on the wall that controls the plug for the compressor in the lean-to. And a sign on the inside door asking if the compressor is offI'd like to see this when you do this, I've got to do something myself, preferably so it only runs when the shop lights are on.
Well true to form I’ve been slacking. And truthfully I never cleaned off the workbench, table saw or router table since I moved back in. So it’s a mess....... You just took everything out of the shop, enlarged the work space, doubled the storage, scrubbed every nook and cranny twice, painted the joint top to bottom and categorically itemized and inventoried everything down to the last paper clip....... What could have possibly needed cleaning?
View attachment 54494
140mower
Don
Hey @Susquatch! ...... You hear that? David thinks HE has a messy shop...... . I think that we had better have a supply of heart pills on hand should he ever come visit either of us.....

