• Scam Alert. Members are reminded to NOT send money to buy anything. Don't buy things remote and have it shipped - go get it yourself, pay in person, and take your equipment with you. Scammers have burned people on this forum. Urgency, secrecy, excuses, selling for friend, newish members, FUD, are RED FLAGS. A video conference call is not adequate assurance. Face to face interactions are required. Please report suspicions to the forum admins. Stay Safe - anyone can get scammed.

Casting sand

I used to hang with a couple old farts that were heavily in to casting, and maybe their site info is still to be got by searching.

The two Names were Robert (Bob) Grauman, and Rupert Wenig. Both now lost to us, sadly.

Robert was pretty involved with the various back alley (essentially) casting shops that operated around Edmonton, and Rupert was from between Camrose and Edmonton Alberta.

Rupert was casting Iron, with a naturally aspirated furnace, and green sand, and Robert left me his, essentially, entire library of books! Plus some other stuff...

I learned the following from them.

First, There are two types of Bentonite. Western, and Southern. One makes things stick, the other is slimy when wet. IIRC, cat litter, is the wrong kind of Bentonite (Western, IIRC, and is also used a lot as drillers mud in the oil industry. I am pretty sure it was Southern Bentonite you wanted for green sand. According to http://www.ece.ualberta.ca/~wyard/foundry/designlog.html I am correct.

You can cast about anything in green sand, you only need to sift it through, to remove any inclusions, and get the moisture level right, and you are in business. Green sand is about your only choice if you want to cast Iron.

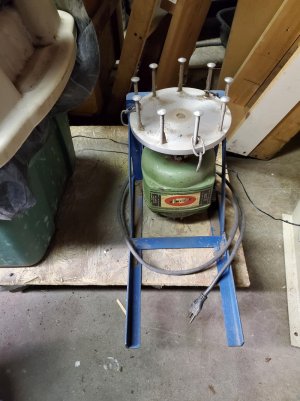
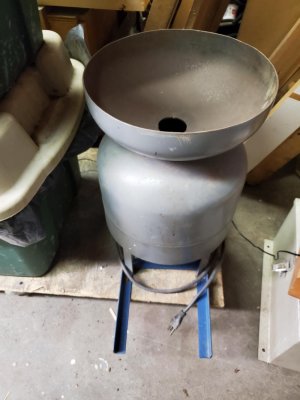
Petrobond pretty much NEEDS a Muller, a device that presses and mashes the oil on to the sand. Think, rotating bowl, with big wide wheels, rolling over the sand mix. A fluffer helps (no, not that kind!) basically a powered unit to break all the burnt bits to small enough pieces that the muller can handle. I have seen several, including Rupert's that were a upside down salad bowl with a bunch of bolts set through it facing up, so as to whir around and break up the bits, as they were fed through a hole over the center of the fluffer. Hard to describe. Dump sand in top, it comes out busted up, around the edges of said bowl. Usually a batch of petrobond has a couple casting cycles before it 'needs' to be mulled. YMMV! When you are really on point, is when you see your own fingerprints transferred to the casting, from the pattern! Petrobond, with fine sand, can take up details well beyond what you would expect.
While I have seen writings suggesting using any old oil to make petrobond, I had been told, that there is a special oil made for the purpose. Sorry, cannot name names, as I don't have them to hand.
What @trevj said.
I have a fluffer like the one Rupert had. I don't know what happened to the muller he acquired.
I use it to break the hard dry stuff down. I bought my bags of casting sand a few decades ago as a premix. It was a bit coarser than I might have liked but overall it's been pretty good. If I haven't used it for a while I use a watering can, add some water, shovel it around, lay plastic on top and some thing to hold it down. Then put the cover back on the tote box.
After a few days the moisture has basically stabilized and then using the fluffer I can mix it all around and cast.

BTW, just as a point of remembering. Rupert Wenig was just outside of Camrose. His shop burnt down due to a grass fire. He rebuilt and continued with casting and machining. His CNC router table was a work of art. The Gingery Horizontal Mill would have been too had it not been melted in the fire.

This photo is from 2003.
Ruperts_Mill6.jpg
 
IMG_1431.jpeg
I used to hang with a couple old farts that were heavily in to casting, and maybe their site info is still to be got by searching.

The two Names were Robert (Bob) Grauman, and Rupert Wenig. Both now lost to us, sadly.


Rupert was casting Iron, with a naturally aspirated furnace, and green sand, and Robert left me his, essentially, entire library of books! Plus some other stuff...
Rupert visited me several times here in Calgary. As well we went up to his acreage by Camrose, great guy he will be missed.

As for Oil and Pertobond sand - I used a Shell Turbine oil to bring the sand back. Have a propane tank cut in two with the spinning plate with bolts to fluff and mixing the oil into the sand. The bottom of the Tank houses an old furnace motor. The wooden top fits a metal Garbage can with the other half of the tank acting as the funnel for the Sand. Yes I have a Beer Keg Furance and can melt Cast Iron like Rupert did.
 
Last edited:
BEER KEG FURNACE

By Rupert Wenig.
Joe's Hidaway
Image003.jpg


Joe holding the business part of his sand fluffer. The can under the fluffer is the receiver. A good use for a discarded propane tank. The motor is mounted in the bottom half. The top half makes a very good funnel to pour the sand into. The wheel is an 8" disc with rods threaded into the disc with about a 1" spacing.

Image004.jpg


Joe's fluffer ready for business.
His furnace is behind the fluffer.

Image005.jpg


What you are waiting to see. The beer keg furnace open and ready for use. As you can see the shell is made from a salvage beer keg. The furnace is constructed by lining the shell with two layers of 1/8" kaowool, then about 1 1/2" of refractory.

Image012.jpg


The interior of the furnace with the tea kettle Joe made for me being tempered to remove weld stress. Note the burner port. Combustion is complete in the first 1/4 turn of the flame. There was no sign of flame out the vent while the furnace was operating. I was able to hold my hand about 3 feet above the vent quite comfortably. After the tempering, melting some aluminum to test the tea kettle and then the brass melt, I was still able to touch the outside of the shell without getting a burn.

Image013.jpg


Joe's version of the monster burner mounted in the furnace actually operating when I took this picture. Note the bell. It is made form a oil patch pipe plug. The burner pipe is 1 1/4" SS. This burner runs very quiet. Wish I had brought my DB meter to get a reading as it is much quieter than mine. Note the air fitting. Joe added this feature in order to inject more air into the burner. I believe this allow him to get more fuel into his burner ,thus, more BTU's.

Image017.jpg


Another view of the burner port.

Image018.jpg


The interior of the furnace- hot this time. The tea kettle is up to tempering temp so the furnace will be shut down for a slow cool down.

Image021.jpg


The brass casting Joe did for a small horizontal steam engine. Note the neat brass rammer in the back ground.

Image022.jpg


The finished brass casting and the original used as the pattern.

And this is not to mention all the other neat toys Joe has like a Bridgport mill with a high speed head and a slow speed head, two Myford 7 lathes and a Southbend lathe 10" (I think). He also has all the goodies to go with these toys. He also has a very nice Acklands mig welder with a hand held wire feed gun which he demonstrated when he made the tea kettle. Then there is all the nice hand held toys but I won't get into that. Just leaves me envious thinking about all the neat toys but he needs a bigger shop. :-)
 
BEER KEG FURNACE

By Rupert Wenig.
Joe's Hidaway
Image003.jpg


Joe holding the business part of his sand fluffer. The can under the fluffer is the receiver. A good use for a discarded propane tank. The motor is mounted in the bottom half. The top half makes a very good funnel to pour the sand into. The wheel is an 8" disc with rods threaded into the disc with about a 1" spacing.

Image004.jpg


Joe's fluffer ready for business.
His furnace is behind the fluffer.

Image005.jpg


What you are waiting to see. The beer keg furnace open and ready for use. As you can see the shell is made from a salvage beer keg. The furnace is constructed by lining the shell with two layers of 1/8" kaowool, then about 1 1/2" of refractory.

Image012.jpg


The interior of the furnace with the tea kettle Joe made for me being tempered to remove weld stress. Note the burner port. Combustion is complete in the first 1/4 turn of the flame. There was no sign of flame out the vent while the furnace was operating. I was able to hold my hand about 3 feet above the vent quite comfortably. After the tempering, melting some aluminum to test the tea kettle and then the brass melt, I was still able to touch the outside of the shell without getting a burn.

Image013.jpg


Joe's version of the monster burner mounted in the furnace actually operating when I took this picture. Note the bell. It is made form a oil patch pipe plug. The burner pipe is 1 1/4" SS. This burner runs very quiet. Wish I had brought my DB meter to get a reading as it is much quieter than mine. Note the air fitting. Joe added this feature in order to inject more air into the burner. I believe this allow him to get more fuel into his burner ,thus, more BTU's.

Image017.jpg


Another view of the burner port.

Image018.jpg


The interior of the furnace- hot this time. The tea kettle is up to tempering temp so the furnace will be shut down for a slow cool down.

Image021.jpg


The brass casting Joe did for a small horizontal steam engine. Note the neat brass rammer in the back ground.

Image022.jpg


The finished brass casting and the original used as the pattern.

And this is not to mention all the other neat toys Joe has like a Bridgport mill with a high speed head and a slow speed head, two Myford 7 lathes and a Southbend lathe 10" (I think). He also has all the goodies to go with these toys. He also has a very nice Acklands mig welder with a hand held wire feed gun which he demonstrated when he made the tea kettle. Then there is all the nice hand held toys but I won't get into that. Just leaves me envious thinking about all the neat toys but he needs a bigger shop. :)
Oh gawd. I haven't seen that posting with all those photos for at least a decade.
 
I know right! I downloaded that fluffer pic and put it on the to do list years ago ( I put it on the round tuit list ) in alphabetical order.

View attachment 34536
Somewhere I had a web page (I think on shaw.ca) that showed the fluffer construction. Can't find the photos (from circa 1998) anywhere so I just went down and quickly snapped these. The rails sit across the plastic totes that hold the sand. The little bits of chain help bang up the sand.
 

Attachments

  • FlufferNaked.jpg
    FlufferNaked.jpg
    129.9 KB · Views: 12
  • FlufferDressed.jpg
    FlufferDressed.jpg
    74.1 KB · Views: 14
oh this is interesting, i never thought about doing a design like that where the bed is floating like that
The bed isn't actually floating. It's held up at both ends. The gantry slides on the rails and has supports that move under the bed.
Like the original JGRO design. Here's mine early on in it's construction.
1684648707281.png


The gantry assembly looks something like this.
1684648837883.png

Rupert's had the same cross braces. He used that extruded stock for his table. What's not clear in my photos is I have a torsion box that the top MDF is fastened to. So my table supported at the ends is quite flat. I looked but don't appear to have any photos of the torsion box construction. I don't know how much Rupert's sagged in the middle if something heavy was set on it.
 
I just picked up sand casting to use for casting brass. I built a strong metal flask similar to the cast iron flasks you see on Amazon. I needed something bigger, and didn't want to go into making it out of wood and see it burn so I welded together a flask made of mild steel. Petro bond casting sand was my go to for the sand I purchased, because it stays together, and can be reused many times.
1000007284.jpg
1000007285.jpg
 
Has any else gone to using lost foam. I have and I have not looked back at sand casting> I have only cast aluminum. I am working up to casting brass. Lost foam has been really productive and it is pretty easy to get good results. When I was sand casting I was using green sand and home made wood flasks. I have a steel flask but it is to big and heavy for what I am casting. I am willing to trade it if someone is interested?
 
The only issue I have with lost foam is the use of drywall mud and the fumes from the foam. If you look up Kelly Cofield on youtube. He has been making cast aluminum manifolds for his ford project and honestly they are pretty amazing. Mostly all I have done is to make the part I want to cast in insulating foam. Once finished then coat in thinned drywall compound. Pack loosely deep in dry regular sand. Make the feed and vents larger then you would with sand casting. I can say that it works really well for pretty simple casting. For complicated casting you still need cores and such but if you take the time during finishing and coating then it works. If your using cores you need to think about supporting the core well with the drywall coating so the core doesn't float when the foam is vaporized. Other then that I find it much easier then regular sand casting. The finish in the foam casting can be pretty amazing.

I would like to see how it goes with foam casting brass, but I am working up to getting my casting set up again after our move. Also I have read some issues with brass casting.
 
I only did a few lost foam casting. I used inch thick styrofoam to make some lathe dogs. I used a Hotwire cutter to cut the outside shape and then cut through to the inside and cut that out. The outside to inside cut was covered with regular scotch tape. A toilet paper tube was taped on to pour through. The whole thing was buried in loose sand and then shaken to settle it around the pattern. The cell structure of the foam is easy to see in the casting.
I’ve circled where the outside to inside cut was taped.
IMG_5576.jpeg
 
I use high density foam which gives a much better finish. Also sand them and clean up the edges after cutting with the wire foam cutter. I made the cutter with a small transformer powered through a old wire wound dimmer and a guitar string. I kind of like the finish on yours as it sort of looks like a form of Damascus.
 
I've worked with greensand, petrobond, and lost foam casting. The insulation foam panels (blue/pink) is easiest to carve/machine since you don't end up pulling out the little foam beads by accident, and theres no bead texture on the surface of the patterns.
Kelly Coffield on YouTube has some wonderful information about coatings, patternmaking, gating, foam types, and best practices for molding and casting using this method. There's a lot of lost foam casting hobbyists making sort of ok stuff out there but KC has pretty much reproduced the current industry standard for lost foam casting in his garage. I would look there for more advanced lost foam advice, there's no hobbyist doing it better. Kelly and I also moderate thehomefoundry.org forums, my favourite online resource for the home metal caster. He's documented his lost foam process there even more exhaustively.

That said, lost foam is perfect for just experimenting with. You don't need a setup like Kelly's, just a metal bucket of dry sand and some carved.styrofoam (and a way to melt and pour metal of course) No need for expensive petrobond or manual mulling of greensand just to try it.

Looking farther back in this thread, kitty litter isn't the best binder for greensand but if you use it look for clumping unscented 100% clay litter. If it is bentonite, it's probably western bentonite aka sodium bentonite. Western B has its place in greensand as it adds hot and dry strength to the sand, but if you can find some calcium (southern) bentonite, it will do more for your sand's green strength. I bought a large bag of powdered sodium bentonite from a company in Ottawa called CanPipe when I made mine. Cheaper than the pottery supply bentonite (which they did the type of - sodium vs calcium - when I inquired. Had to settle for a smaller bag of ebay southern bentonite for my diy blend, which uses half and half of both types.
Making good greensand yourself using easy to find ingredients isn't as easy as you might hope. Without a mulling machine, the amount of kneading and squishing required to coat each grain of sand. In a thin layer of clay is going to take a lot of elbow gr use and probably won't ever get it as complete as a muller would. And the sand ingredient's grain size distribution and grain shape also makes a really big difference. Even with my muller my homebrew greensand made with single mesh sieved sand always kinda sucked. In the foundry industry the fineness of the grains is described using the American foundry association's Grain Fineness Number which is an average mesh size that takes into account the number of screens the sand is kept from. Complicated, but the good news is you can make castings without perfect sand, it just might be a more fragile, friable sand you end up using. And you may see more inclusions, flashing etc.
I have a 500# barrel of AFS GFN 130 olivine sand from Foundry Supply Source in Milton ON that I've been sitting on for about 3 years now while I try to source the organoclay binder I need to make my own oil bonded sand (K-bond recipe).
I've picked up a couple hundred more pounds of petrobond since then though, so I sort of wish I bought sand coarse enough to make greensand suitable for iron casting instead. Been getting a few inquiries about that...
 
Capilano college used to have a casting program but closed it down in about 2013. They sold off their muller and a local fellow here bought it. When he picked it up the fellow on the loading dock said "That has to go too". He said it was petrobond and there were 20 or 30 20kg sacks of it. I got 2 of them but I am still trying to figure out what it is. The bags are deteriorated but it says "Hy-Bond" on the front and "A Hy-Bond product" from a company called Fairy and Co. in Surrey on the back in smaller print. Of course they have long gone out of business. I talked to a fellow at Greenbarn pottery in Surrey who said he worked for Dave Fairy when he was a student 30 years ago. He knew nothing about casting but said they had a whole line of products that went under the generic brand of Hy-Bond. He said they had several products where they bought the raw material in large quantities and repackaged in smaller bags. It is a pale yellow and if there is sand in it it is extremely fine (to the point where I think it is a straight clay product). I have a bit of bentonite from a pottery shop and it does not act at all like this stuff. Bentonite with water forms a thick slippery paste. This stuff does not mix with water at all and just settles out. I tried Varsol and 10 weight non detergent oil but neither mixed or dissolved the clay. If anybody knows anything about this stuff I would love to hear about it. I tried to track down a fellow that knew quite a bit about the Capilano course but he did not respond to my email.

Brian
 
Back
Top