• Scam Alert. Members are reminded to NOT send money to buy anything. Don't buy things remote and have it shipped - go get it yourself, pay in person, and take your equipment with you. Scammers have burned people on this forum. Urgency, secrecy, excuses, selling for friend, newish members, FUD, are RED FLAGS. A video conference call is not adequate assurance. Face to face interactions are required. Please report suspicions to the forum admins. Stay Safe - anyone can get scammed.

What sort of vise for a mini-mill?

The general consensus I find is no swivel, it takes up precious vertical room and can reduce rigidity HOWEVER I say get a vice that has a swivel as most (maybe all?) the swivel is removable. Install it without the swivel and keep it just in case you need it.
4" vise will probably be a bit large I think on a mini mill and likely a 3 inch vise is more appropriate.
 
@Tom Kitta & @DPittman - thanks for the quick responses. I have a milling attachment (with vise) for my mini-lathe. I thought that the vise on it was 3", but I just checked and it is 2". So yes, absolutely, 3" would be appropriate; 4" too big. I also checked the drill press vises I have - they are only 3.5" and seem very large (and tall).
I'll be on the lookout for something 3" and low profile; the 2" would probably work OK for a while anyway, when a mill gets added to the collection of tools..
 
I have 5 vises for the mill as follows:

1. Swivel 6 inch vise (first Purchase from BB)
2. 6" Kurt Clone from Accusize. Solid and better than the 6"BB
3. 4" Tilt Swivel Vise from BB for specific application
4&5. 4" Precision Vises from BB I have made a set of custom jaws for these so I don't need to use Parallels. Both are generally now mounted for Milling applications as they allow for 2 parts to clamped in at a time, one set up two parts....CNC
 
What size did you go with?
The replacement is 'the same' as the 3" Vevor I bought first, except that this one' HFS ('Harbor Factory Store') seems to have had better QC as all the holes I see are aligned. Even at 3", the standard vise types are too big for the mini mill (Sieg X2) table, but the extra mass is welcome ....... anything to add a bit of 'gravitas' to the mill is a plus.
 
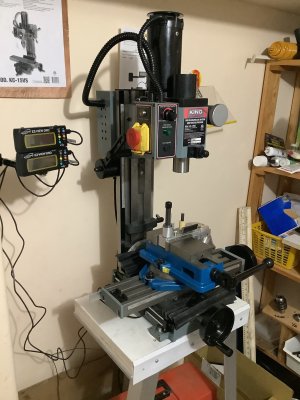
My 3” mill vise is not huge, but, it suits my KING Canada mill just right.
The castings are good and the swivel is very handy.
 

Attachments

  • 723C096B-7F2C-4197-8F54-9147E17015C2.jpeg
    723C096B-7F2C-4197-8F54-9147E17015C2.jpeg
    513.1 KB · Views: 17
  • F6F38941-BA15-46C5-AA41-F60749A87B6F.jpeg
    F6F38941-BA15-46C5-AA41-F60749A87B6F.jpeg
    518.3 KB · Views: 17
I can see production rates going thru the roof !!

We utilized custom parrallels with registration points on the 602 mills at Ex-Cell-O back in my Tool and Die days, especially when we were producing identical components for assemblies.
 
@Degen posted, I could add a third vise and maximize setup, but it does make the initial install significantly more difficult to align all the vises, two are difficult, three:oops:


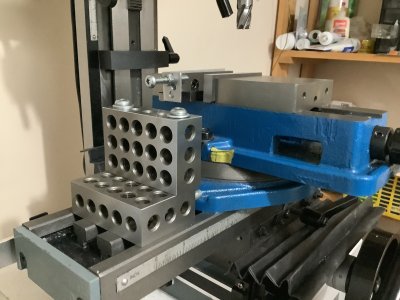
I put 1-2-3 blocks between my vice separation's for an easier Y alignment . For your set -up, I would use 1" between each vise.
( provided the vices have a ground or nicely milled side faces... ) Clamp a squared bar up the length of the vises. Tighten vises down to 20ft/lb arm strong torque.
The dial indicator would take less than a few minutes at that point, tighten vices down the rest of the way, remove the side set blocks and your solid.
I hope your set-up works well Degen!
 
Last edited:
With the common fix jaw liner its like having one vise and 3 jaws, my set up and alignment time is about 10-15min. As to the tight spacing this is a work table and travel issue 4" per vise plus 1/2" spacing is 13" to travel is 14" and I want to stay at full cutter size to spare at either end (general max size for cutters that I use is 1/2") so I have a bit if wiggle room.

I have done the bar method it works but this is faster and more accurate.

Additionally the vises are numbered and the fixed step (acts like a parallel) is machined in place which zero height to table and give a straight edge for this set up. A lot of thought went into decided the easiest and fastest with the best repeatability set up.
 
Back
Top