• Scam Alert. Members are reminded to NOT send money to buy anything. Don't buy things remote and have it shipped - go get it yourself, pay in person, and take your equipment with you. Scammers have burned people on this forum. Urgency, secrecy, excuses, selling for friend, newish members, FUD, are RED FLAGS. A video conference call is not adequate assurance. Face to face interactions are required. Please report suspicions to the forum admins. Stay Safe - anyone can get scammed.

Truing 3Jaw Lathe Chuck

thestelster

Ultra Member
Premium Member
I have a Bison 8" 3-Jaw, with 2-piece jaws which I bought brand new 25 years ago. Over the years, the jaw faces have worn a bit, to the point they're bell-mouthed by a couple thou' and unevenly. It previously didn't bother me too much, and especially since I mostly use a collet chuck, or the 4-jaw.

There is no play between the jaws and the chuck body. Still tight as a drum. But, I decided to address the issue. First, some testing is in order. Before mounting the 3-jaw, cleaned all surfaces, removed the jaws, cleaned the scroll and slots, and jaws. Then reassembled.

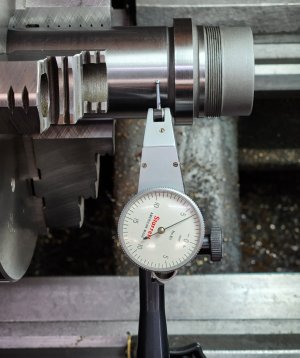
I chucked a known accurate part, in this case a spindle of a 5C indexer, all the way in, so that both sections of the jaws were gripping the part. And measured runout at 1" away from the jaws. 0.004"...ouch. Then repositioned the part out so that only the top part if the jaws were gripping the part. 0.001" runout. Hmmm....it seems as though the two parts of the jaws are not true with each other.
 

Attachments

  • 20230316_130329.jpg
    20230316_130329.jpg
    318.9 KB · Views: 8
  • 20230316_130640.jpg
    20230316_130640.jpg
    151.3 KB · Views: 8
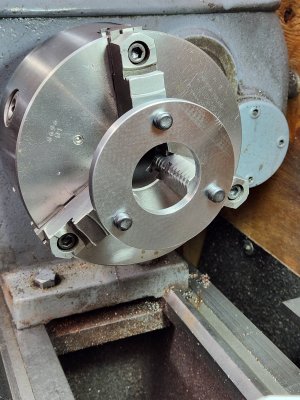
So before I grind the faces, i have to make a device that holds the jaws in the tightened position, and allows me to grind the faces. I've watched a number of YouTube videos, and seen commercial products. But this is my solution.

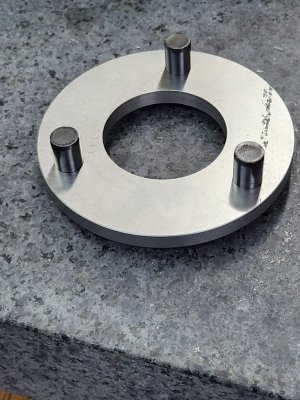
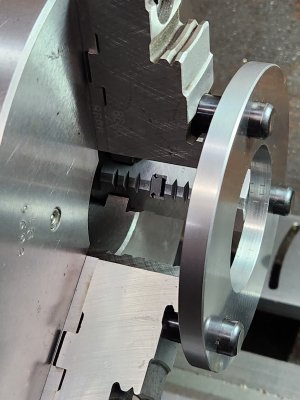
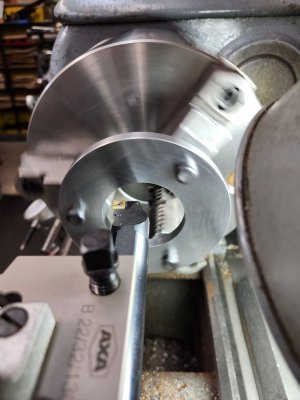
The steel ring started out as a 3/8" thick, 5x5 angle. I cut one part off, milled the faces, bored the center hole, drilled and reamed 3 holes on the mill spaced evenly. Install hardened dowel pins.

The dowel pins will go into the holes for the top jaws. In fact, I temporarily replaced those SHCS with button head cap screws, so that I can have the dowel pins deeper into those holes.
 

Attachments

  • 20230316_131030.jpg
    20230316_131030.jpg
    408.6 KB · Views: 8
  • 20230316_131252.jpg
    20230316_131252.jpg
    544.4 KB · Views: 8
  • 20230316_131328.jpg
    20230316_131328.jpg
    300.1 KB · Views: 8
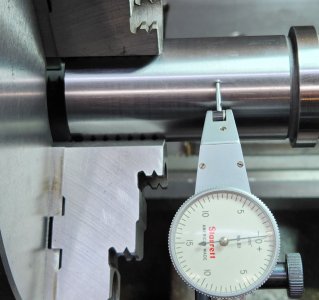
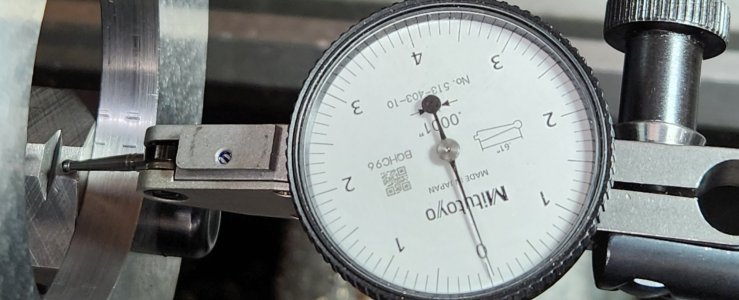
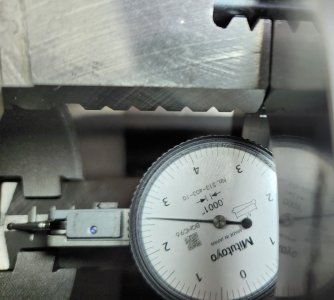
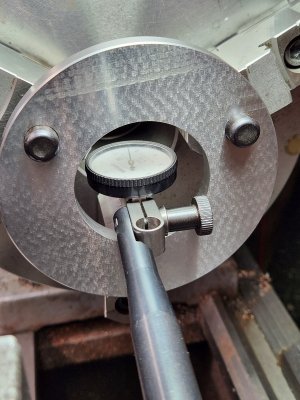
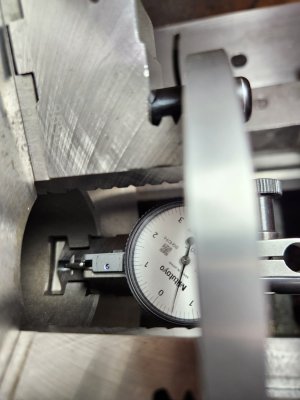
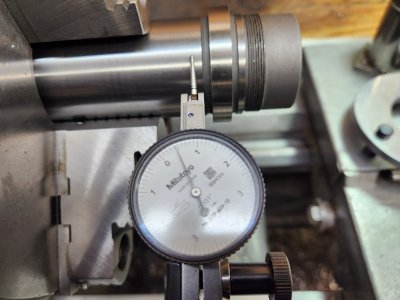
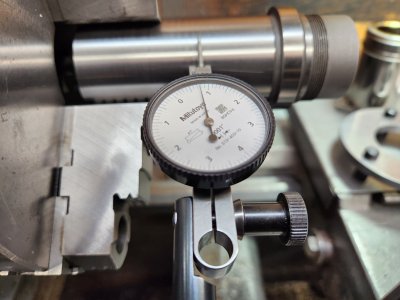
Ok. So now to measure the jaw faces while in tension. They're bell-mouthed by about 0.0025" from front to rear, and moving to the next jaw, gave me different readings.
 

Attachments

  • 20230316_133352.jpg
    20230316_133352.jpg
    181.9 KB · Views: 5
  • 20230316_132956.jpg
    20230316_132956.jpg
    320.3 KB · Views: 5
  • 20230316_132853.jpg
    20230316_132853.jpg
    450.1 KB · Views: 5
So, what I wanted to do is grind them with the tool post grinder. And none of the three set ups I have would work. So I say to myself, what the hell. Lets bore it out.
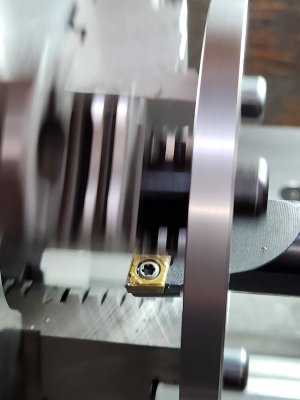
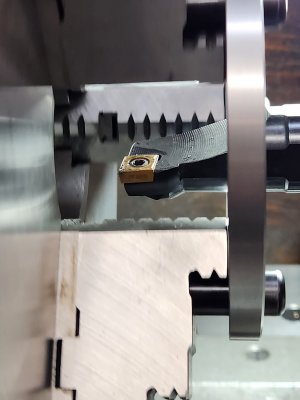
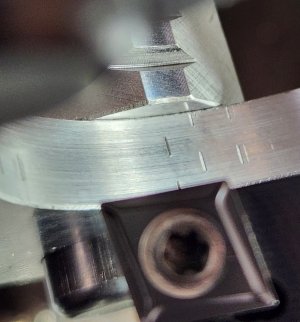
Using a 1" boring bar with carbide inserts. Of course I don't have CBN inserts, which would be the preferred insert for hardened materials, carbide will have to do.
Just taking 0.001" depth of cut at a time and 100rpm, it seemed to work, and then a final 0.001" pass with a brand new insert. The finish is ok. CBN would probably be better, and grinding for sure much better. But after all it's just chuck jaw faces! And I like the idea of no grinding dust to worry about.
 

Attachments

  • 20230316_135813.jpg
    20230316_135813.jpg
    259.7 KB · Views: 13
  • 20230316_135834.jpg
    20230316_135834.jpg
    192.3 KB · Views: 10
  • 20230316_135931.jpg
    20230316_135931.jpg
    196.3 KB · Views: 13
  • 20230316_143410.jpg
    20230316_143410.jpg
    386.3 KB · Views: 10
Last edited:
Ok, the results. Measuring the surfaces, while still under tension. The difference front to back is 0.0005", and the same measrements at all three jaws.
The difference though, for some reason, is now the front tips of the jaws will touch before the rear section. But thats probably a good thing. Now to measure runout.

First, removed the jaws, cleaned everything out, and reinstalled them.

Did the same test using the 5C indexer spindle, and it's considersbly better than before.

So I think I'm happy. And I probably will not grind them. I might get some CBN inserts though. (When I'm ready to sell one of my kidneys!!)
 

Attachments

  • 20230316_144546.jpg
    20230316_144546.jpg
    237.6 KB · Views: 7
  • 20230316_151127.jpg
    20230316_151127.jpg
    265.7 KB · Views: 7
  • 20230316_151254.jpg
    20230316_151254.jpg
    261.7 KB · Views: 7
I grind all of my Chinese chucks even when new. Since they have single jaws I usually tension them by placing some rubber or wood between jaws.

Note that this will make them quite accurate for the size ground. I.e. test your chuck for different sizes, not just around what you were grinding at.

In your case you are measuring the accuracy of your boring job.

Since you have quality chuck the results should be quite good - not as good as new but close - i.e. once you test different sizes you will see how good your scroll is and how good the jaws are. There could be some disappointing spots where scroll is worn.
 
Nice work. I guess that is a plus of reversible jaws, one can use the inner bolt holes to tension the jaws before dressing vs wedges or drilling dowel pin holes in the jaws.

Are the dowels pins making contact with the area corresponding to clearance for head of cap screw, or the shank portion of cap screw?
I had the dowels up against the outside wall of the counterbore for the SHCS. And I replaced those bolts with button head screws because the heads are shorter, which allowed me to use longer dowel pins.
 
Last edited:
I had the dowels up against the inside wall of the counterbore for the SHCS. And I replaced those bolts with button head screws because the heads are shorter, which allowed me to use longer dowel pins.
I watched all of Mr Crispin's videos on this for when I will be grinding my own chucks. I love any info of this type of process
 
I grind all of my Chinese chucks even when new. Since they have single jaws I usually tension them by placing some rubber or wood between jaws.
I've been eyeing a small 3" or 4" Chinese plain back chuck for my spin indexer & other gadgets. They have solid jaws & I'm expecting runout may be unacceptable.
So when you put (I assume) 3 pie segments between the jaws & tighten, do they stay put & tight during grinding rotation like that, or do you somehow band the segments on their OD like with a big hose clamp retention principle. I think it was Stefan who drilled his jaws & installed pins to clamp a ring, I'll have to go back & watch. I'm not sure what to expect, maybe carbide would do it but it would be PITA if it didn't work.
 
So I think I'm happy. And I probably will not grind them. I might get some CBN inserts though. (When I'm ready to sell one of my kidneys!!)

Wanna hear stupid?

I did basically the same setup except I used the outside screws instead of the inner ones. I replaced the short original screws with longer screws with collars and just pushed my home made ring against the collars. That way I didn't have to drill the expander or install studs and I also got better access to the inside jaws. I also reasoned that pushing on the outside screws would allow me to apply more centric pressure to the Jaws to keep them parallel.

Now for the stupid part.

I had assumed that my cheapo jaws would need truing. But after rigging all that up to true them I discovered they were about as perfect as anyone could ever hope for.

That's when I decided to stop being so stupid.

I didn't touch them.
 
Last edited:
Ok, the results. Measuring the surfaces, while still under tension. The difference front to back is 0.0005", and the same measrements at all three jaws.
The difference though, for some reason, is now the front tips of the jaws will touch before the rear section. But thats probably a good
I've been thinking about this. I guess when the jaws are held open near the front end with the ring, and that the jaws are tigtened with the chuck key near the back, there is a certain amount of flex. Could this be the reason that that the jaws are tighter at the front by that 0.0005"? And if so, would that mean the more we tighten the jaws onto the ring, the greater the flex, and therefore the greater the deviation? But also, if the jaws are loose in the chuck body because of wear, it would cause a greater deviation?

Is that not what we want to see? Because of the flex of the jaws, the fronts should bite onto the work first, so when we fully tighten the jaws, there will be a more even grip along the whole jaw face.

And if thats the case, using a method to keep the jaws open during truing, should utilize a method that holds them open at the front, and not the rear of the jaws. Is this correct?
 
And if thats the case, using a method to keep the jaws open during truing, should utilize a method that holds them open at the front, and not the rear of the jaws. Is this correct?

That agrees with my thinking.

My only caveats would be determining the degree of the compromise and then achieving that. In my mind there has to be a compromise.

Ideally, we want perfectly parrallel jaws whether loose or tight. But in practice that's impossible. Even if the Jaws don't tilt in their retaining slots, they will distort due to the clamping forces. The size, depth, and precision of the work part all affect that.

I think you are second guessing what you did. I think it's healthy to do that. But I also think what you did is just fine!

Did you end up having to face the Jaws a bit? Or did you miraculously avoid damaging the nose a wee bit over the years? If you faced them, how much of the end grip pad (jaw tooth at the nose) were you able to save?
I ended up removing a total of about 0.004" off the jaw face.
 
Haha!! I know you're a busy guy, but I posted all that earlier in the thread.:)

My bad. I bet I read it too. In fact I bet it put a reaction emoticon on it! Truth is that I might not even remember it even if I wrote it......

My problem isn't being busy. It's having a poor memory for numbers, names, dates, events, and data points. My memory for such things basically sucks.

I compensate for that with a logical understanding of the science and math and a life partner who can remember everything I ever did or said. :eek:

I wish my memory was better, but after 3/4 of a century, I have learned to accept who I am, be happy about my differences, and celebrate those around me who can do what I can't.
 
Food for thought, Using those CCGT DCGT high positive rake with small nose rad will deflect the boring bar less and allow to take a small cut like you are after. Super sharp inserts. Not sure if you seen them before?
Aimed for aluminum but I use it on steel all day every day. With in reason.

Nice work!
 
Thank you.

You mentioned those inserts before, and I tried them in steel, and yes they worked really well.

For this case, because the jaws are hardened, I needed to make sure the insert edge didn't chip mid way through a cut.
 
Back
Top