• Scam Alert. Members are reminded to NOT send money to buy anything. Don't buy things remote and have it shipped - go get it yourself, pay in person, and take your equipment with you. Scammers have burned people on this forum. Urgency, secrecy, excuses, selling for friend, newish members, FUD, are RED FLAGS. A video conference call is not adequate assurance. Face to face interactions are required. Please report suspicions to the forum admins. Stay Safe - anyone can get scammed.

Stuart 10V Steam Engine Build

YotaBota

Mike
Premium Member
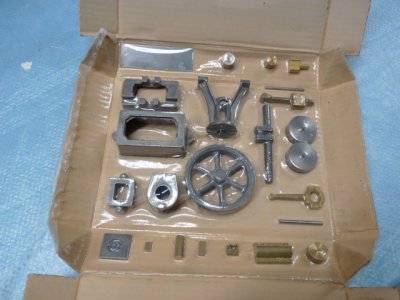
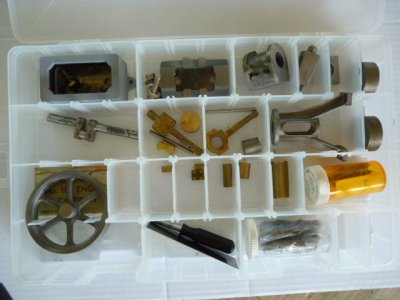
Well here goes everything. I picked up the casting kit from TOBARApprentice a while ago and it's finally time to get going. This won't be a speedy build but I'll update when there's something to update.

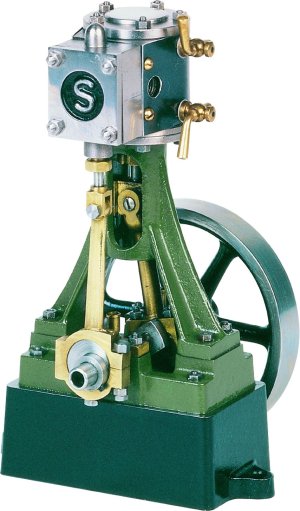
The first couple of pics show what I have in the kit and what it's supposed to be when complete. I put all the parts in a Plano parts box and made a list of every thing. I also enlarged the drawing and started a log book with one part per page so the dimensions were close and I could make notes, lots of notes.
I'm going to start with getting the hardware together so more to follow.
 

Attachments

  • 10V.jpg
    10V.jpg
    152.3 KB · Views: 23
  • 10v1.JPG
    10v1.JPG
    46.7 KB · Views: 22
  • 10v2.JPG
    10v2.JPG
    41.3 KB · Views: 22
Yeah I glanced at my bits I’ve got no real plans for it though but do have a drawing to get a idea of its construction.
 
Well here goes everything. I picked up the casting kit from TOBARApprentice a while ago and it's finally time to get going. This won't be a speedy build but I'll update when there's something to update.

The first couple of pics show what I have in the kit and what it's supposed to be when complete. I put all the parts in a Plano parts box and made a list of every thing. I also enlarged the drawing and started a log book with one part per page so the dimensions were close and I could make notes, lots of notes.
I'm going to start with getting the hardware together so more to follow.
Hey did you hear back from Stuart about the changes with the newer versions and our versions?
 
Encouragement appreciated,there's gonna be lots of learning but it should be interesting.
TomO - what kit do you have?
DPittman - I did hear from Stuart, they didn't have an answer as to why the changes were made and said changing to SAE hardware shouldn't be an issue as long as everything fits.
 
Mike - In case you haven't seen this website, it might provide some useful tips for your Stuart 10V.

It is a fun little engine to build - I hope you enjoy yours. Mine is supplied by a PM Research vertical boiler and runs a little open-frame generator to Elmer Verburg's design. It just manages to light an LED lamp standard.
Charlie
 
Making an engine form castings really ups the ante. They're a lot harder to fixture than bar stock and the castings make them look like a real model (i.e. model of a prototype)...... but you can't afford a mistake! Too many years ago, on one of my first engines, a Stuart 7A, I had to make the call of shame for a cylinder casting. "Hello, um, would have, um, an extra 7A cylinder in stock". it felt scandalous! lol
 
Last edited:
CWelkie - I've been to HH's site many times. I've gone over his 10V build 3 or 4 times now checking stuff out. Thanks.
Mcgyver - When Andrew Whale built his 10V he bought a new standard. He had the hole on an angle.
That's one reason I'm keeping a log for each part, helps to keep track of progress, progression/sequence and the machining numbers (how many thou left to take off). Hopefully slow and triple checking will mean I won't need to replace parts.:)
 
Looking at the pictures again it looks more like a holding tank than a boiler,,,, no fire box. What do you do, build a campfire under the tank, lol
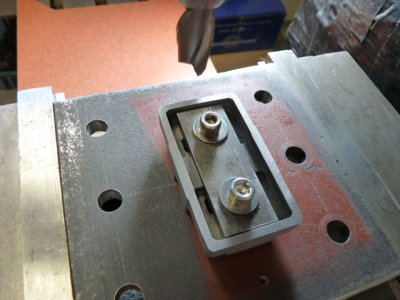
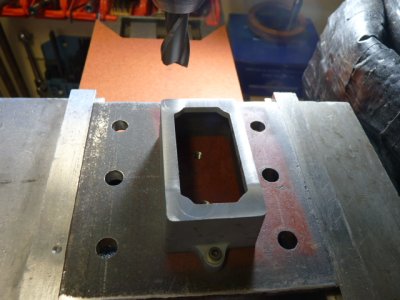
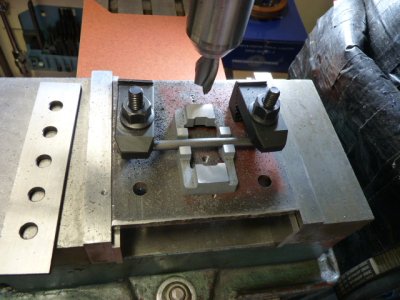
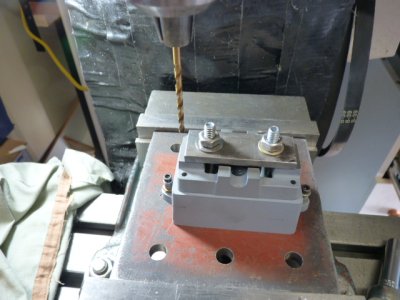
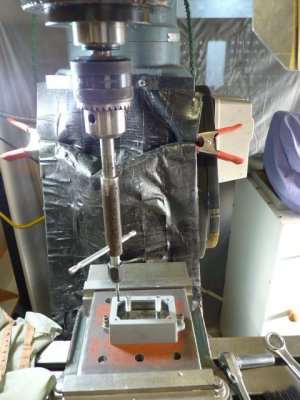
While I was waiting for hex stock, rod and collet stuff to be delivered I started removing the casting flash from all the parts and filed the skin off all the places that would be machined. Filing seemed like a good idea to help save tooling. I made up some parts holding devices as per other youtube builds and machined flat the box bed and the sole plate. Clamped the two pieces together and drilled/taped the holes for the studs. So far so good.
 

Attachments

  • 10v4.JPG
    10v4.JPG
    51.2 KB · Views: 9
  • 10v3.JPG
    10v3.JPG
    45.4 KB · Views: 8
  • 10v5.JPG
    10v5.JPG
    56.8 KB · Views: 8
  • 10v6.JPG
    10v6.JPG
    46.2 KB · Views: 8
  • 10v7.JPG
    10v7.JPG
    64.8 KB · Views: 9
You are off to a good start! The technical term for cleaning up the castings is fettling. Its really good to file things to point where the casting is solidly resting on the filed areas - no rocking! You can readily do so with a bit of blue on the surface - touch the casting to the plate and file off the blue. Same idea is scraping. The reason for doing so is with any rocking, the clamping pressure can easily distort the casting a wee bit. Then when you remove the casting it springs to its orignal shape....potentially distorting the just machined geometry. The spindlier the casting, the greater the risk.
 
Some of the old boilers used a lever safety valve that had a weight on the end of the lever. I would think the missing rod and valve seat would have gone into the hole next to where it is fitted to get better leverage.

AEA5A609-59A6-49D5-95D9-122A17308513.jpeg
 
Back
Top