• Scam Alert. Members are reminded to NOT send money to buy anything. Don't buy things remote and have it shipped - go get it yourself, pay in person, and take your equipment with you. Scammers have burned people on this forum. Urgency, secrecy, excuses, selling for friend, newish members, FUD, are RED FLAGS. A video conference call is not adequate assurance. Face to face interactions are required. Please report suspicions to the forum admins. Stay Safe - anyone can get scammed.

Repurposing old rotary table as welding positioner

Tmate

Well-Known Member
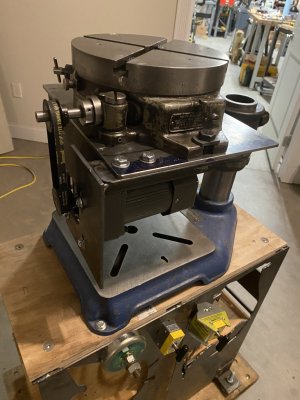
Since I purchased a slightly larger Yuasa rotary table, i have no need for my old 9" Troyke BH-9. Since they are not worth a great deal on the used market, I thought I might try my hand at using it as a welding positioner.

Using it solely as a flat, horizontal positioner requires virtually no fabrication or modification. I coupled it with an adaptor to a Grainger gear motor, and hooked it up to an electric train transformer. It rotates easily and has a broad speed range in forward and reverse.

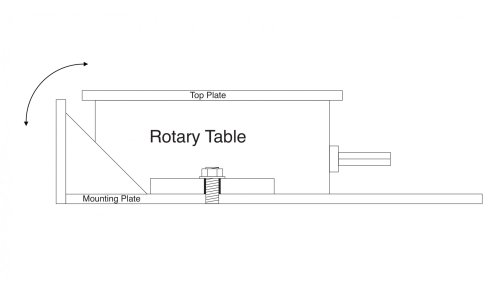
I plan to fabricate a right angle mounting plate for it so it can be used both horizontally and vertically. The motor rests perfectly flat against the mounting plate, and is held in place by the coupler. There is little to no oil in the unit, so leakage shouldn't be a problem if used vertically. I'll need to make a top plate for it to protect the top of the unit and provide some clamping holes, etc.

I happened to have several of the gear motors and a transformer on hand, so the project cost me nothing. Kind of a dumb project, but fun to experiment with.
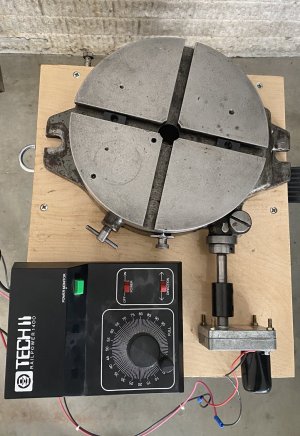
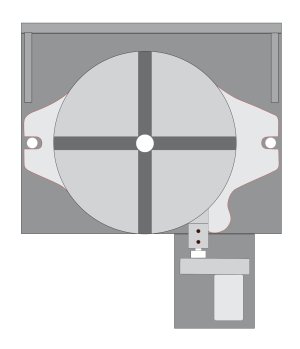
Troyke BH-9.jpg top view.jpg side view.jpg
 
Sounds like a neat little automation project.

Just make sure the Rotary Table and Motor you are using are . . .
Multi-positional for vertical and horizontal applications.
The motor will have NEMA standard seals and bearing orientations.
 
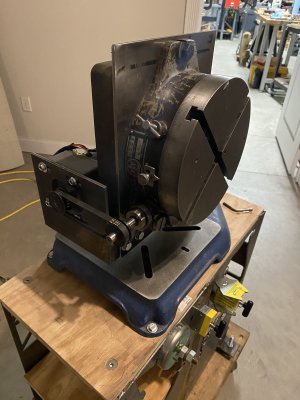
Finished up the rotary positioner today. With the timing pulley arrangement as shown, top of the table has a speed range of zero to 1.5 rpm. An almost infinite combination of pulley sizes are available to adjust the speed range. Of course, the optimal table rpm varies with the diameter of the piece being welded.

IMG_4339.JPG IMG_4340.JPG
 
Nice job, looks quite useful.

What is best practices for grounding to give a good ground to the work (oil doesn't conduction well) and avoid arcing through the the device. The later is probably more a problem with rolling element bearings. but still, how do the pro rigs handle grounding?
 
Nice job, looks quite useful.

What is best practices for grounding to give a good ground to the work (oil doesn't conduction well) and avoid arcing through the the device. The later is probably more a problem with rolling element bearings. but still, how do the pro rigs handle grounding?

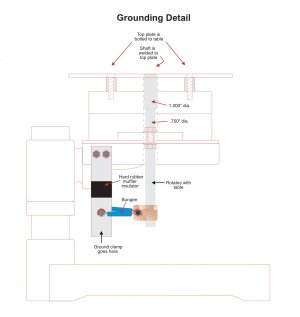
Here's how I plan to do it.

Grounding detail.jpg
 
Last edited:
What I did on mine was use some 3/4 copper rod spring loaded in a tube running on the bottom of my rotating plate. The spring kept the rod in constant contact to the table. The copper rod had some braided flat conductor solder to it then rand in to a solid copper flat bar were the ground was attached. Works fine haven't any issues so far. If you don't have copper brass should work. Here's some pics not to clear but I'm sure you'll get the idea.
grnd rod.jpg


conductor.jpg
 
@Aliva have you got a picture of your positioner? I'm interested to see how you have it set up with that big chain gear


I've seen a few home made hobby positioners where they use a car ground strap and wrap it around the axle

Or you can just put your ground on the part :confused:
 
Nice Job tmate.

I just scrapped 2 cars last weekend and grabbed the wiper motors out of both of them before they went (among a few other items to be repurposed). I had planned on using one for a welding positioner eventually too. They're great little motors. Never thought to use a drill press frame though, I like that idea. Thanks for sharing.

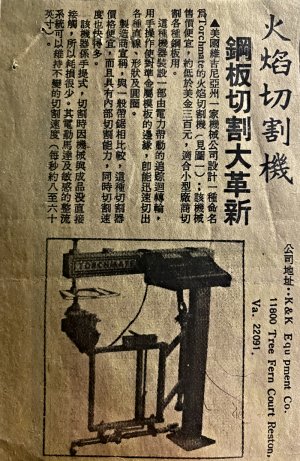
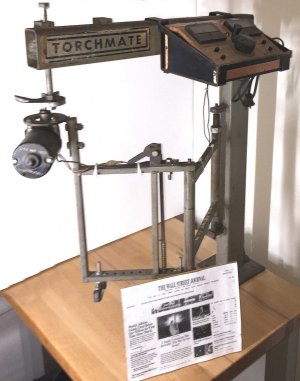
Speaking of wiper motors, here's a piece of trivia. The first Torchmate (a pantograph machine) used modified Ford Granada wiper motors. After selling a couple hundred of these, Grainger gear motors were used. Photo is from a 1980 Chinese newspaper. They were all over this stuff way back then. By the way, I still have one of these - the 17th unit produced in 1980. It still has the original wiper motor, and it still works 40 some years later.

1st Torchmate.jpg 1980_Torchmate.jpg
 
Love the history. I really enjoyed your thread over on PM.

I used a modified Pontiac G6 wiper motor to power the skein winder I built for my wife a few years ago. Handy little things.

fOvOy7yl.jpg

EF5Vljyl.jpg


Still waiting for my first order, but it should catch on like the Torchmate any day now.....;)

That reminds me, I still need to finish the arduino controller for yardage, etc.
 
My neighbor kid is a welder by trade and has a set-up similar to yours but it has no chain or belt drive nor does it have the gear reduction rotary table.
His outfit is bone simple, he started out with a piece of 3/4 steel rod & a cast-off 6" 3 jaw from a junk lathe along with a face plate from the same lathe. He used 2 pillow block bearings that would accommodate the 3/4 bar, mounted them to a scrap piece of heavy angle iron so it would mount & be held in a welding truck vice. Then the chuck back plate was welded to the bar.
On the driven end of the shaft he has a round plate of 1/2" steel about 8 " in dia. Now this is the part of the machine where simplicity shines. This round plate is driven by friction from a solid rubber wheel from an old lawn mower that is mounted to a 12 volt truck heater motor that has riostat switch that has an infinite range to power the motor. He says he can "make er sing" as you would if adding steel filings to a shaft with a rosebud torch, or dead slow for a filler pass. The engagement of the rubber wheel to the driven plate can be increased by a turnbuckle if a heavy workpiece needs extra oomff to turn it.
The faceplate has a round bar spudded/bolted into the center hole so it can be gripped by the 3-jaw, gives him almost unlimited mounting opportunities of a workpiece.
 
Here's the finished welding positioner. For a ground I used a spring loaded brass rod riding against the edge of the rotary table on the work side of the bearings. The ground cable is either bolted or clamped to the bracket holding the brass rod. The bracket is insulated from the rest of the machine via nylon bolts & washer spacers. Three clamping shaft collars and some scrap steel bar make a sturdy adjustable hand rest which can also accommodate a Tweco torch holder. Motor is a 13 amp 12 volt dc planetary gear motor and a 30 amp switching 12 volt dc power supply. A separate speed control is used. There are positive stops at zero degrees and 90 degrees tilt. Table speed range is .5 to 4.5 rpm. An on/off foot pedal can be used if desired.

planetary1_890kb.jpg


planetary2_770kb.jpg
 
Back
Top