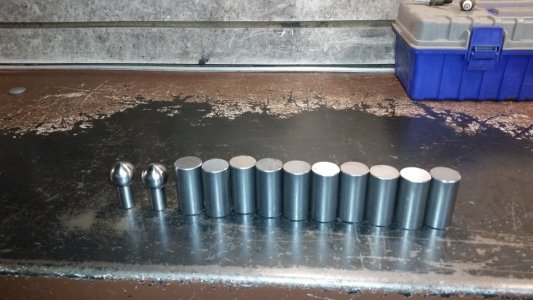
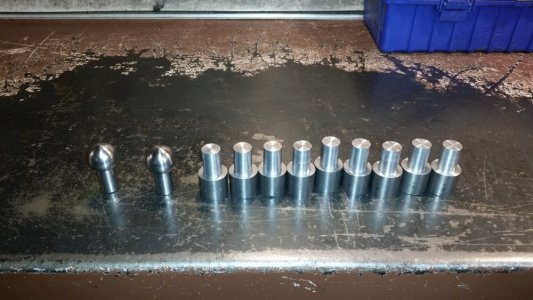
I recently got my radius turning tool modified to fit my new lathe. I was sure I posted the build of the tool here but I can't seem to find the post. It uses a tapered roller bearing and a flat thrust bearing to prevent twisting during turning operations and works really well. Anyway, I have decided to replace all 11 plastic handle knobs on the lathe with machined ones. I have been learning how to best use the radius tool to quickly make a ball end. I used 1 inch diameter cold rolled steel and cut 11 two inch lenghts. I turned 1 inch of each piece down to 5/8" diameter which leaves a cylindrical knob 1 inch long and 1 inch diameter on each one. I drilled and tapped each piece with M10 X 1.5mm thread. The piece was then threaded onto a custom arbor I made up. This would probably work best with my 5C collet chuck but the arbor is bigger then my largest collet so I used my 6 inch 3 jaw. Care must be taken to avoid crashing into the chuck with the radius tool or your hands. The first step is to set the radius tool to cut the right size ball, I set this one so the cutting tip is just under 1/2" from the center of rotaion of the tool so it will make a ball just under 1inch in diameter. The next step is to set the cross slide so the cutting tip is on center with the work piece, with the tool aligned with the spindle I set the point of the cutter on the center line then turned it 90 degrees in both direction to eyeball the center. Then I locked the cross slide. With the lathe running I got the best results at 900 rpm, that's the speed where I got the least chatter. The work piece is not supported well so small cuts are required. Here are some pics and a link to a video. The vid is is 2 parts, the turning and polishing have a stop between them. I made sure to cover the ways during polishing to avoid as much grit as possible.
Attachments
Last edited:


