• Scam Alert. Members are reminded to NOT send money to buy anything. Don't buy things remote and have it shipped - go get it yourself, pay in person, and take your equipment with you. Scammers have burned people on this forum. Urgency, secrecy, excuses, selling for friend, newish members, FUD, are RED FLAGS. A video conference call is not adequate assurance. Face to face interactions are required. Please report suspicions to the forum admins. Stay Safe - anyone can get scammed.

New Never-Twist clamps

Brian26

Well-Known Member
Premium Member
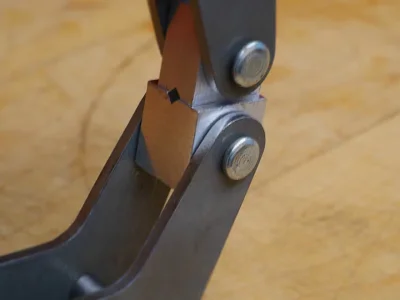
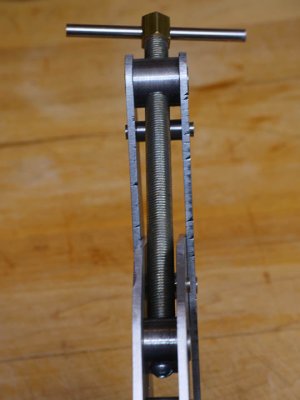
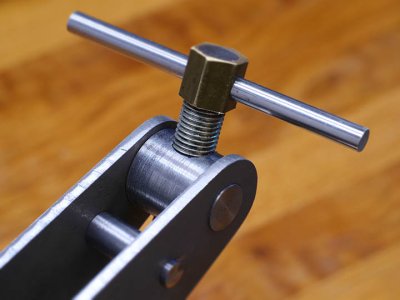
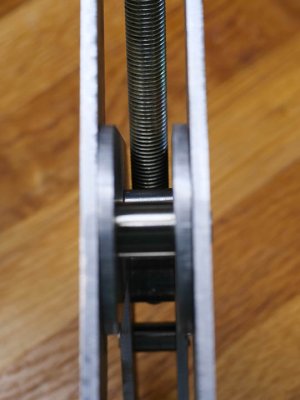
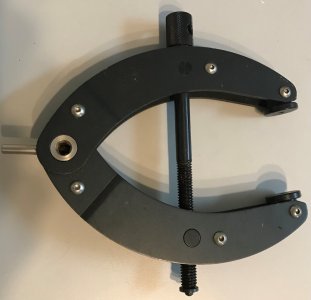
This summer I have been designing and building my own version of Kant-Twist clamps in 3 sizes - 2.5", 4.5" and 6". I have the 6" one finished and will include pictures. I am happy with the design and have learned a lot from the process of building my first clamp. I had a decent quantity of the various arms manufactured locally, using a laser cutter, and this has worked well. Of special note is that the design includes all necessary holes - very precisely located to make the clamp go together accurately and work smoothly. I created a document with many more details and will attach that for anyone who wants to read the fuller story. This documents covers the flaws in the clamps I purchased, the major design goals of my re-design, the process of making the first clamp and some prices.

Happy to make available sets of the arms to anyone interested - details in the document attached. My thinking is that only a few of you would want to read 5 pages of details on this subject! But, for anyone interested, the complete story - so far - is in the attached PDF file.
 

Attachments

  • P1034511.JPG
    P1034511.JPG
    36.6 KB · Views: 39
  • P1034514.webp
    P1034514.webp
    18.8 KB · Views: 34
  • P1034515.JPG
    P1034515.JPG
    31 KB · Views: 34
  • P1034524.JPG
    P1034524.JPG
    34.2 KB · Views: 31
  • P1034527.JPG
    P1034527.JPG
    33 KB · Views: 32
  • Never-Twist Clamp Full report.pdf
    Never-Twist Clamp Full report.pdf
    143.9 KB · Views: 47
That is a great effort, and I've downloaded your PDF. Looking forward to reading it tonight!
 
Just finished making some of the larger arms look nice, using a 1" abrasive pad. One new image shows a pair of the short arms - one as it comes from the fabricator, the other after using the abrasive pad. The second new image shows a complete set of the arms after treatment with the abrasive pad.
 
those look great, good job! Kant and parallel clamps are the ones I use the most, you just can't have too many of them!
 
This summer I have been designing and building my own version of Kant-Twist clamps in 3 sizes - 2.5", 4.5" and 6". I have the 6" one finished and will include pictures. I am happy with the design and have learned a lot from the process of building my first clamp. I had a decent quantity of the various arms manufactured locally, using a laser cutter, and this has worked well. Of special note is that the design includes all necessary holes - very precisely located to make the clamp go together accurately and work smoothly. I created a document with many more details and will attach that for anyone who wants to read the fuller story. This documents covers the flaws in the clamps I purchased, the major design goals of my re-design, the process of making the first clamp and some prices.

Happy to make available sets of the arms to anyone interested - details in the document attached. My thinking is that only a few of you would want to read 5 pages of details on this subject! But, for anyone interested, the complete story - so far - is in the attached PDF file.

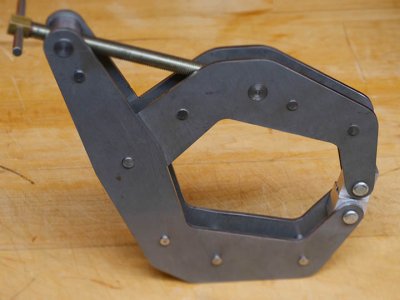
I've reviewed your pictures and the PDF quite closely now Brian. Post more pictures! Nice job. I have a few questions:
  1. Are the peened standoffs holding the arm sandwiches together the only thing holding the arms on? I don't think there is any peening or anything else at the pivot parts with the threaded rod or the main pivot point?
  2. Related to this is the threaded hole standoff - it looks like it just rotates in the hole and is held in place by the clamp arms? Yes?
  3. The aluminium clamping pads are attached with clevis pins - in the pictures the cotter pin isn't visible. Did you use that kind of clevis pin or something with retaining rings? or some sort of chicago bolt setup?
  4. Is there a "quick" version of a kant-clamp where the threaded rod can be moved back and forth without turning for gross adjustment and then the nut engaged for clamping? Kind of a half-nut arrangement for kant-clamps?
If you like I would make CAD PDF's for your 3 designs for you - we could post them on the forum for interested members.
 
one more question - how exactly does the threaded rod mate with the end that pushes and pulls the arm? #10 screw ok with a bit of loctite holding it - I assume the screw is a bit loose and the buttom of the head pulls the clamp open? What about the pushing end in the block? Any lubricant in there ?
 
I've reviewed your pictures and the PDF quite closely now Brian. Post more pictures! Nice job. I have a few questions:
  1. Are the peened standoffs holding the arm sandwiches together the only thing holding the arms on? I don't think there is any peening or anything else at the pivot parts with the threaded rod or the main pivot point?
  2. Related to this is the threaded hole standoff - it looks like it just rotates in the hole and is held in place by the clamp arms? Yes?
  3. The aluminium clamping pads are attached with clevis pins - in the pictures the cotter pin isn't visible. Did you use that kind of clevis pin or something with retaining rings? or some sort of chicago bolt setup?
  4. Is there a "quick" version of a kant-clamp where the threaded rod can be moved back and forth without turning for gross adjustment and then the nut engaged for clamping? Kind of a half-nut arrangement for kant-clamps?
If you like I would make CAD PDF's for your 3 designs for you - we could post them on the forum for interested members.

John
Insightful and, in the case of your No. 4 - most interesting! Here are some specific answers:
1. Yes - only the "standoff" pins are peened. All the rest need to rotate.
2. Yes - held by the peened standoffs. Note that my redesign has added an extra pin in each arm to make this a lot more sturdy than the original. This especially applies to the third point below:
3. None of the above! I took a standard, 2" clevis pin and shortened it to the right length. Then, when drilling the hole in the aluminum, I made sure to choose a drill bit that would result in an interference fit for the clevis pin. Then, just pounded it through! So, the aluminum block does not rotate on the pin, BUT, the whole assembly rotates in the holes near the ends of the arms. Cannot get loose because there is an arm on each side. Big plus: Easy to replace these pads if ever it becomes necessary. Just pound them back out!
4. What a great idea! That would save tons of twisting - especially when you use a 7/16-20 threaded rod like I did. We need to get our heads together on this. See below also:
5. I would welcome your help with this. I tried to learn EasyCad, but that is not going too well - there are so many basics to learn before you can actually do anything! I also tried using just Microsoft Word - and that has possibilities - but just 2-D of course. As it stands, my plans are, er, sketchy to put it mildly, but for the most part, understandable. Can I get these to you somehow - or, even better - bring them to Calgary? Send me a message outside the forum (or, call me...) and we will make this happen. I would be more than pleased to meet with you - or whatever you think is best.
Thanks for the informed and useful response. Cheers,
 
one more question - how exactly does the threaded rod mate with the end that pushes and pulls the arm? #10 screw ok with a bit of loctite holding it - I assume the screw is a bit loose and the buttom of the head pulls the clamp open? What about the pushing end in the block? Any lubricant in there ?
John
I turned down the threaded rod to 5/16" for about .750". Then, after turning the smaller diameters on each end of the "push/pull" part, I milled a flat on the "top" and "bottom" of the rounded section of the 7/8" steel rod I used for this part. Made the flats 180 degrees from each other of course. This left the distance between the flats at a bit less than 3/4" - so the turned-down portion protruded maybe .010". I made sure the 10-24 bolt would fit properly, then used my sander to shorten this turned-down part so it just barely clears the "width" of the flats. This is finicky of course, but it only took a few minutes. Net effect - there is very little "play" in this part of the mechanism - perhaps 15 degrees? I could get it closer perhaps - but then differences in the shop temperature might make it inoperable!

No lubricant in the other end, apart from what might remain after the lathe work. Could easily be added if it ever needed it. Another great idea! Cheers
 
before you guys invest a lot of time and effort, have you heard of Dimide clamps?

The first 1"20" of the video is all you need to know. They use left hand and right hand threads on that clamp, but with the drill-ready end, one could just use 7/16 ready rod to close them. I think they are superior to KantTwist, but I have 8 KTs right now, so I'm not buying Dimide ones in the near future...


My take on an 'improved' no-twist clamp is a shape like the dimide, but with 1/2-13 ready rod, but with the Dimide ends for impact on one side, and a handle on the other. The trouble with the Kant-twist, is the wierd shape,on which the Dimide improves. To save material, it could be designed with a stackable curve. It's so simple to redesign, I wonder why more people aren't cloning that one(?)
 
Last edited:
before you guys invest a lot of time and effort, have you heard of Dimide clamps?

The first 1"20" of the video is all you need to know. They use left hand and right hand threads on that clamp, but with the drill-ready end, one could just use 7/16 ready rod to close them. I think they are superior to KantTwist, but I have 8 KTs right now, so I'm not buying Dimide ones in the near future...


My take on an 'improved' no-twist clamp is a shape like the dimide, but with 1/2-13 ready rod, but with the Dimide ends for impact on one side, and a handle on the other. The trouble with the Kant-twist, is the wierd shape,on which the Dimide improves. To save material, it could be designed with a stackable curve. It's so simple to redesign, I wonder why more people aren't cloning that one(?)

Thanks for alerting me to these great clamps. No doubt about it - stronger then the Kant Twist ones due to their change away from the cantilever design. Their direct-acting threaded rods must be what is responsible for their higher clamping force. Of course - you lose some high percentage of the clamping depth - so I think I will stay with the Never-Twist for now because I value throat depth more than closing force. But for some things, these will be hard to beat.
 
The Dimide clamp looks a lot like this Starrett 1640. 164C
Great clamps that don't twist.
Starrett 1640.jpg

I have a few sizes from years back but it looks like Starrett no longer offers this clamp. This one can't be used with an impact wrench since there is no hex on the adjustment knob, however the knob does have a hole for a tommy bar and a rotateable mounting stud (on the left).
 
Last edited by a moderator:
The Dimide clamp looks a lot like this Starrett 1640.
Great clamps that don't twist.
View attachment 17125

I have a few sizes from years back but it looks like Starrett no longer offers this clamp. This one can't be used with an impact wrench since there is no hex on the adjustment knob, however the knob does have a hole for a tommy bar and a rotateable mounting stud (on the left).

Couple of things. First, I wonder who owns the patent on these clamps, because this does indeed look a lot like the Dimede one. Second - it doesn't look as if this Starrett model has the quicker-acting left/right threads as does the Dimede? Great to know about this - thanks.
 
The Starrett looks like single thread, yes? That would be simpler to make all things equal. I like those button head screws for assembly & also to swap in different jaws pads.
 
Yes - the Starret has a single thread. I haven’t taken one apart to see if the sides are just aligned by the button head screws or if the screws are threaded into a step dowel. It seems to be an elegant build - I’d expect nothing less from Starrett.
 
The Dimide clamp looks a lot like this Starrett 1640.
Great clamps that don't twist.
View attachment 17125

I have a few sizes from years back but it looks like Starrett no longer offers this clamp. This one can't be used with an impact wrench since there is no hex on the adjustment knob, however the knob does have a hole for a tommy bar and a rotateable mounting stud (on the left).

@eotrfish what does the back of the clamp look like? ie what do the machine screws holding the clamp together attach to?
 
Correction - the clamp I mentioned is actually Starrett 164C - not 1640
It looks like Starrett had this protected under two patents as stamped into the frame.
Starrett 164C 03.jpg

Janger - the button head machine screws attach to stepped dowels.
Starrett 164C 02.jpg

I also found when I took it apart that the rotatable stud actually has an eccentric which can be used to apply additional clamping pressure once the thread is tightened as far as possible. This explains the internal hex - you can use an allen wrench to further tighten the clamp.

If you look up https://uspto.report/patent/grant/10,307,893 you'll get some insight into the Dimide adaptation of the Starrett clamp. There are a lot of interesting drawings at the end of this patent.
 
Last edited:
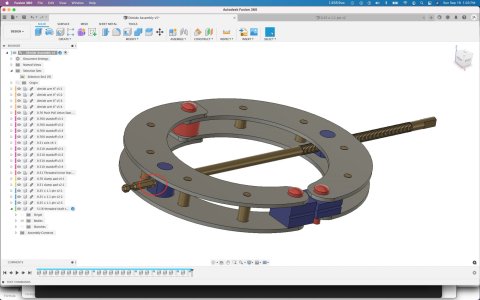
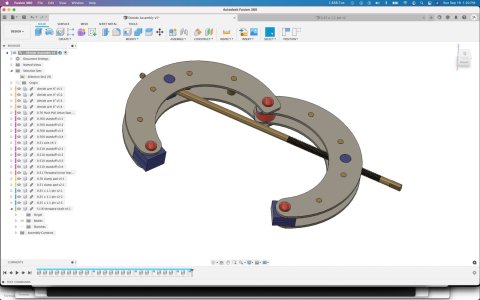
I got busy and designed up a version of the dimide in Fusion 360. This is about a 6" throat depth version.

I've been mulling over options on how the threaded rod would exert the clamping pressure. The area in red circle is still to be defined. I was thinking of using two locking collars on the threaded shaft - one on each side of the stand off - probably with flats or even holes going right through the threaded rod for a pin. Any suggestions on this? I see on the starett 164 there are two square blocks on the shaft. The one located on the threaded section is clearly threaded and moves back and forth exerting the clamp pressure. The closer one at the handle end though is not so clear what it is doing. It seems it must be fixed in place yet also allow the shaft to spin - @eotrfish how does that part work? Perhaps the knurled handle part presses on the square block and the rod simply spins inside the block? Is the threaded rod and handle all one piece? and thanks for posting that disassembled picture it's interesting.

Does the far end of the threaded section have a screw on stop?

I also like the standoffs are internally threaded and use machine screws for assembly. And the bend in the arms means you only need one length of standoffs and only one clamp pad depth - very clever Starett. (Edit -> well not quite looks like there are a few different lengths of standoffs) And I see the standoffs holding the clamp pads have a different head diameter - I wonder why they did that?
 

Attachments

  • dimide clamp.jpg
    dimide clamp.jpg
    195.6 KB · Views: 10
  • dimide 2.jpg
    dimide 2.jpg
    188 KB · Views: 10
Last edited:
Probably one piece shaft there’s a shoulder and a circlip, pinned is also possible as no forces are in that direction.
 
Another thing you might consider is the clamp faces being flat like most clamps I think it would be useful to have a v cut in opposite the main gripping flat that way they could be rotated to hold round to flat or round to round without skating they could have a spring and ball locating the position keeping them in place. I would cut the v on both but at 90* to each other for 2 directions of holding.
 
Back
Top