• Scam Alert. Members are reminded to NOT send money to buy anything. Don't buy things remote and have it shipped - go get it yourself, pay in person, and take your equipment with you. Scammers have burned people on this forum. Urgency, secrecy, excuses, selling for friend, newish members, FUD, are RED FLAGS. A video conference call is not adequate assurance. Face to face interactions are required. Please report suspicions to the forum admins. Stay Safe - anyone can get scammed.

New Digital Edge Finder

Susquatch

Ultra Member
Administrator
Moderator
Premium Member
I am finishing up the install of a DRO on my Hartford Mill. Now it needs to be commissioned and calibrated.

I already have two mechanical edge finders. But they only work on the X and Y Axis. To be truthful, I'm not sure how the Z-Axis works, but more on that further down.

So I decided to splurge on an electronic X/Y/Z finder. I decided on this one:

Accusize Industrial Tools Electronic Short Shank Edge Finders with Sound Alert, C028-9273 https://www.amazon.ca/dp/B01F44BQDQ/ref=cm_sw_r_apan_i_CWM2FQ1AP1SERQY2SJ5X?_encoding=UTF8&psc=1

It has a 0.4" precision ball on it. The ball is spring loaded so you can't damage it by going a bit too far. It also has both sound and a bright red LED.

Let me just say that for old guys with bad eyes and ears, it was worth the money!

To check accuracy, I used it from both sides of a precision block. This also demonstrates the versatility of the DRO.

Coming from Right to Left, I zeroed my DRO on contact, then rechecked it several times. Totally repeatable within a tenth. Then I plugged in the ball offset (1/2 of the diameter of 0.4 = 0.2) by hitting X, then 0.2, then enter.

Then I repeated the same exercise Left to Right on the block. Exactly 2.2000 inches plus minus a tenth.

Now for the Z. Drum roll please........

Hmmmmm....... Nice ball that allows for precision sensing. But it seems the OP on this thread is an idiot. The edge finder does a great job of finding the top edge, but now what? There is no way to use that edge! Every tool and every collet has adjustable length. There is no collet/spindle to maintain a zero like the X & Y........

The traditional methods is to take a scuff cut using whatever bit you plan to use. But that loses the benefit of the precision ball, the LED, and the Beeper.

In conclusion, it's a nice edge finder and well worth the money, but unless another member has a better idea, it's pretty much useless as an edge finder in Z.

The only idea I can come up with is some kind of insulated fixture and a separate led/beeper. Or maybe put the sensor into a 3/4 inch collet in a 2" collet block and then bring the end mill down to contact the edge finder. But I doubt those collet blocks are all that accurate......

Ideas?
 
use tool holders, number them, record the z height offset in the DRO's tool library.

Also when edge finding, you can find the edge, move over - 0.100 in your case, and just zero the axis in question....no need to enter numbers. May save a few keystrokes...
 
use tool holders, number them, record the z height offset in the DRO's tool library.

Also when edge finding, you can find the edge, move over - 0.100 in your case, and just zero the axis in question....no need to enter numbers. May save a few keystrokes...

I'll address your suggestions in reverse.

Re zeroing the DRO. That's actually what I did with my old edge finders before the DRO or the electronic edge finder. I just found the edge, and then moved the dial to account for the offset. So naturally, that's what I did with the DRO and EEFinder too.

But I actually found entering the new coordinate to be much easier than moving the spindle and re-zeroing. Ya, moving it isn't hard, and tapping on the handle allows you to get tenths pretty easy. But I found that entering the new coordinate is even easier. Just find the edge, hit X, then 0.2, then enter is a lot easier than backing away on x, moving y out of the way, then moving x back to zero, then carefully tapping in to 0.2000, then hitting X0. Maybe is just my Noob DRO Experience. That may change in time. But you should try it my way a few times too. Who knows it might be your habit that needs a revision too!

There is soooooo much to learn about using a DRO that I am downright giddy about it! So many habits to break, and so many new processes to learn.

RE the tool library idea. I ABSOLUTELY LOVE THAT! The library is a function I have not explored yet. But I know it's there and I'm sure I can figure it out. I can even use that to take the cutter size into account. But I'm not sure what you mean about the holders. How do you index a tool bit in the holder collet so it always goes in to the same place?
 
dedicated r8 endmill holders for example, or tormach tts system, will always , in theory, have the same Z height, ie, you can remove the holder and reinstall and Z will remain constant. When you swap tools, you tell the DRO what number holder is installed and it adjusts Z offset.
 
dedicated r8 endmill holders for example, or tormach tts system, will always , in theory, have the same Z height, ie, you can remove the holder and reinstall and Z will remain constant. When you swap tools, you tell the DRO what number holder is installed and it adjusts Z offset.

I have dedicated R8 Endmill Holders. Some junk ones I bought as a set, some well worn ones that came with the mill, and a few really good Hardinge ones that also came with the mill. None of them have a register stop for an endmill. At least not where it belongs - the endmills would have to clamped in thd cutting edge to reach the stop. I'm not familiar with the tormach tts system, but it sounds really $$$. Makes some sense for cnc, but do you use them?

Regarding the collet holders - doesn't the retaining torque change the zero?

But ya, the DRO can do it so it seems worthwhile to figure out how to index the endmills themselves.
 
You'd leave the endmill in the holder and number the holders. When you remove the endmill from the holder itself, you'd have to reset the Z offset in the DRO. So to swap from your 1/4" to 1/2" endmill, yo would be swapping out the holder by undoing the drawbar.
 
You'd leave the endmill in the holder and number the holders. When you remove the endmill from the holder itself, you'd have to reset the Z offset in the DRO. So to swap from your 1/4" to 1/2" endmill, yo would be swapping out the holder by undoing the drawbar.

I think I am missing something REALLY important here Darren.

Doesn't the endmill move around in the holder once the tension is off? In some cases, it falls right out on mine! Certainly, even the tight ones move when you tap the draw bar to release it.

None of mine have a stop (at least not in the right place).
 
You'd leave the endmill in the holder and number the holders. When you remove the endmill from the holder itself, you'd have to reset the Z offset in the DRO. So to swap from your 1/4" to 1/2" endmill, yo would be swapping out the holder by undoing the drawbar.

Even if I never figure out how to handle the Z-Axis, I love this tool indexing idea for the X&Y Axis. I could make a chart for all my tools and then plug them into the tool library on the dro and never need to add/subtract the tool radius ever again! Just select the 3/8 tool and it automatically accommodates the 4 digit 3/16ths offset (0.1875) and done!
 
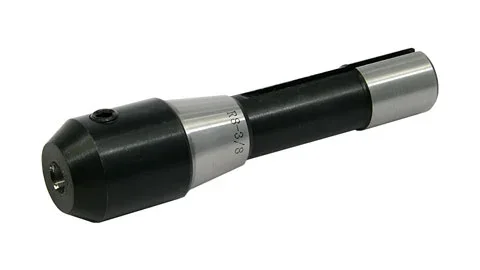
i think that you are thinking collet. this is an endmill holder:
 

Attachments

  • 1254.480.webp
    1254.480.webp
    5.6 KB · Views: 5
Even if I never figure out how to handle the Z-Axis, I love this tool indexing idea for the X&Y Axis. I could make a chart for all my tools and then plug them into the tool library on the dro and never need to add/subtract the tool radius ever again!

You probably have a tool radius function where you simply enter tool diameter.
 
You probably have a tool radius function where you simply enter tool diameter.

To my knowledge, there is no tool radius function. But I think the library is prolly a better way to do it anyway.
 
i think that you are thinking collet. this is an endmill holder:

By George, you are right! I have some of those in MT3, but none in R8. Never even thought about using them. The collet style is sooooo much more useful. Might be worth buying a few in the standard diameters. (3/4, 5/8, 1/2, 3/8, & 1/4 - maybe 12 and 6mm too. More $$$$ on tooling. (Insert forlorn hopeless look here.)

How do you take drawbar torque into account? Or does it really matter?
 
I'm not sure how much effect the drawbar torque would influence Z height. You'd have to experiment. I have always set Z manually. I dont have a DRO on the Z.

Starting over, i think i'd be looking more closely at the TTS or other type of quick change setup. I really like putting everything in the ER40 collet chuck for speed, but with the power drawbar i can swap fairly quickly now.
 
Little plate. 2”x2”x1/8” chunk of plastic, something you can use with epoxy. Glue it to a similar-size chunk of aluminum to make a sandwich. Aluminum needs a small tab to attach a wire. Clamp sandwich to mill, face to a known thickness. You now have an insulated gauge block, connect an LED and a battery so the LED lights when your tool bit touches the block. Zero the DRO, remove the block. You now have a known distance bit to table.

This is how I zero the cutter on my little CNC engraver.
 
Last edited:
@David_R8 - I had to Google the TTS system as my mill is a 30 taper not R8.

Bridgeport came out with the Erickson QC 30 collet system in the 80’s I think? My mill has that but with the quill bored for using a draw bar if required. Works well and 30 tapers fit great and are easy to index (common for CNC use)

I don’t have the nut required for using the quick change process:

5148AD26-3764-4080-BBBE-47F06206D662.webp


It runs about $350 to $600 CDN so it will not be a purchase I plan on making. Hopefully I will find one some day and be able to test its abilities.
 
Back
Top