• Scam Alert. Members are reminded to NOT send money to buy anything. Don't buy things remote and have it shipped - go get it yourself, pay in person, and take your equipment with you. Scammers have burned people on this forum. Urgency, secrecy, excuses, selling for friend, newish members, FUD, are RED FLAGS. A video conference call is not adequate assurance. Face to face interactions are required. Please report suspicions to the forum admins. Stay Safe - anyone can get scammed.

Leblond no 2 tool and cutter grinder tear down

Rediron

Active Member
Hey everyone,

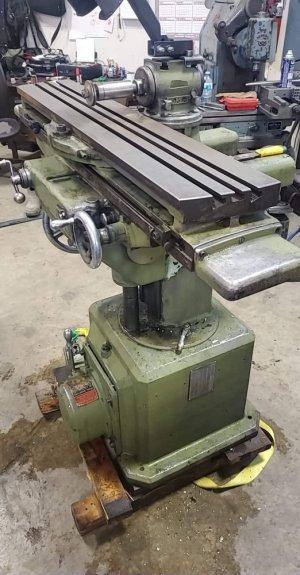
Last week I was lucky enough to come into a leblonde no2 tool and cutter grinder.

It's in pretty nice shape. And of course I have to shred it to clean / replace broken or badly repaired parts / paint it before I even get power to it

Seems best that way, to me anyway... once I start using something I don't like to stop and tear it down unless it's terminal.

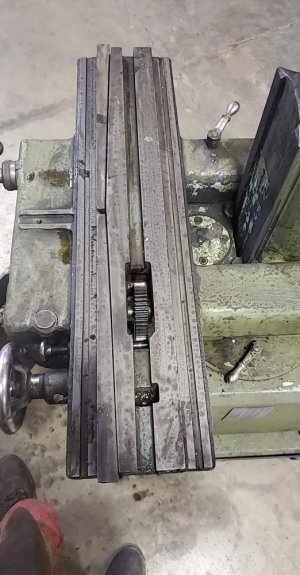
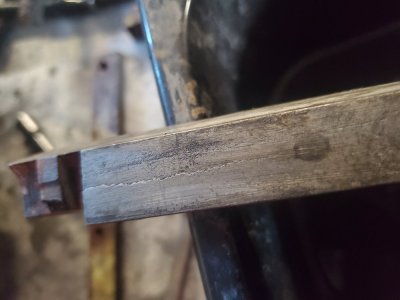
Found a couple ugly spots, forgot to take pictures of it all. Need to rebuild a couple of the shafts, where the rapid traverse handles slip on, as well as where the table cross feed screw comes out the back. Also have a slightly cracked gib but I think I'll leave that dog lie.

Going to be a fun one! Looks like minimal wear even though there was a fair bit of grinding slag packed into a few places you don't want it.

Any advice or resources for parts/manuals appreciated!
 

Attachments

  • received_223541409433607.jpeg
    received_223541409433607.jpeg
    116 KB · Views: 20
  • received_440918417342563.jpeg
    received_440918417342563.jpeg
    104.9 KB · Views: 23
  • 20210218_123810.jpg
    20210218_123810.jpg
    169.5 KB · Views: 23
  • 20210218_164646.jpg
    20210218_164646.jpg
    77.5 KB · Views: 22
  • 20210218_123632.jpg
    20210218_123632.jpg
    135.4 KB · Views: 22
Nice score.

That table has two gibs, one from either side - do I see that correctly?

I would at least stop drill the crack in the gib to prevent it from migrating.

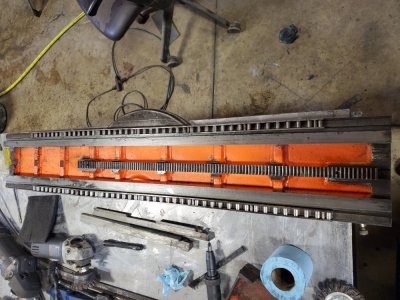
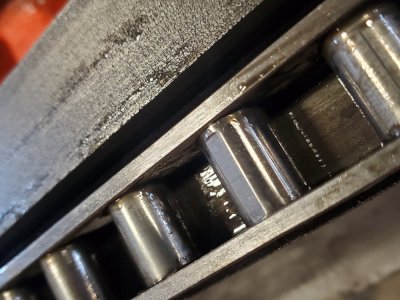
Can one replace the rollers individually? Or is it a whole assembly?
 
Nice score.

That table has two gibs, one from either side - do I see that correctly?

I would at least stop drill the crack in the gib to prevent it from migrating.

Can one replace the rollers individually? Or is it a whole assembly?


Yes it has 2 tapered gibs adjusted on each end of the table.

received_736623033661430.jpeg


That's a good idea to stop it cracking, although i believe it to be from abuse and not normal stress.

The rails that hold the rollers is pinned in 3 or 4 places, removing one or two pins would give access to the damaged rollers, I think im going to remove the damaged ones and slide the neighboring rollers in to fill the gap. I might make a replacement and throw it on the end, we'll see how they measure up.

I sure wouldn't want to buy the roller assemblies, I'm sure they cost more than I paid for the machine if they are still available.
 
Now you see, once i have the grinder going ill be able to setup and grind some stock to make rollers.

I seem to run into this problem often... like, if I had a working mill I could fix my broken mill
 
I seem to run into this problem often... like, if I had a working mill I could fix my broken mill

Sounds like there is another mill in your future - welcome to the club...

Now is see where you are coming from when you said to just move the bad rollers “off to the side”: you can then use your machine to make parts for itself. Nice.
 
Welcome to the LeBlond club! I was lucky enough to get a LeBlond lathe just over a year ago. That T&C grinder looks fantastic!
 
Welcome to the LeBlond club! I was lucky enough to get a LeBlond lathe just over a year ago. That T&C grinder looks fantastic!

Thanks dabbler I'm hoping it's going to be that one tool that can really give me an edge...

It's been interesting disassembling this machine, very nice castings and seemingly (mostly) very well designed.
 
First attempt at anything other than rattle can paintjobs, still to decide on paint type and color but it's coming along. Lots of lessons along the way on this one.

Also shaped and polished the top chamfer and top if the base, for some sucker for punishment reason.

Will continue to add to this thread, can a moderator move this to active projects perhaps?


16144263658396979804342107895037.jpg
16144267071368031905825518252141.jpg
 
Looking good. What is your plan for the color application?

I'll try my hand at brushing I think, I've managed a few decent paintjobs with a brush over the years.

I've wasted a fair amount of time and money messing around with high build primer and filler trying to flatten out these castings, should have just slapped it with bondo right off the bat and sanded it all down.

If I can appropriate an airless paint sprayer through the business I may go that route as well.
 
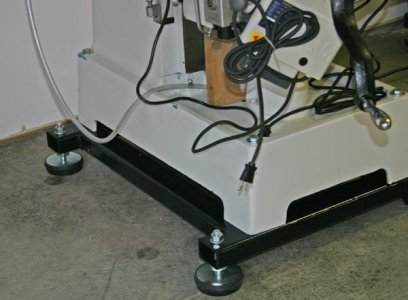
This isn't a great picture of my mill base but I used one of those disposable 1" foam rollers & Tremclad paint. I was a bit apprehensive about how tough a non-catalyzed finish would stick, but so far so good. The mini roller did what I thought was a decent job for a machine. The roller is really quite good at regulating how much paint is going on. Initially it has kind of a I'll call it 'micro pebbly' finish, but smooths out a bit more as it cures. I was able to get into most of the nooks & crannies with the roller or just use a similar foam brush in the tight areas. But this base was a pretty easy, flat, surface whereas machines can have many more features to work around. Bottom line is a lot easier than masking & spraying unless you have the setup. Lets face it, typical machine castings are not like beauty car panels unless you do a whole lot more prep work. But I think that light, uniform texture actually makes it look better because it tends to hide irregularities. Tremclad is quite viscous so so brush marks tend to stay. Just a personal thing, I'm weird that way LOL. In another post we were talking about adding aftermarket hardeners to speed the cure & toughen. Haven't tried that yet. I think your prep is going to come out nice. On my old RF-45 mill I remember tightening a bolt & a big chunk of 3/16" thick filler came off. It wasn't like regular Bondo, it seemed very weak & cheesy.
 

Attachments

  • IMG_7610_edited-1.jpg
    IMG_7610_edited-1.jpg
    40 KB · Views: 4
I brushed a lathe using alkyd enamel. Like tremclad , but very forgiving re: brush strokes. It was from Dulux. I’d use it again


Sent from my iPhone using Tapatalk
 
Back
Top