-
Scam Alert. Members are reminded to NOT send money to buy anything. Don't buy things remote and have it shipped - go get it yourself, pay in person, and take your equipment with you. Scammers have burned people on this forum. Urgency, secrecy, excuses, selling for friend, newish members, FUD, are RED FLAGS. A video conference call is not adequate assurance. Face to face interactions are required. Please report suspicions to the forum admins. Stay Safe - anyone can get scammed.
You are using an out of date browser. It may not display this or other websites correctly.
You should upgrade or use an alternative browser.
You should upgrade or use an alternative browser.
Lathe test bar
- Thread starter DPittman
- Start date
The answer is 'yes' 
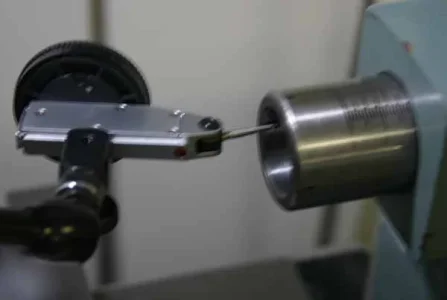
If you want to check your head alignment, the MT side goes in your headstock MT. A lot of test bars are MT3 so if your lathe is MT5 spindle, you need a socket adapter sleeve. With test bar set in place, now you traverse down the bar with DTI in the carriage & it tells how its aligned along the bed axis. This eliminates chucks, collets, gripping discrepencies of cylindrical test bars etc. If the head is rotated any amount, you are cutting a taper. If your lathe allows adjustment, you can tweak it back into position so test bar is parallel to ways.
If your lathe is non-adjustable meaning spindle is bored in the casting, all it can do is indicate that's its misaligned or worn. This is where you get into lathe levelling, which is a misnomer, it really means lathe twisting. Some people believe its better to cut material to confirm head alignment because that's live conditions. It comes under different names & sometimes its explained overly complicated, but I've heard it called the Rolly's Dad's Method. Basically you chuck some stock (no tailstock support), relieve the center section so you have 2 dumbbell shapes on end. Then traverse cut the 2 dumb bells in one pass. Measuring the dumbbell diameter difference tells you the same thing as test bar. Exactly equal diameters means aligned head. Unequal diameters means you are cutting a taper one direction or another. Again, there is no tailstock involved in either of these operations, that comes later. My experience has been cut method works too but subject to more variables involving the material choice, bar length, cutting tools, finish etc. Ideally its a chunk of good quality aluminum because its lower mass (less deflection on the cantilevered end) & cutting finish.
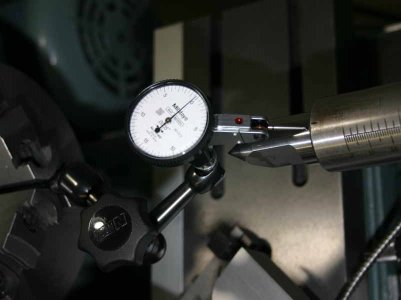
Assuming your headstock is good using either method, now you can do a similar check on your tailstock. MT goes in the TS socket, now you can chuck a DTI & indicate around the cylindrical section sticking out. This then measures tailstock axis in/out and up/down relative to headstock axis. You can do this with a shorter plain arbor too, but the test bar length exaggerates the misalignment. Tailstocks are adjustable, at least in the level plane so you can tweak it back on center. Height is another matter, but it actually is less critical for taper issues.
Sorry for the ramble, I just assumed you were using the test bar for more general alignment. Spot checking the tailstock can be done with a DTI.
- without any accessories in the tailstock, just indicate around the ID of the TS. Make sure its clamped securely & consistently. However if you have a worn surface or scratches this can be a bit misleading so be aware
- by inserting pretty much any accessory like an arbor or dead center, do the same thing but go around the arbor surface. Its smoother & presumably more accurate. So an MT test bar like what I was referring to above is just a longer length & more convenient version of a tool you may already have & works perfectly fine
- you can get (or maybe make) a fancy schmancy alignment tool like the Edge http://www.edgetechnologyproducts.com/tailstock-alignment-bar/
But in all the above, this presumes that the headstock is aligned to the lathe axis. If that's good & all you are trying to do is correct a taper that the tailstock is imparting to the work, its perfectly fine.
Attachments
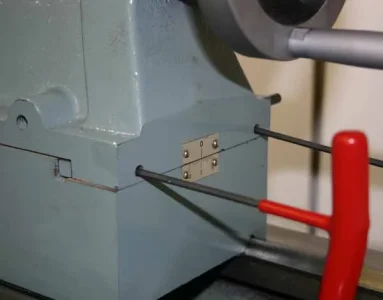
BTW, I didn't comment on the tailstock photo. Was a bit of learning revelation there. The wrenches shown are for the 2 set screws that act on the TS gib strip. You loosen those first, then make the adjustment with 2 different set screws on the front & rear casting face. Anyway what I discovered is after setting the TS secure, the gib screws can actually move it a couple thou out of position again. You have to kind of alternately tighten them. So moral of the story is: keep the DTI on the arbor so you can monitor the needle stays in position while you snug everything up. Might be a function of my lathe design but though I'd mention.
Bofobo
M,Mizera(BOFOBO)
I found that the direction you are turning the wrench will affect which way the readings will change, I used a HAAS machine that needed a traming, and wouldent you know it, final torque put it out by a thou over 24" again and again. Eventually I eliminated it but I began to notice the same thing happening while mounting tools in the quick change for the lathe and even in the vice (why you set with a malet) on the mill. So it's not Just you


