• Scam Alert. Members are reminded to NOT send money to buy anything. Don't buy things remote and have it shipped - go get it yourself, pay in person, and take your equipment with you. Scammers have burned people on this forum. Urgency, secrecy, excuses, selling for friend, newish members, FUD, are RED FLAGS. A video conference call is not adequate assurance. Face to face interactions are required. Please report suspicions to the forum admins. Stay Safe - anyone can get scammed.

Is it just me or is milling something flat actually one of the most difficult things in the machining world to do?

TOBARApprentice

Super User
Hey everyone.....

So I pose this question in hopes that I am missing something, but I am pretty sure I’m not, and what’s worse, I may just “suck at this”.

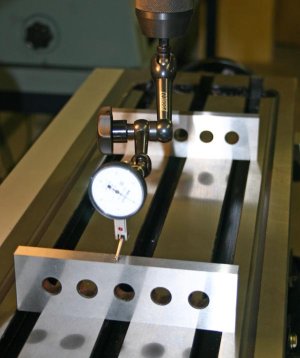
So last night I mounted my “new to me” but never used Tormach vice to my mill table. I put my Indicol ontobthe mill quill with its .0005 resolution Starrett indicator on it. Tap tap...... tap tap...... tap tap.... tap tap.... before you know it, .0002 difference over 5 inches, I come upstairs and proclaim to my wife that I am some kind of rockstar!! Slept like a baby!

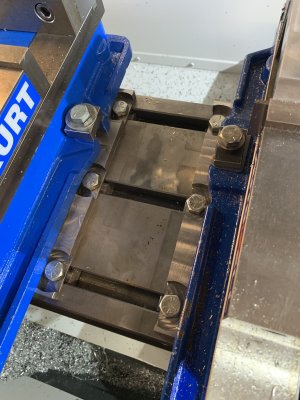
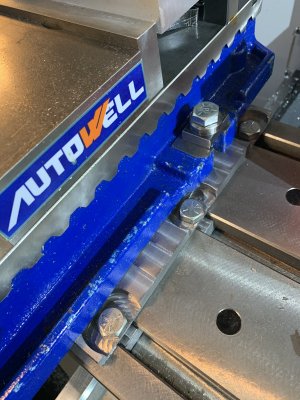
Tonight I go to the shop..... Some background, I have the Tormach 5” Vice on the mill next to the Autowell 4” Vice. I have begun a Stuart Models Victoria Steam Engine and the first operation is to make the base surfaces parallel. So the difference in height of the 2 vices is .272, no problem thinks I...... I grab a piece of aluminum from the scrap pile and put it on Starrett parallels the Tormach Vice. I use the carbide insert shell mill to mill the top surface flat, flip it over and mill the bottom parallel. I took .010 off the top and .020 off the bottom. I removed it form the vice, de-burred it and mic’d it.

Thanks for staying with me to this point.

All four corners are different thicknesses and by .005 to .009 difference how is that even possible? There are no chips - the vice is immaculate and has been cleaned with MEK (that’s some nasty sh@$). The Parallels are Starrett and mic perfectly parallel. I used a hammer (soft face dead blow) to make certain the material was seated. All I can think is that I am going to have to tram the mill head again...... and that job SUCKS!!!!

Or does everyone seem to run into this? My plan is to try again with a fresh piece if scrap tomorrow to see if I can isolate the culprit...... my fear is that you’ve been listening to him.

In any case, thanks for listening and commenting if you do. Good luck lads with that move tomorrow; if my wife would let me out if the house I’d be there to help too.

Cheers.

Derek


Sent from my iPhone using Tapatalk
 
The aluminum plate is probably bending during the clamping/milling operation.

I would try some 1”x1” or 2”x2” square steel stock as an experiment. See if you can take off, say 10 thou per side and get parallel planes. If not, check the vise jaw for lifting. Then check tram.
 
Hmmnn. No real answers from me as I will be anxious to hear possible culprits as well as the eventual final solution.

However I got a kick out hearing that the same sort of things that make for a good night sleep for myself are the same for you.
before you know it, .0002 difference over 5 inches, I come upstairs and proclaim to my wife that I am some kind of rockstar!! Slept like a baby!
 
Good morning guys. The lock on the knee is tight. Because I am milling with the X it can’t be locked. The y seems irrelevant but will try it to see. This Tormach vice wont allow the jaws to lift by its design but will measure it. I will give some steel a look later today and perhaps not clamp it so tightly. The stock was supported its full length by 2 parallels and was 2 1/2” wide, 1/2” thick. A few things to try today and I’ll report back tonight. Thanks for the comments so far!

I came upstairs last night and confessed to the wife that I was perhaps instead of the aforementioned rockstar, rather more like a roadie, or maybe even the guy who washes the roadies under clothes.... I still slept ok, but we’ll see how today goes; I’m not beat yet!

Cheers all....

Derek


Sent from my iPhone using Tapatalk
 
Hi there :)

When you were checking the vises, did you use the same parallels to check height with the indicator? I found on my drill press vise that I have on my horizontal mill that this surface is definitely not parallel to the top face of the vise.
Other suggestion is to place some thin wire or paper at 3 locations on the parallels (2 pieces on 1 parallel, 1 in middle on the other) and support material for the first cut that way. (It ensures the metal sits properly). Mill, then flip without the 3 shims. Mill & check.
Either way, enjoy some Dillons rye in the evening as a reward for trying and/or succeeding.
Gerrit
 
It will take some detective work to find your problem and ther may be more than one. I had a similar episode that led me to replace my cheap off shore milling vise with a Kurt DX6 but I also discovered the uneven wear on the Y axis of my mill.
 
... aluminum from the scrap pile and put it on Starrett parallels the Tormach Vice. I use the carbide insert shell mill to mill the top surface flat, flip it over and mill the bottom parallel. I took .010 off the top and .020 off the bottom. I removed it form the vice, de-burred it and mic’d it. ...
Pretty sure you did this, but just in case. Did you deburr after milling the first face and flipping the work for the second face?

Craig
 
I did Craig, but very likely not well enough because I caught myself on some of the burr after all was said and done. 2nd time around will be different.


Sent from my iPhone using Tapatalk
 
Can you show some pics of the part insitu in the vise? I can think of a few things but kind of depends on the setup & length.
 
One more thing, after the first skim, check to see how flat the part is, straight edge with backlighting e.g. Then after finishing that side, remove and check again for flatness. Depending on how hard you whack the piece into place, it can distort, then spring back upon release. Hence my suggestion to place it for first cut on 3 points.

Gerrit
 
It’s easy to pound with the hammer too hard and the material will bounce up in the vise jaws. I learned how to correctly do this by watching a young machinist on video teaching how to tap in the part gently with the dead blow just do it gently. Ah men we just want to swing that hammer ;) Then you can test by wiggling the parallels they should not move underneath the part. And I agree it’s easy to clamp the material too hard and see it bend. Try putting an indicator on the mill head upside down measuring the deflection as you tighten up the jaws.

Another thing to check when you have indicator on the mill head. Is the the table parallel? Both ways x and y. Is the vise parallel? Are your parallels parallel? Same height all the way across?
 
Last edited:
When I made plates for under my non matching vises it was suggested to make recessed clamp down holes and then clamp the material to the table through the holes. Then face the plate. The plate is then held down without any bowing from vise jaws.
 

Attachments

  • F1FD02DC-3374-4C36-9212-42B8C94AFAE0.jpeg
    F1FD02DC-3374-4C36-9212-42B8C94AFAE0.jpeg
    512.1 KB · Views: 15
  • 6122970A-CB5F-4F69-AD20-61917E44F794.jpeg
    6122970A-CB5F-4F69-AD20-61917E44F794.jpeg
    414.7 KB · Views: 14
So I have returned from my crusade gentlemen and I have much to share..... I’m guessing that mist if you will know already what I am about to share but think of it as you would watching a child learning to count to 100 or perhaps the ABC’s..... just smile and nod.

Rule #1. When you face something, you must de-burr it completely before flipping it over and trusting the face you just milled is flat. The aluminum faces beautifully but the burrs influenced what became the reference bottom of my piece and began the chain reaction.

Rule #2. Clamp the vice securely, but too tightly introduces bending and warping that will undo when you release the pressure.

Rule #3. Assuming that your mill head is trammed properly front to back can be a huge mistake. Check your tram regularly.

Rule #4. A digital calliper (Starrett or otherwise) is NOT a micrometer; it’ll give you a rough idea, but not a measurement (when it counts). It’s like when you are a boy and your dad/grandpa teach you how to pee in the forest. Move your feet apart a little more than your shoulders..... so you don’t drip on your shoes..... With a micrometer your accurate and deliberate. With callipers you are likely achieving the equivalent of peeing on your shoes.

According to my MIC, after adjusting .010 of “out of tram” my four corners now measure .040, .040, .041, .040. I’m not sure how I am out by .001 in the one corner but I’ll take it.

Thanks for the suggestions all. This spacer block will be fine for now but I think that I will try to get some tool steel and make a plate that lifts the whole vice..... and it might be time to scrape the mill bed.

Cheers all. Heading up to see the wife.... should sleep like a baby tonight!

Derek.

cca5e791e8d7a3fe8cfc4abfbcbd58d2.jpg

3aaf03154c42f8f8ea5b325487bb44cb.jpg


Sent from my iPhone using Tapatalk
 
Good to read the report and it will be a reminder of good practices.
I'm wondering though how did the head get out of tram? Was it a measuring mistake or is something moving?
 
Last edited:
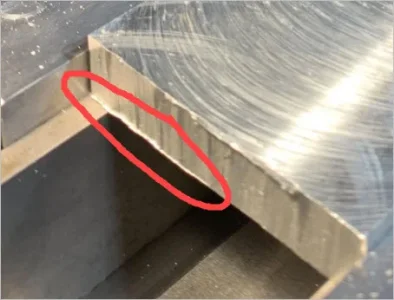
> When you face something, you must de-burr it completely before flipping it over and trusting the face you just milled is flat. The aluminum faces beautifully but the burrs influenced what became the reference bottom of my piece and began the chain reaction.

Yes, this is a must with all materials. And do all 4 bottom edges, not just the ones adjacent to vise jaws. Not sure if its the pic but an burr overhang on this edge extending to the other can be enough to bridge between the part & parallel & lift that corner. It may even give you the false impression that the part is flush because the parallel is not sliding when clamped. But its being hooked vs in flush continuous contact. File the burrs off, then lightly glance the file accross both faces, then clean it.

If the parallels have shifted, remove them & clean the vise ways because bits can easily get under the parallel. Also look for any corner nicks in the parallels. They are hardened so you can use a super fine stone & oil to lightly remove a burr. You can also get a teeny frag of material physically stuck on on a parallel especially gummy material like micro aluminum swarf. Increased odds for people who like to beat their parts into the jaws with a dead blow. If a little tap doesn't do it, somethings wrong. If you distort it while clamping, guess what, it will just return the favor & go bwaang when the vise is loosened.
 

Attachments

  • 2021-04-18_22-44-20.webp
    2021-04-18_22-44-20.webp
    19.3 KB · Views: 9
Shimming 0.010 under the front parallel over that short a distance is a lot. Something is not right. Are you saying you went back after this & re-trammed? Or you have some kind of inter-plate between table & vise? I wouldn't think about scraping until you 101% certain of perpendicular spindle & true vise.

There's lots of setups for tramming but I find using a thick parallel is quick & reliable. That way you can flip to the left-right or fore-aft direction quickly & the needle runs continuously so you can bump adjust on the fly. Start out with a coarse 0.001" reading indicator if its way out. Some people will use a digital & min/max on either side, same thing. The nod direction is the tricky one because the pivot point is aft of the measurement points, so its a bit of iteration.

Once the spindle is bang on relative to the table, now go back & do the same thing sweeping your vise base rail. If you have accurate parallels you can lightly clamp them so they extend proud where you an indicate across & that will show any relative twist of the vise.
 

Attachments

  • IMG_7646_edited-1.jpg
    IMG_7646_edited-1.jpg
    43.4 KB · Views: 10
Last edited:
That is a lot of stick-out on that face mill.

Generally I am off by few thou on say 5" piece which I am doing to meh precision - i.e. I do not care and measure stuff with calipers only. When very careful I should be able to machine to roughly +-0.001 for smaller parts, say up to 6". Anything more and I need to grind it.

Errors previously were from as simple things as an errant chip somewhere lifting one side. Small deburr error, hammer use error, part not exactly square to start with, milling machine quill not locked, part not secure - there are dozens of ways to screw up.
 
Back
Top