• Scam Alert. Members are reminded to NOT send money to buy anything. Don't buy things remote and have it shipped - go get it yourself, pay in person, and take your equipment with you. Scammers have burned people on this forum. Urgency, secrecy, excuses, selling for friend, newish members, FUD, are RED FLAGS. A video conference call is not adequate assurance. Face to face interactions are required. Please report suspicions to the forum admins. Stay Safe - anyone can get scammed.

Hendey T&G Lathe

Rauce

Ultra Member
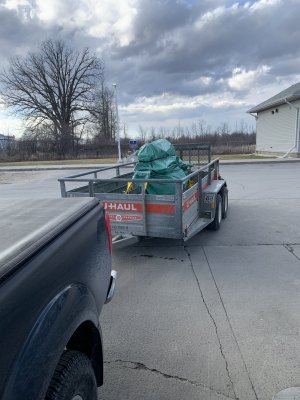
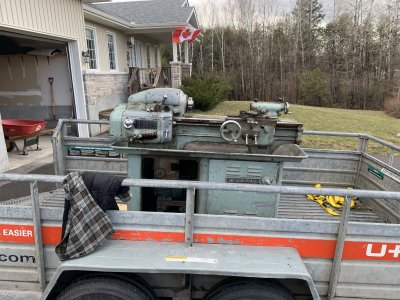
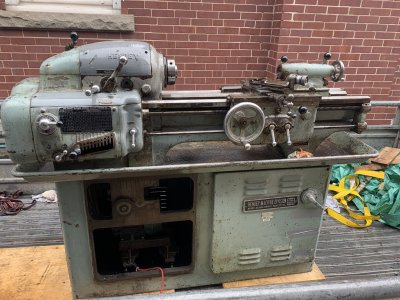
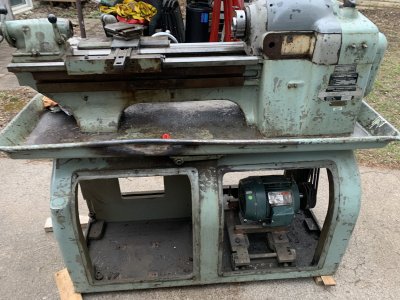
Just got home about an hour ago after a long day driving to kemptville from Hamilton to pick up this lathe.

It came with many many extras including several 3 jaw chucks, spare spindle, spindle bearings and an assortment of gears, sheaves and other odds and ends. I have the cover that is missing from the machine in the photo as well.

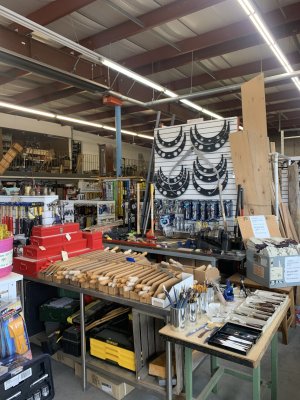
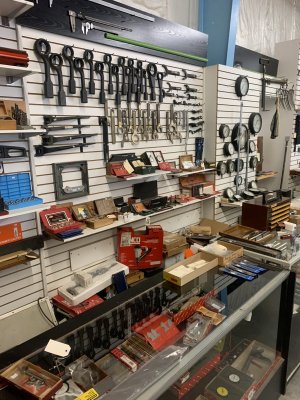
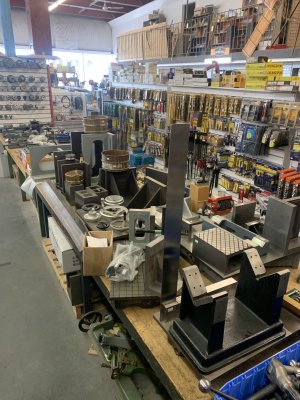
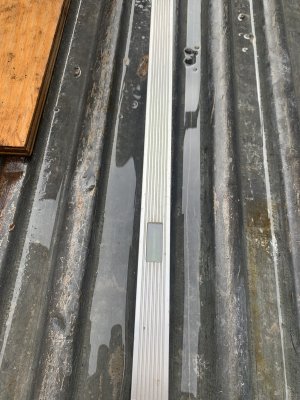
Stopped at Cardon Tools in Perth on the way home and ended up with a rough machined 4ft Busch dovetail straight edge along with some other small stuff.
 

Attachments

  • 421E3BCE-33F6-4E17-B97F-A585CD01A05B.jpeg
    421E3BCE-33F6-4E17-B97F-A585CD01A05B.jpeg
    534.1 KB · Views: 116
  • CB1F0E10-B6BC-4694-8371-3811E902AB44.jpeg
    CB1F0E10-B6BC-4694-8371-3811E902AB44.jpeg
    515.9 KB · Views: 124
  • C7200D07-AE03-4354-B3DB-350CEED41DE9.jpeg
    C7200D07-AE03-4354-B3DB-350CEED41DE9.jpeg
    528.7 KB · Views: 101
  • 07E59015-3206-4940-8C1A-D123771A9756.jpeg
    07E59015-3206-4940-8C1A-D123771A9756.jpeg
    507.3 KB · Views: 105
  • F16ECABB-FD26-43C2-A2E6-8006143FF792.jpeg
    F16ECABB-FD26-43C2-A2E6-8006143FF792.jpeg
    631.3 KB · Views: 130
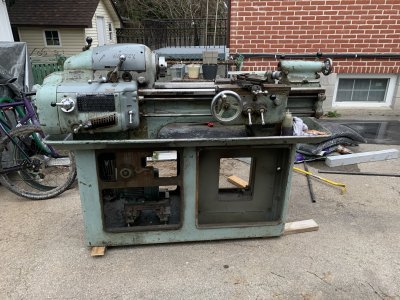
That lathe looks like a beauty. Can't wait for the full inspection report, more pictures, and first chips! Nice! I bet you are a very happy camper right now!

I showed my bride those photos and she asked why my shop couldn't be as neat and tidy as yours! She thought that was your shop!

I'll be putting that place on my bucket list of places to go visit when I get old...... ;)
 
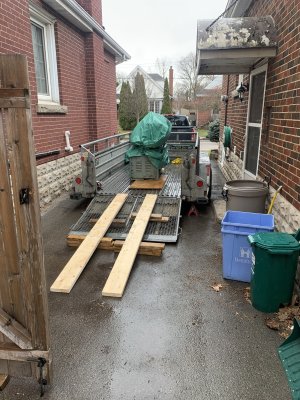
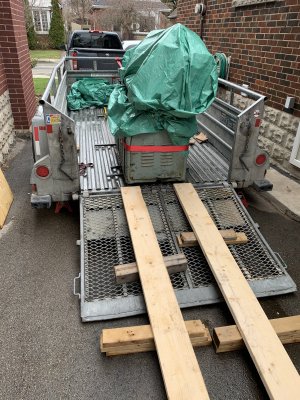
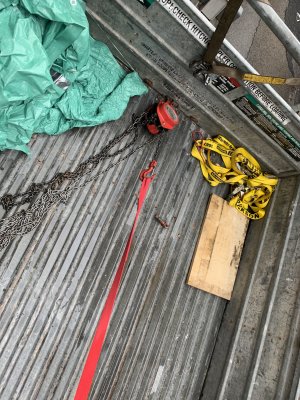
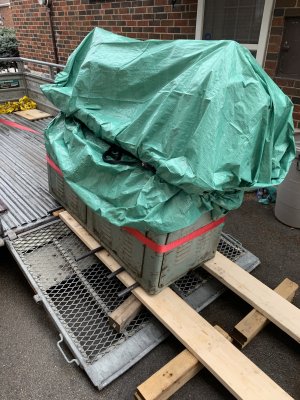
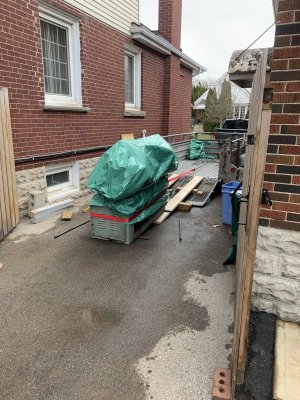
Just getting set up for removal from the trailer. The non-removable ramp on the trailer makes it impossible to use the engine hoist I borrowed from work.

I removed the straps and the haggard tarp from yesterday and liberally sprayed down all the exposed surfaces with WD-40. Retarped for now since it’s raining a bit.

Got the ramp assembled. This is the same method we used to load the machine.

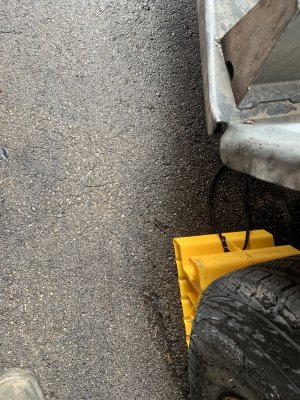
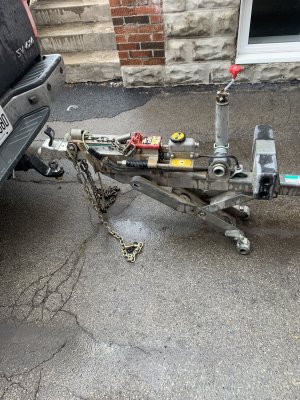
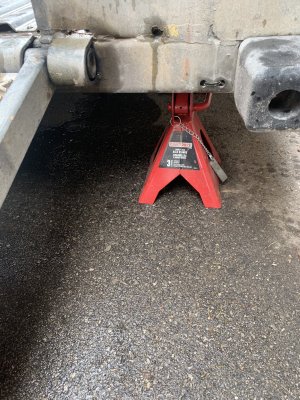
I used the tongue jack to get the trailer to slope slightly and put some weight on two jack stands at the back end to keep the trailer stable as the machine slides towards the back. Chocked wheels for good measure.

I’ll put it on pipes and use a 1ton hoist and a recovery strap to control its roll to the back and down the ramp.

Now to wait for the rain to go away!
 

Attachments

  • 5FC6F3E6-A16A-4A06-B7C4-5886579D6DF6.jpeg
    5FC6F3E6-A16A-4A06-B7C4-5886579D6DF6.jpeg
    567 KB · Views: 41
  • 2BFE3A6B-BD8C-4E14-B23C-304A232B68CF.jpeg
    2BFE3A6B-BD8C-4E14-B23C-304A232B68CF.jpeg
    857.4 KB · Views: 39
  • 121DD93C-D659-4CAA-AF24-CF78B5ABE9DD.jpeg
    121DD93C-D659-4CAA-AF24-CF78B5ABE9DD.jpeg
    876.3 KB · Views: 34
  • F0920629-4FE7-40CE-AE95-37AF4AF33BFD.jpeg
    F0920629-4FE7-40CE-AE95-37AF4AF33BFD.jpeg
    840.4 KB · Views: 33
  • 477AE2E4-228F-4ED9-8414-B1146F4B2B74.jpeg
    477AE2E4-228F-4ED9-8414-B1146F4B2B74.jpeg
    553.4 KB · Views: 34
  • 4C836939-78C3-45B4-AC1C-14D2604EC86C.jpeg
    4C836939-78C3-45B4-AC1C-14D2604EC86C.jpeg
    791.1 KB · Views: 41
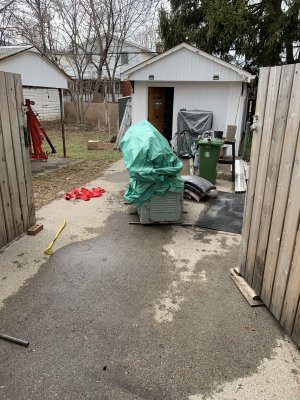
As I set up I thought I may need another person but it became clear I could do it on my own but just go slower.

I had a couple friends available later this afternoon but wanted to get the trailer back to uhaul to avoid a late fee.

Took a little over an hour to get it down the ramp going a few inches at a time and going around to adjust pipes etc. No muscle needed.

Maybe later today or tomorrow once things dry out I’ll get the tarp off and do some inspection before getting into partial disassembly.
 

Attachments

  • 30C9E1AC-EE08-4488-8803-3244161A6BDA.jpeg
    30C9E1AC-EE08-4488-8803-3244161A6BDA.jpeg
    848.3 KB · Views: 30
  • 9D5D858C-6DF7-4F8D-99E9-947EB5FA6E0B.jpeg
    9D5D858C-6DF7-4F8D-99E9-947EB5FA6E0B.jpeg
    720.7 KB · Views: 28
  • 14FADE94-ED7A-456C-AB2C-38C3ACCD6525.jpeg
    14FADE94-ED7A-456C-AB2C-38C3ACCD6525.jpeg
    665.8 KB · Views: 28
  • 12887D9D-A6D7-46B2-9410-044D40E6E2D4.jpeg
    12887D9D-A6D7-46B2-9410-044D40E6E2D4.jpeg
    831.6 KB · Views: 27
  • 4B4E789F-8933-4007-8FDB-A4530C4B2FC3.jpeg
    4B4E789F-8933-4007-8FDB-A4530C4B2FC3.jpeg
    916 KB · Views: 30
I removed the straps and the haggard tarp from yesterday and liberally sprayed down all the exposed surfaces with WD-40. Retarped for now since it’s raining a bit.

Great job @Rauce !

Just a note of Caution. WD-40 is a poor rust preventer but works great on stuff that got wet. WD stands for Water Displacing. I forget what the 40 meant but I have a faint recollection that it just stands for the 40th formulation they tested.

Although others will argue and perhaps even have other experiences, my own personal experience is that WD-40 is a lousy rust preventer. It evaporates way too fast and doesnt leave enough protectant behind. I can't begin to list all the things I thought I was protecting with WD-40 only to find them rusted like crazy later on. I've seen tests and reports that say otherwise. But there is nothing like personal experience to test their credibility.

The same company does make a special rust preventer though - It is called wd-40 Rust Specialist. I bought some but have not tried it yet.

My goto volume rust preventer is "Fluid Film". For my really good stuff I use Remington Gun Oil with VCI. The VCI part is essential. Not all Remington Oil has it. Stands for Volatile Corrosion Inhibitor. The stuff vaporizers and finds its way into every crack and crevice in the metal. Still wishing I could find some bulk VCI.

All the above is just my own experience based on living in Canada's worst Rust Zone (high humidity & high temp). All of Southern Ontario is bad but Windsor area is the worst.

So ya, by all means spray it down with WD-40 when it's raining, but follow up as soon as you can with proper rust protection.
 
sweet new lathe!

I agree with @Susquatch, wd40 is pretty crap for rust prevention, if its going to sit out there for a while i would use something better, i like ad3000 or fluid film, seems to stick around, and not to terrible to clean up
 
Yeah I chose WD-40 since it was already a wet under the tarp this morning. I wiped most of the WD-40 off this afternoon and put some way oil on the exposed surfaces.

I’ve never used fluid film but I can get some LPS from work if needed. It’s a rust inhibitor that dries as a waxy film.

I’m mulling over my plan of attack right now.

The chip pan is bent and I originally wasn’t going to bother with fixing it. I’m now realizing that I can do a much better job of cleaning up the base for paint if I remove the bed, headstock etc. at which point the chip pan would be off and I might as well straighten it then.

So I think I’ll remove the bed and headstock and repurpose my ramp material to make a dolly to put that on and wheel it into the shop. The base I can keep under a tarp outside until I have an opportunity to bring it in to work to bead blast and paint it.
 
Just got home about an hour ago after a long day driving to kemptville from Hamilton to pick up this lathe.

It came with many many extras including several 3 jaw chucks, spare spindle, spindle bearings and an assortment of gears, sheaves and other odds and ends. I have the cover that is missing from the machine in the photo as well.

Stopped at Cardon Tools in Perth on the way home and ended up with a rough machined 4ft Busch dovetail straight edge along with some other small stuff.
It looks like part of a scraping straight edge in the 3rd picture (left side middle) if anyone is looking for one.
 
Doh! So what else are’nt you telling us? There is definitely tools to drool over there.
I was originally going to buy one of the angle blocks also in that same photo but went with the straight edge instead. Other than that I got a small tap wrench, a couple slitting saws and a couple countersinks. That was rest of the cash I brought with me so I left it at that.
 
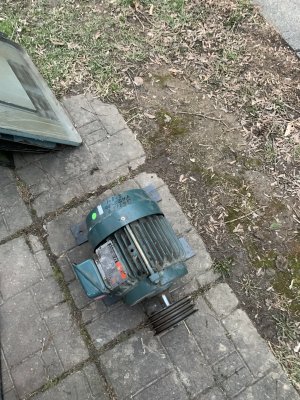
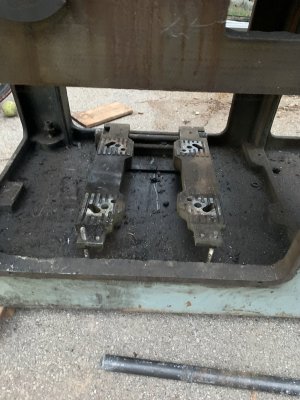
Last night before it got too dark to see what I was doing I took all the covers off the base and removed the motor, motor mount and levelling screws.

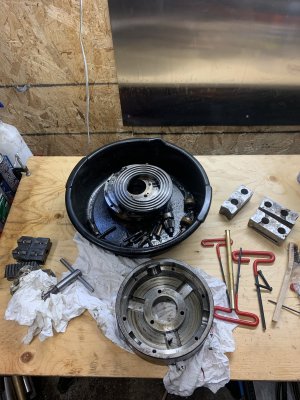
This morning I consolidated the spare parts into two bins and set up a little temporary work bench where my old lathe used to be.

The lathe came with three chucks, each with shortcomings. The largest is an 8” SCA steel 3 jaw that is missing the hard top jaws but came with aluminum soft jaws. I started in on it and it is grimy but in good condition with minimal rust. I’ll have look into hard top jaws for it, hopefully not too expensive. 8” is a bit big for this lathe but it would still be a useful chuck to have.

The other two are both cushman 3 jaw chucks. One is a very clean 5” chuck that only has the reverse type one piece jaws. Not sure if the regular one piece jaws can be easily sourced.

The least desirable chuck of the three is a pretty grimy 6” cushman that is a direct mount for a 2-1/4” (I think) threaded spindle and has been fitted to a home brew adapter of some sort. I’ll probably seperate the adapter and sell this one later.

I also realized last night that this lathe has an MT2 tailstock. Many of my centres, drill chucks etc. are that size from use on my old bench top Logan but quite a few things I bought for my last lathe will no longer be useful. I’ve offered them for sale to the guy that bought my Churchill lathe but if he doesn’t take anything I will post them in the classifieds here.
 

Attachments

  • 9B36A99E-1169-42F2-8A28-3BEE222F4CA2.jpeg
    9B36A99E-1169-42F2-8A28-3BEE222F4CA2.jpeg
    510.6 KB · Views: 35
  • FC5D34AC-D51E-44BD-8514-7FDF7DC92E6A.jpeg
    FC5D34AC-D51E-44BD-8514-7FDF7DC92E6A.jpeg
    525.6 KB · Views: 31
  • E02BF2E2-9F25-42EF-A59E-3014C4F252BB.jpeg
    E02BF2E2-9F25-42EF-A59E-3014C4F252BB.jpeg
    784.2 KB · Views: 31
  • 8BE78F2A-7CD0-4544-BCE2-C176299BE309.jpeg
    8BE78F2A-7CD0-4544-BCE2-C176299BE309.jpeg
    437.2 KB · Views: 34
  • F189AF3B-5622-4023-B1D3-830857569BD1.jpeg
    F189AF3B-5622-4023-B1D3-830857569BD1.jpeg
    656.4 KB · Views: 35
@Rauce and others.

News Flash! Wd40 Specialist Corrosion Inhibitor contains a VCI!!! That makes it an outstanding long term corrosion protection coating.

After checking the details, I'll prolly be ordering a case of it.
 
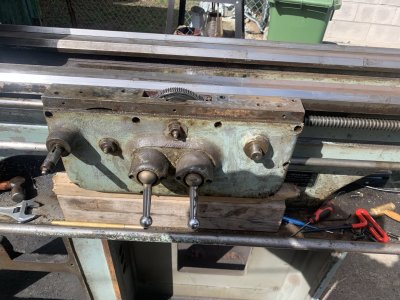
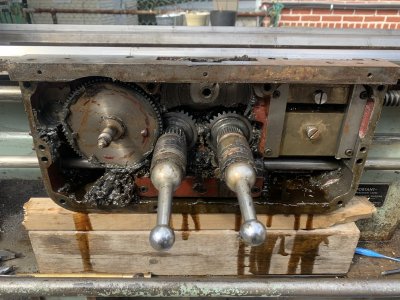
Into the thick of it now!

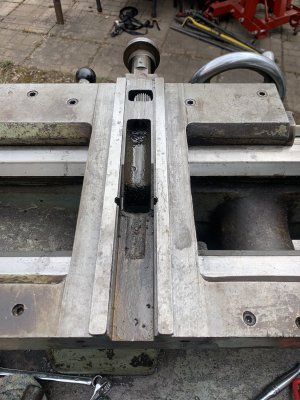
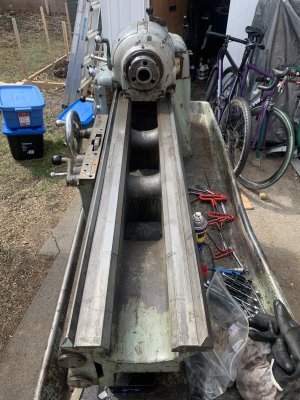
With the carriage off I have a much better view of the ways.

The carriage rides on the V on both sides. There is enough wear that you can see and feel it since the wear leaves a small ledge towards the bottom of the V.

The flat ways and inside angle that the tailstock rides on don’t show any visible wear other than some nicks and staining.

I’m going to try to quantify the wear soon using a precision V block and indicating to it from the flat way. If I had to put a guess on it I’d say maybe .004” in the most worn area.
 

Attachments

  • B3A1C636-0475-43C0-91B2-6B1AC374E244.jpeg
    B3A1C636-0475-43C0-91B2-6B1AC374E244.jpeg
    534.8 KB · Views: 31
  • 3CF0756C-5D0A-495D-BCA0-695D43CC8DB7.jpeg
    3CF0756C-5D0A-495D-BCA0-695D43CC8DB7.jpeg
    635.8 KB · Views: 33
  • 5E24DFF4-170D-415B-8716-6B1EC6625A3F.jpeg
    5E24DFF4-170D-415B-8716-6B1EC6625A3F.jpeg
    539.2 KB · Views: 33
  • C1F42C7D-2A83-4321-9DA3-34AB815AB7CF.jpeg
    C1F42C7D-2A83-4321-9DA3-34AB815AB7CF.jpeg
    568.8 KB · Views: 30
Back
Top