• Scam Alert. Members are reminded to NOT send money to buy anything. Don't buy things remote and have it shipped - go get it yourself, pay in person, and take your equipment with you. Scammers have burned people on this forum. Urgency, secrecy, excuses, selling for friend, newish members, FUD, are RED FLAGS. A video conference call is not adequate assurance. Face to face interactions are required. Please report suspicions to the forum admins. Stay Safe - anyone can get scammed.

Gerrit's King KC20-VS2 enhancements

gerritv

Gerrit
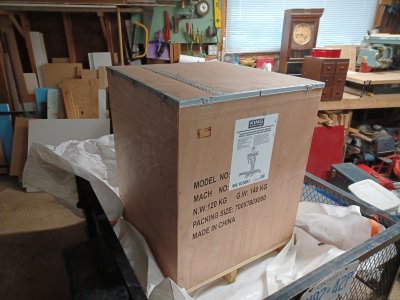
When the idea of a Deckel FP1 in my basement fell through last Dec, I instead ordered a new KC20 from KBC tools. Picked it up in my baby trailer and with help from one of our members got it into the basement in one piece.

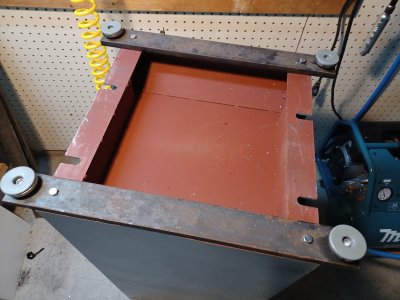
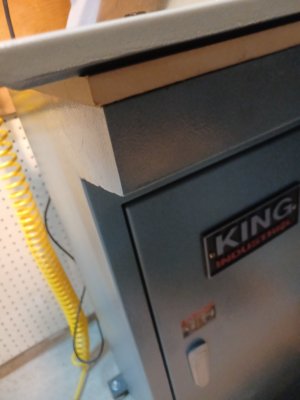
First issue was a lot of resonance when cutting, esp. in steel. The solution: Sandwhich 1/2" mdf between the chip tray and cabinet. And support the base on 4 adjustable rubber pads. I used 1/2"x2" hot rolled flat bar because I have lots of it.
 

Attachments

  • IMG_20240110_143633.jpg
    IMG_20240110_143633.jpg
    380.3 KB · Views: 21
  • IMG_20240130_134026.jpg
    IMG_20240130_134026.jpg
    315.5 KB · Views: 17
  • IMG_20240130_144631.jpg
    IMG_20240130_144631.jpg
    177.5 KB · Views: 20
  • IMG_20240127_171823.jpg
    IMG_20240127_171823.jpg
    526.1 KB · Views: 21
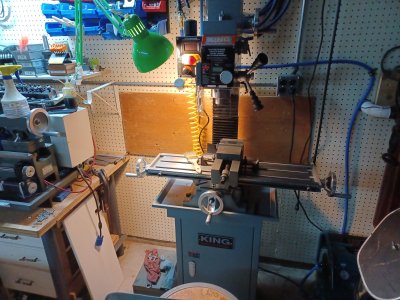
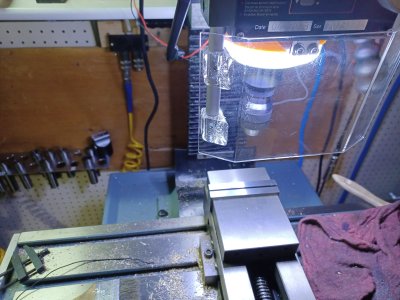
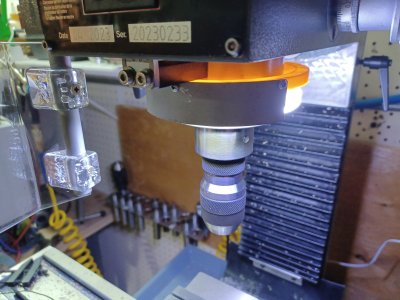
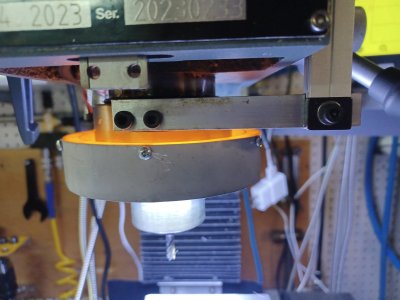
Next was some spindle lighting. I bought a pair of LED ring lights, 110mm diamter from AliExpress. A visit to Thingiverse came up with this mount: https://www.thingiverse.com/thing:1270485
The LED was shining in my face so I added a thin aluminum baffle to the front.
I do most of my milling sitting down after having seen Stefan G doing that often. Saves my back and gives a good view of what is happening
 

Attachments

  • IMG_20240207_134640.jpg
    IMG_20240207_134640.jpg
    410.3 KB · Views: 12
  • IMG_20240207_141040.jpg
    IMG_20240207_141040.jpg
    370.4 KB · Views: 12
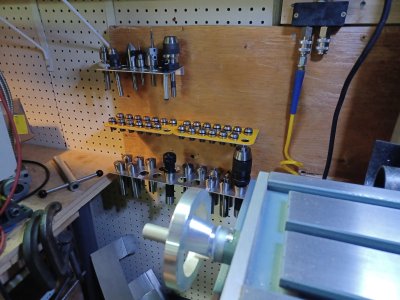
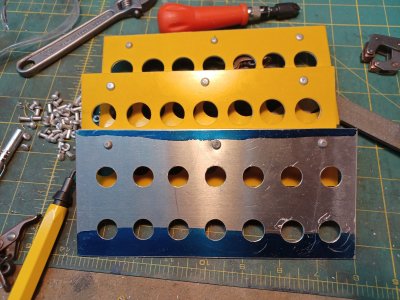
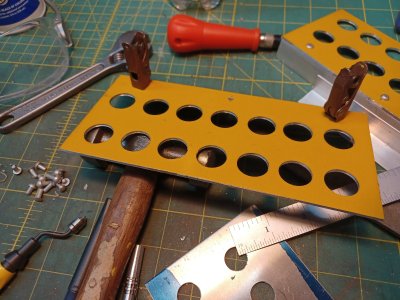
After a month of using the machine I figured out how I want my collets stored. Made a set of 1/16" thick aluminum holders and mounted then behind the mill. Always at hand, and easy to select between metric and the other. Also a rack with 1/2" arbour mounted items. I expect to add one for 3/4" arbour ones if/when I decide to also use TTS style holders in the future.
Rivets and clecos are courtesy of Sanderson Aircraft, Malton, ON where my dad worked in 1954.
 

Attachments

  • IMG_20240302_154141.jpg
    IMG_20240302_154141.jpg
    396.3 KB · Views: 14
  • IMG_20240302_144255.jpg
    IMG_20240302_144255.jpg
    494.3 KB · Views: 14
  • IMG_20240302_143544.jpg
    IMG_20240302_143544.jpg
    433.2 KB · Views: 14
Looks awesome I need to get a light for my mill. How big of a difference did the MDF/rubber feet make?
 
Huge difference. The stance is very solid now, I think it is more with the position of the feet than the rubber.
Mdf dampened the connection so it it is no longer metal-metal.
Gerrit
 
E
And today I ordered the 4 axis DRO from Aikron. Quill is magnetic, it will fit in place of the capacitive scale that comes on the machine.
It will be a week or two before I have pics of the install. I have taken a lot of guidance from @neer724 thread: https://canadianhobbymetalworkers.com/threads/yet-another-dro-install-king-kc-20vs-2.4866/

gerrit
Excellent Mods Gerrit!

I recently saw this, if you have a 3d printer might make the DRO install much easier:


Here is another one too
 
thanks,
I saw that first install as well. My printer doesn't have a large enough bed. Plus I prefer aluminum :-)
But the second link has some good attributes, esp. the Y axis mounts. I'll print those out and see how it works.
 
Scales arrived today, display apparently arrives tomorrow. UPS charged HST of course, and only $12 additional for customs handling. I expect the rest was bundled into the shipping charge. 8 days from China, not too bad at all.

None of the 3D prints will work for me, some due to size of my printer, some due to my readers and scales being slightly different in size. So the install will be a combination of @neer724 and my own adaptation.

Glass on 3 axes, magnetic on the quill, it will be hidden inside where the capacitive one use to reside. Pics in the next fews days.

In the intervening 3 months since buying the mill, price went up $200 although the base dropped by $40. Still excellent value, getting a LOT of use out of the machine.

gerrit
 
None of the 3D prints will work for me, some due to size of my printer, some due to my readers and scales being slightly different in size. So the install will be a combination of @neer724 and my own adaptation.
Can you split the parts in your slicing software? I've done that a few times in Bambu slicer and it worked really well. The 2 parts dovetailed together with almost no seam at all.
 
I could but with the exception of a few of the items they are better/quicker made out of aluminum. The prints are a good template in some cases.
 
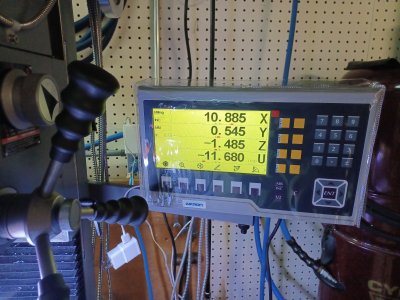
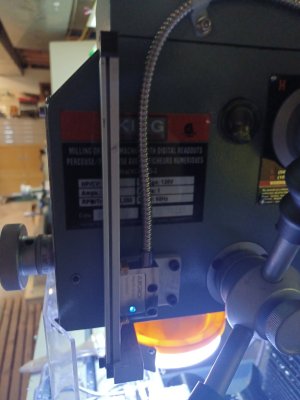
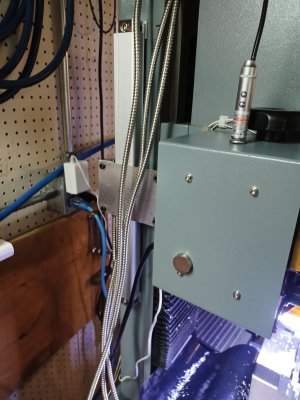
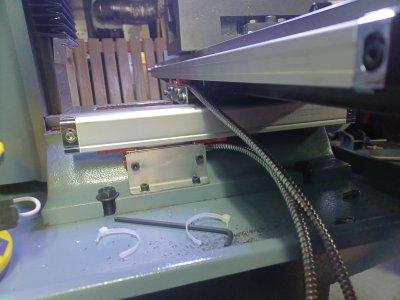
All 4 axes are done. Still some cable and swarf management to complete. I made a couple of 3D printed shims and spacers to speed up the install.
X is 520mm AKS scale
Y is 220mm AKM scale
Main Z is 320mm AKM scale
Quill is 120mm magnetic scale, a bit shorter would have been great.
All are 5um.
 

Attachments

  • IMG_20240325_173251.jpg
    IMG_20240325_173251.jpg
    451.1 KB · Views: 22
  • IMG_20240325_173246.jpg
    IMG_20240325_173246.jpg
    318.3 KB · Views: 20
  • IMG_20240325_173232.jpg
    IMG_20240325_173232.jpg
    262.8 KB · Views: 21
  • IMG_20240325_173208.jpg
    IMG_20240325_173208.jpg
    378.7 KB · Views: 21
  • IMG_20240322_173750.jpg
    IMG_20240322_173750.jpg
    284 KB · Views: 24
Looks good.
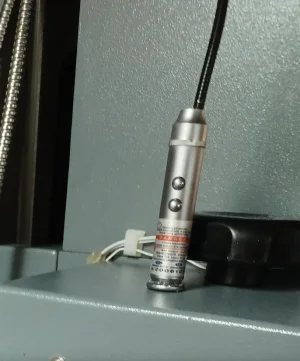
What is this connection for?
 

Attachments

  • Screenshot 2024-03-26 at 10-29-11 Gerrit's King KC20-VS2 enhancements.webp
    Screenshot 2024-03-26 at 10-29-11 Gerrit's King KC20-VS2 enhancements.webp
    65.8 KB · Views: 5
That is a convenient led light (with optional laser) with magnetic base. The ring light that installed has a blind spot if I am using a drill chuck. :-( I am looking at making a spotlight using a powerful led I have left over from replacing the filament bulbs on my optical comparator.
 
Looks good Gerri !!
DROs sure beat counting the number of cranks.
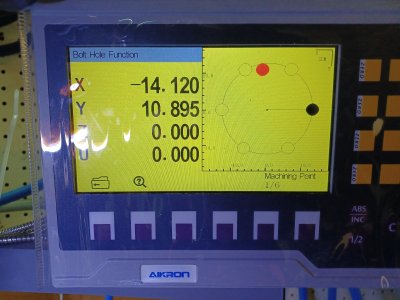
Have you tried a ‘bolt circle‘ ?
 
@LenVW - funny how that bolt circle capability works out. Always did it manually before. Then got the DRO with that built in. Never knew how much I'd like that feature till I got it. I've used it regularly ever since.

I especially like the Ditron feature that shows a circle where you are plus coordinates, and where the target is plus coordinates. Sort of like manual CNC. You can just tab between target circles. Nice to pre drill all the holes, drill all the holes to size, then tap all the holes. Very cool!
 
Back
Top