• Scam Alert. Members are reminded to NOT send money to buy anything. Don't buy things remote and have it shipped - go get it yourself, pay in person, and take your equipment with you. Scammers have burned people on this forum. Urgency, secrecy, excuses, selling for friend, newish members, FUD, are RED FLAGS. A video conference call is not adequate assurance. Face to face interactions are required. Please report suspicions to the forum admins. Stay Safe - anyone can get scammed.

Embossing text on parts - Prusa Slicer

slow-poke

Ultra Member
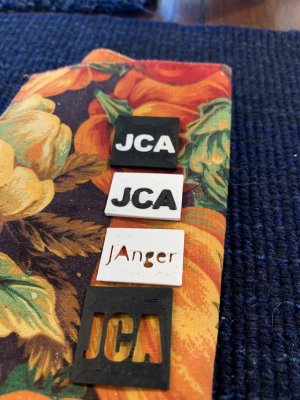
I just found a feature in the Prusa slicer that seems pretty handy. It is not uncommon for me to print a part and then tweak the design a bit and then print the new version. a day or so goes by and you can't remember which one your dealing with. I just discovered that you can add text to the part as a last minute thought using the add text feature in the Prusa slicer, perhaps this is old news, but seems pretty handy to me.


IMG_0809.JPG
IMG_0807.JPG
 
it's very nice feature. Also you can engrave. AND you can emboss or engrave on a round surface! Here I am experimenting with void space or cuts for engraving. On some of these I'm trying printing a negative layer then the same thing as a positive layer but both separately, then I'm putting them together. The results are ok but I want them better. I was reading on the prusa site to downgrade to a 0.25 nozzle so I'm trying that now.
 
I want to script embossing. There does not seem to be a find and replace. Or is there another way to do change all the 1/4" to 3/8" other than laboriously going through all the text items.?

1703869579504.webp
 
Can you set up the different sizes and store them as values?
On the other hand how often would you have to change the other metric value.
 
There does not seem to be any way to do things like that in the slicer. Perhaps it is more possible on the CAD side with scripting. No idea never looked into it. Anybody doing Fusion 360 scripting?
 
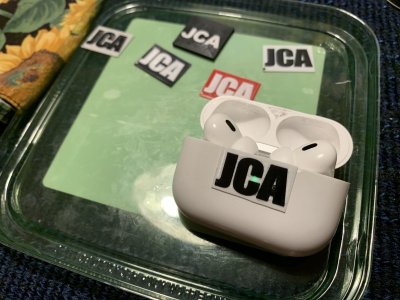
More labels. Just two layers thick for the base, 3 layers for the letters, and the key is a 0.25mm nozzle. I positioned a hole as well to let the LED green shine through.
 

Attachments

  • IMG_4465.jpeg
    IMG_4465.jpeg
    332.8 KB · Views: 10
Back
Top