• Scam Alert. Members are reminded to NOT send money to buy anything. Don't buy things remote and have it shipped - go get it yourself, pay in person, and take your equipment with you. Scammers have burned people on this forum. Urgency, secrecy, excuses, selling for friend, newish members, FUD, are RED FLAGS. A video conference call is not adequate assurance. Face to face interactions are required. Please report suspicions to the forum admins. Stay Safe - anyone can get scammed.

Centering Work in a 4-Jaw Chuck

An hour? It should not take more then few minutes. Use a dial indicator.

I just read instructions. If you follow that yeah it may take an hour ;)

1. Put part in and make sure it is more or less in the middle - if chuck is already open to approximate size of the part, time needed less than 30 seconds. Secure part well with 4 jaws.
2. Set dial indicator to touch the part, time needed 1 - 3 min.
3. put in neutral or put in high speed - time needed 10 sec
4. spin chuck and notice near which jaw it is closest to you. Then loosen opposite jaw and tighten the jaw that is close to you.
5. repeat #4 keeping in mind that when it gets close you need to move the part in the chuck only half then full distance
6. remove dial indicator 30 sec

4-5 step repeats are about 10-15 seconds each, so 2 to 3 min.

You should be able to have part well under 1 thou runout in well under 10 min
 
An hour may have been a bit of an exaggeration but it felt like an hour:rolleyes: Those LMS instructions are essentially what you described. I had it within a thou in two rotations of the chuck today:D
 
@YYCHM said: Now if I could only find something similar for tramming the vise square on my mill.....

I am making a 3 gauge tramming tool to do x & nod all at once.

I have the reference plate and the three gauges already, and I pick up the steel for the plate posts and the aluminum for the spinner today. Then I have some machining and some illusionary imaging to do.

I think I can incorporate vise squaring too.

When I am done, or when I hit a road block, I'll post the project.

Here is the background in the thread 'Spindle square' https://canadianhobbymetalworkers.com/threads/spindle-square.4225/post-56477
 
Last edited:
When centering on a 4 jaw, remember, " Loosen the low jaw, Tighten the high jaw". It takes practice but you'll eventually get good at it and have it done in little time
 
When centering on a 4 jaw, remember, " Loosen the low jaw, Tighten the high jaw". It takes practice but you'll eventually get good at it and have it done in little time

How do you know which jaw is low and which jaw is high?
 
How do you know which jaw is low and which jaw is high?

The high jaw is the one where the teeth show when you smile..... LOL!

You have to use an indicator to do this.

When you get good at it, you also learn to interpolate the Jaws when the high and low is in between.
 
Set your indicator to 0 on any jaw you like, this is your starting point, rotate the chuck to the jaw that is 180 degrees from the first. Note the indicator reading, if its higher than 0, tighten that jaw, if its lower than 0, loosen it. Once you have these 2 jaws equal, do that same on the remaining 2 jaws.
 
Set your indicator to 0 on any jaw you like, this is your starting point, rotate the chuck to the jaw that is 180 degrees from the first. Note the indicator reading, if its higher than 0, tighten that jaw, if its lower than 0, loosen it. Once you have these 2 jaws equal, do that same on the remaining 2 jaws.
This is a better way of saying it. :)
 
All good stuff.

Few other things to consider perhaps:

a) it is easy to overtorque and thus deform a part - especially if there is a hole in it
b) the part may not be a true cylinder to begin with - then it becomes difficult to indicate it
c) the closer you get to the part running true, the smaller the “corrections” on each jaw will need to be - it could be as little as just increasing the pressure on the chuck key, you are not actually moving anything (well, you are, but you can’t tell by chuck key position, only the DI or DTI will show the movement)
d) sometimes the jaws stick, especially when you get them tight; might be worth taking a soft blow hammer and gently tapping the jaws to “redistribute” the clamping forces - get ready for a big movement as the jaw(s) unstick
e) don’t be afraid to start over - back off the jaws so they hold the part lightly and try again
f) etc…

Practice, practice, practice. And when you are done and comfortable with round stock, try some square stock….
 
Not on my DI or DTI

Sometimes indicators get their positive and negative mixed up or don't have a +/- marked on them. The easiest way to know is to manually and very gently push the indicator toward the work. This simulates the work being higher. Whichever way the needle goes is the way it goes for the high side. If the work isn't being held rigidly, you can also push the work toward the needle. Doesn't really matter. You will get the hang of it quickly.
 
Sometimes the item you are trying to dial in is out of round or not regular. When that happens dial in 1 pair of opposing jaws and then the other. The pairs may not be the same and you may still have runout but that's as good as your going to get.
 
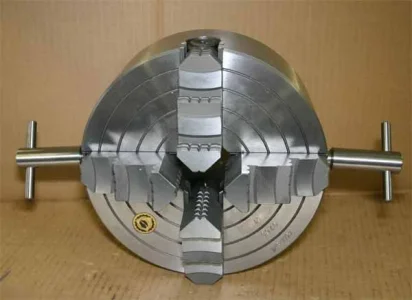
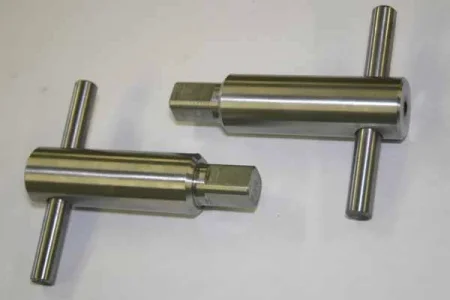
I really like using my twin, mini chuck keys on 4J. An easy home project to make them. They give you a much better feel for dialing in the jaws from 'way out' to within a thou very rapidly because you are adjusting 2 jaws simultaneously. That's more time efficient than in/out on 4 points. Your brain quickly develops a feel to micro-adjust one key the same as the other as they turn opposite one another. This not only makes the the requisite displacement adjustment, it gets very close to equalized jaw force on the part which is very important & overlooked. When its relatively firm & within say a thou, you're 95% there. Then tighten whichever remaining single jaw to move the needle last thou home. Rookie mode is jaws are tight being too far out like 5 or 10 thou. That's when the loosen/tighten iteration dance starts or getting impatient & bringing out the Gronk wrench.

What RobinHood says about over torque is exactly right. You can see this being done by many YouTube <cough> pros. Squishing material is not the same as proper centering. You can get away with this on an log of steel if you don't care about & overstressing the jaws/worms, but its also a good way to pooch a softer alloy part you may have several hours of prior machining on.

It is possible to make skid marks on the part because as the jaw tightens in X, its being dragged across Y. The 2 key method helps but still a good idea to use packing material for protection. Some use brass sheet or pop cans. I like adhesive backed metal aluminum? tape, I think its used for ductwork or something.
 

Attachments

  • IMG_6745_edited-2.webp
    IMG_6745_edited-2.webp
    24 KB · Views: 89
I really like using my twin, mini chuck keys on 4J. An easy home project to make them. They give you a much better feel for dialing in the jaws from 'way out' to within a thou very rapidly because you are adjusting 2 jaws simultaneously.

Alright @PeterT ... You got my attention on that one.

How do these Twin mini-keys work and what does this contraption look like? Is that like some kind of external scroll? Does it have to be custom made for each chuck or is it adaptable to your chuck size? How much do you think it cost you to make it?

I am curious as a Prairie Magpie!
img_6745_edited-2-jpg.18843
 
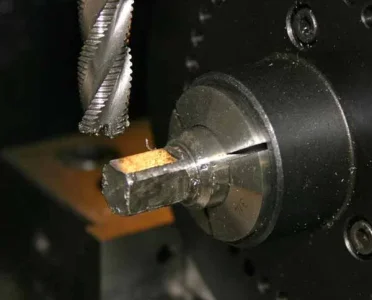
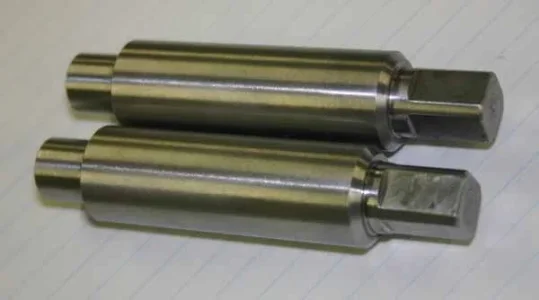
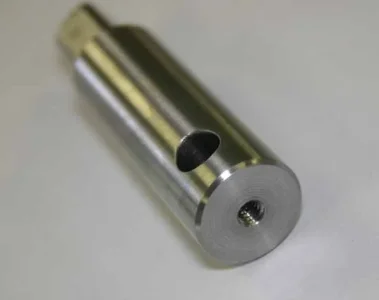
Hope I'm not overselling something dead simple. All I made was 2 identical chuck keys. They are shorter & more compact than the typical regular key so its comfortable to position your hands on either side of the 4J chuck (horizontally in a lathe vs up-down). Just insert them into the opposing key registers & rotate simultaneously. Obviously to displace the work they turn in reverse direction to one another dictated by the jaw screws, but your brain figures that out really quick. As you feel it tighten against the work you crack one open & tighten the other nudge-nudge mode. Everything else about dialing in is no different than regular 4J setup.

On initial setup setup, what I find is you can get real close if you just focus on the gap between an indicator tip positioned say 1mm away from work. Don't even look at the dial at this point. Just make the gap the same between the 2 jaw axis lines rotating 90-deg. You eye is amazingly good at distinguishing a gap. Then when you apply the indicator to the part, the needle will exhibit much less movement & center will be much more obvious. If its counting 2 revs one way or another (out by a lot) just drives you batty & wastes time. Using the reference circles in the chuck relative to jaws is another good initial visual cue.
 

Attachments

  • IMG_6735_edited-1.webp
    IMG_6735_edited-1.webp
    22.9 KB · Views: 2
  • IMG_6738_edited-1.webp
    IMG_6738_edited-1.webp
    12.4 KB · Views: 2
  • IMG_6741_edited-1.webp
    IMG_6741_edited-1.webp
    7.8 KB · Views: 2
  • IMG_6742_edited-1.webp
    IMG_6742_edited-1.webp
    11.3 KB · Views: 2

Seriously?

That looks fully manual to me!

HUGE disappointment!

I thought we were talking a coordinating mechanism of some kind.

I don't want to be turning both of those at once myself. I prefer to get two hands on just one key at the top. I don't even like cranking a jaw from the side let alone two sides at once!

But ok, I guess the joke is on me.

My preferred method is to put the indicator at the top of the work, find the low side and put that at the top. Interpolate the Jaws if they don't work out to coincide, and back them off enough to remove 1/2 of the low amount, then rotate 180 and dial out the other half. Then repeat.

If it's out a lot, I may do that in bigger chunks without much attention to how much I'm taking out or adding.

I tend to make the Jaws tighter and tighter as I get close but never enough to distort the part unacceptably.

FWIW, I'm in the camp that says some distortion is inevitable. The only real question is how much is acceptable. In this particular case, sometimes hangout can be my friend cuz I can clamp and distort further away from my work.
 
Back
Top