• Scam Alert. Members are reminded to NOT send money to buy anything. Don't buy things remote and have it shipped - go get it yourself, pay in person, and take your equipment with you. Scammers have burned people on this forum. Urgency, secrecy, excuses, selling for friend, newish members, FUD, are RED FLAGS. A video conference call is not adequate assurance. Face to face interactions are required. Please report suspicions to the forum admins. Stay Safe - anyone can get scammed.

Tool Ball Burnisher

Tool

Ironman

Ultra Member
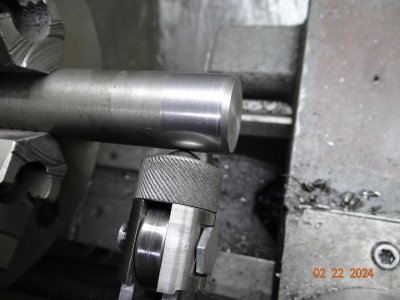
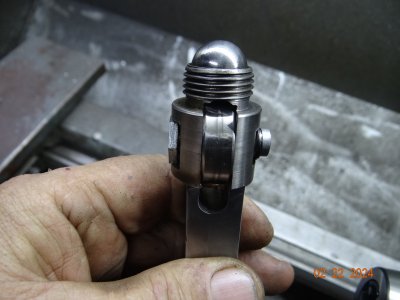
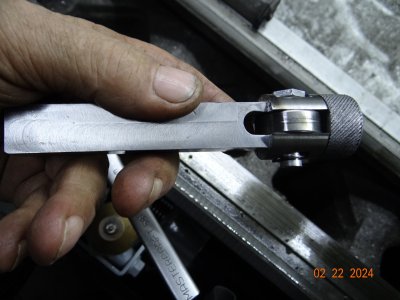
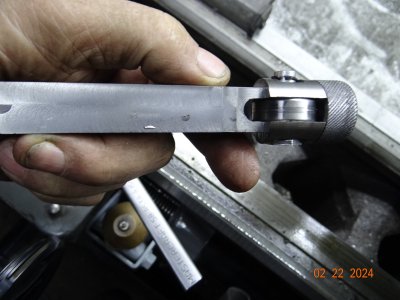
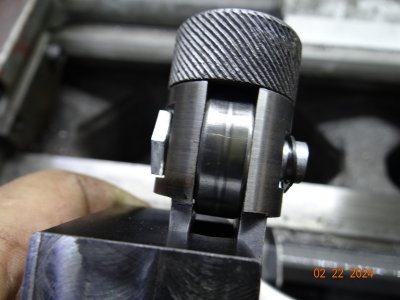
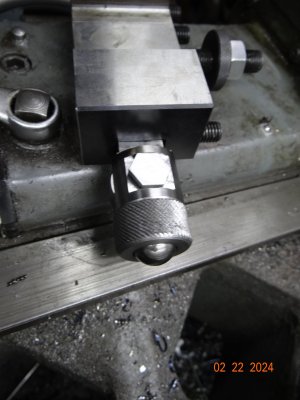
I wanted to make one of those ball burnishing tools, and I tried to copy things from the video. Thought I had done all the figgerin' and measuring right, and then proceeded to turn a nice piece of CR stock into blue chips and scrap metal. The axle measurement was off so the ball cap could not seat.
I sat down and pulled up the PlasmaCam software as I can work to a thou with that and read measurements. I drew the whole shebang up and then copied it in metal and it worked out well. Of course, now the hunt was on for some metal. I found a bent shaft that I had built up with welding and when it finally failed for good, the customer had me make a new one. So after a bit of wiggling around I got enough out of the shaft to use it on this. After these pictures were taken I chucked up another 3/8 bolt and made a better pin. The one in the picture is too long but I was horned up to try it out.

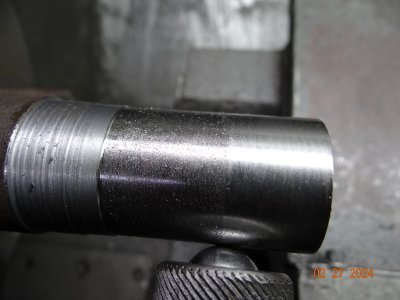
It works well, I tried it out on a stub of CR stock.
 

Attachments

  • DSC05650.JPG
    DSC05650.JPG
    285.8 KB · Views: 37
  • DSC05655.JPG
    DSC05655.JPG
    268.3 KB · Views: 37
  • DSC05654.JPG
    DSC05654.JPG
    294.1 KB · Views: 34
  • DSC05653.JPG
    DSC05653.JPG
    293.3 KB · Views: 37
  • DSC05652.JPG
    DSC05652.JPG
    265.3 KB · Views: 36
  • DSC05651.JPG
    DSC05651.JPG
    278.8 KB · Views: 36
Looks great. I'd be curious to see the dimensional changes from using one.
From what I can read on this, there are no changes. When you measure a rough surface, you are reading the high spots. Burnishing causes the metal to flow from high to low and fills the lows. If you were sneaking up on a 1/2 thou interference fit in a ball bearing, this would be better than 600 grit or a file wiping off the high spots.
 
Thanks for the video. I might make one some day out of curiosity.
If it would help, I can post the drawing I built it off .
There is a hydraulic house video of a hack job ball burnisher he made welding a pipe stub onto a fork holding ball bearing. It shows him measuring before and after dimension, but I am not sure if I like his micrometer technique.
I used very little pressure to do my testing, and I want to experiment with light and heavy to see what it does.
 
In the video, after the process it points out to hardened surface. So this process work harden the surface to a higher Rockwell ?
 
Nice. Love the results on the work. In use does the ball rub on the housing? If not why not? Or does the ball largely just roll on the bearing and on the work and not touch the sides? In that video from vietnam the machinist put a lot of oil on his when he was using it. Is that needed?
 
Nice. Love the results on the work. In use does the ball rub on the housing? If not why not? Or does the ball largely just roll on the bearing and on the work and not touch the sides? In that video from vietnam the machinist put a lot of oil on his when he was using it. Is that needed?
The ball bearing is an 11/16" ball, and the hole it sits in is a couple of thou larger. Being a ball, te surface contact area anywhere is small. all the sides do is guide the ball. The main thrust force is supported by the ball bearing. I don't think a large amount of oil is needed like if you were knurling. You are not flushing out chips. A drop or two to lube the ball is all you need.
 
If it would help, I can post the drawing I built it off .
There is a hydraulic house video of a hack job ball burnisher he made welding a pipe stub onto a fork holding ball bearing. It shows him measuring before and after dimension, but I am not sure if I like his micrometer technique.
I used very little pressure to do my testing, and I want to experiment with light and heavy to see what it does.
Thanks for the offer, but when it comes time, I'll just wing it from what I have laying around. I have a small lathe, so a more appropriately sized tool would be better. Something with about a 10mm ball, and a 608 skate bearing would probably work for me. It's on the long list of stuff to make if I run out of other things to make lol.
 
Here is an example of how crude it can be and still work. Love the welding.:oops:
I found out the hard way that the dimensions from the centre of the bearing to the end of the ball and back to the cap thread shoulder are critical. The cap is not. You can shave off some from the thread end, chamfer the ball end inside with a drill bit and shave off the ball end of the cap to get the protrusion and the clearance you like.
 

Attachments

Last edited:
In the video, after the process it points out to hardened surface. So this process work harden the surface to a higher Rockwell ?
I personally doubt the hardening is more than 1/2 thou deep and will depend completely on the shaft material.
I think with hot rolled stock which I always seem to have a lot of, there would be no measurable hardening, but the surface would be much better than the torn up results left from a lathe tool.
It takes very little pressure to burnish. I am going to experiment with seeing about dimension reduction under greater pressure. I'm hoping I could reduce the last thou or 1/2 thou with a burnisher instead of polish with 400/600 grit.
That is what I though. By burnishing and filling the void, the material is more compress but not much hardened. I am curious in what application would we benefit from burnishing? To burnish a shaft were an oil seal rides. To burnish a shaft before hydraulic pressing parts together and prevent galling. a better finish on gummy material.
Your drawing gives a really good idea. Thanks for taking the time to post.
 
Last edited:
I looked it up on the web, this new to me burnishing tool and it improves the surface finish, the fatigue life 300%, harden the surface
~ < 10% and offer some corrosion resistance. Ironman, you added a project to my list. Just the fact I would no longer use sandpaper to improve the surface finish of my parts on the lathe is a bonus.
 
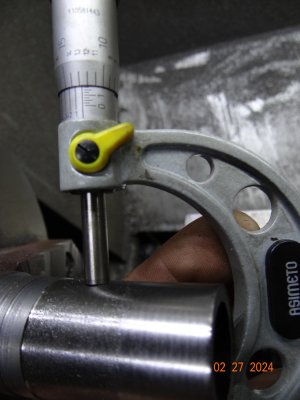
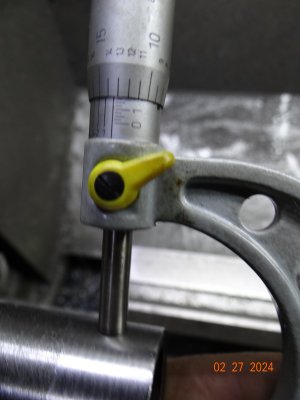
OK, today I did a test on some hot rolled heavy wall. I used a new insert and took it down to some dimension below 1.25" Although I got curls about 6" long it is typical HR with a snotty finish. So then I brought the ball up to contact enough to rotate the bearing, and then advanced the crossfeed 1 thou. I burnished at 350rpm and one pass, and then measured it. It appears to smooth and increase size by a little, perfect for a ball bearing press fit. I have no idea as to what multiple passes would do but I'm out of time today.
 

Attachments

  • DSC05656.JPG
    DSC05656.JPG
    327.1 KB · Views: 10
  • DSC05657.JPG
    DSC05657.JPG
    255.8 KB · Views: 10
  • DSC05658.JPG
    DSC05658.JPG
    226.7 KB · Views: 10
Back
Top