• Scam Alert. Members are reminded to NOT send money to buy anything. Don't buy things remote and have it shipped - go get it yourself, pay in person, and take your equipment with you. Scammers have burned people on this forum. Urgency, secrecy, excuses, selling for friend, newish members, FUD, are RED FLAGS. A video conference call is not adequate assurance. Face to face interactions are required. Please report suspicions to the forum admins. Stay Safe - anyone can get scammed.

accurate indication between operations

MrBlair

Member
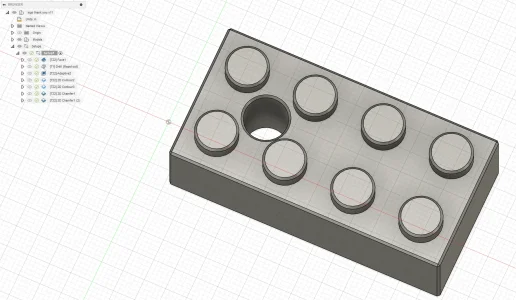
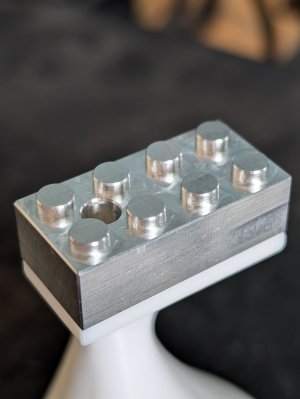
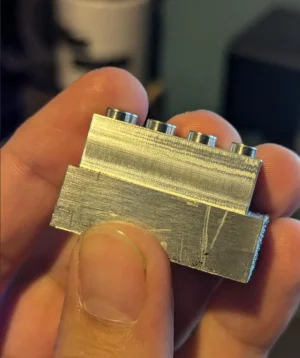
Hello everyone, I'm currently working on a thank you gift to a few coworkers + a tour gift to groups, a Lego piece. Currently finished the first operation, faces and contours the top and sides, cutting .02 lower than necessary to give extra breathing room for 2nd operation. (mostly happy with that, except for a weird abrasion mark on the finishing pass of the sides, using a 12111810 M.A. FORD 2 flute 3mm carbide and only removing .005).
help1.png

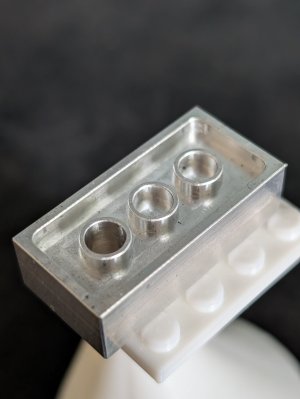
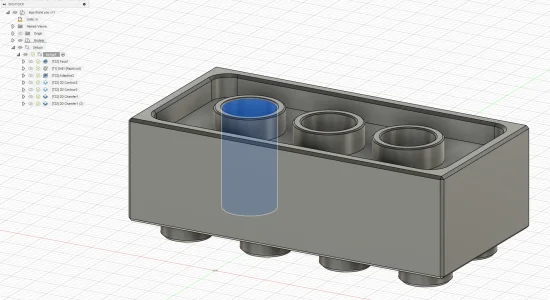
The second operation has me a bit worried, chamfer around is .01 on the outer edge, and .005 on the inner cylinders, I'm worried that if I'm off by even a small amount it'll be rather noticeable. To help with indicating I plan to put a hole through one of the inner cylinders on the bottom, to help indicate from there. Am I overthinking it, would simply removing the excess stock, and then edge finding before removing the last .02 be all I need to do? Or would using an indicator holder and finding the center of the hole be the best solution, or what would you guys do?
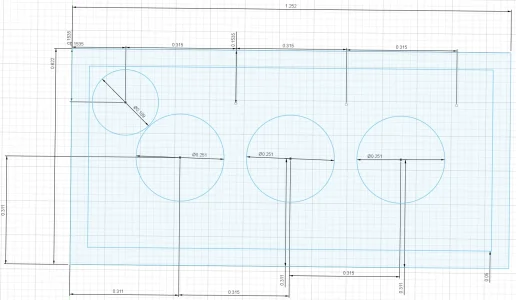
op2.pnghelp drawing.png
 

Attachments

  • op1.webp
    op1.webp
    224.8 KB · Views: 7
  • help2.webp
    help2.webp
    51.1 KB · Views: 6
Cool project. Personally I like to use the center of stock for my pickup for almost everything, especially parts done this way, as it's the best chance to blend into what's there IMO. I would just flip it over, pickup the center of stock, and deck it down to thickness, then pickup the center of the actual cut surfaces , and then run op2. I made a top hat style edge finder years ago for doing stuff like this and reaching under the uncut ledge, but don't think it would reach in this case, as there's not a lot of real estate left after holding the block.

There are times when a center block pickup isn't the best depending on the print (if there is one) or critical features that need to reference a datum/feature, but for blending in op2, to op1 on parts like this, it's the best way IMO.
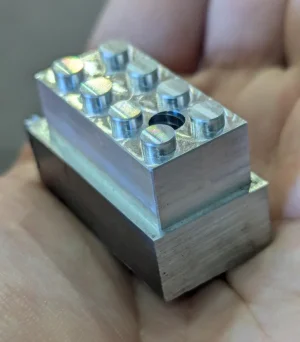
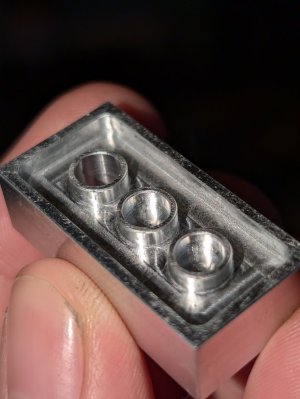
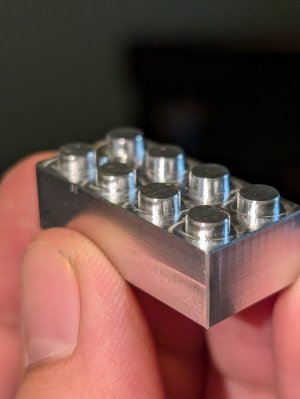
much appreciated worked like a charm!
 

Attachments

  • PXL_20240708_235605655.jpg
    PXL_20240708_235605655.jpg
    278.9 KB · Views: 6
  • PXL_20240708_235541632.jpg
    PXL_20240708_235541632.jpg
    223.3 KB · Views: 7
  • PXL_20240708_213241020.jpg
    PXL_20240708_213241020.jpg
    188.4 KB · Views: 7
  • PXL_20240708_213318115.jpg
    PXL_20240708_213318115.jpg
    172.2 KB · Views: 7
OMG. It's not just a small part, sometimes referred to as a LEGO piece but a real LEGO piece.

Too cool!
 
Back
Top