-
Scam Alert. Members are reminded to NOT send money to buy anything. Don't buy things remote and have it shipped - go get it yourself, pay in person, and take your equipment with you. Scammers have burned people on this forum. Urgency, secrecy, excuses, selling for friend, newish members, FUD, are RED FLAGS. A video conference call is not adequate assurance. Face to face interactions are required. Please report suspicions to the forum admins. Stay Safe - anyone can get scammed.
You are using an out of date browser. It may not display this or other websites correctly.
You should upgrade or use an alternative browser.
You should upgrade or use an alternative browser.
3D printed sensitive drill press
- Thread starter justin1
- Start date
Saw that video. Haven't had a chance to watch it yet. Does look interesting but why not just buy a $100 Princess Auto mini drill press.Thought it was neat project worth a share.
Depends what your doing with the drill I guess, the princess auto drill probly doesn't go past 10k rpm so any drill bits under 1/16 is probly not recommended. Also runout becomes an issue I would think with low quality bearings/spindle design.Saw that video. Haven't had a chance to watch it yet. Does look interesting but why not just buy a $100 Princess Auto mini drill press.
I don't usually drill anything smaller then 1/8 so I don't have any use for micro drill but they are neat none the less.
Ah. Watched it. Didn't understand that he filled the forms with cement. Much more stable. Not sure his moving table is stable enough. Might be why he broke the drill bit. Still... interesting project.Depends what your doing with the drill I guess, the princess auto drill probly doesn't go past 10k rpm so any drill bits under 1/16 is probly not recommended. Also runout becomes an issue I would think with low quality bearings/spindle design.
I don't usually drill anything smaller then 1/8 so I don't have any use for micro drill but they are neat none the less.
pdentrem
Active Member
Surprisingly these little cheap drill presses are pretty functional. We have two on the shop floor. Can not be ham fisted but for the money pretty good.
With tiny drill bits, your layout has to be right on, center punch the locations etc.
Pierre
With tiny drill bits, your layout has to be right on, center punch the locations etc.
Pierre
I had a MF-70 mini mill. Proxxon makes some neat little stuff. Also it's came down in price compared to when I bought the mini mill. Ok machine for small stuff but aluminum ways so not really a production machine.Surprisingly these little cheap drill presses are pretty functional. We have two on the shop floor. Can not be ham fisted but for the money pretty good.
With tiny drill bits, your layout has to be right on, center punch the locations etc.
Pierre
Thought it was neat project worth a share.
Yes, thanks. Brilliant idea imo using 3D printed parts as a mold like that. imo cement is a poor choice for the fill concrete, it never stops moving. Instead, why not do what best machine tool makers do and use epoxy granite concrete (epoxy + sand) (e.g. Harcrete by Hardinge)? Perfectly stable and vibrating damping that is 2x (or more) that of cast iron. Granted, epoxy is expensive, but that machine is a small volume.
I think raising the weight of the table plus the weight of the part takes away from the sensitive part of the operation.
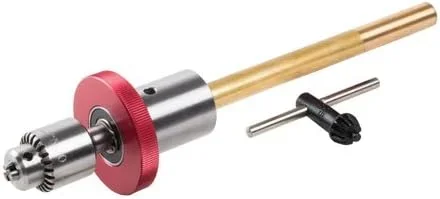
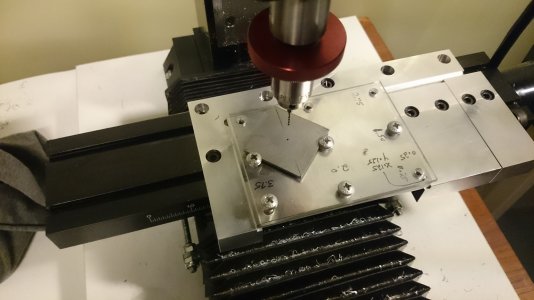
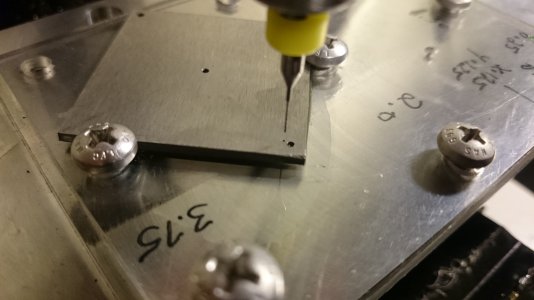
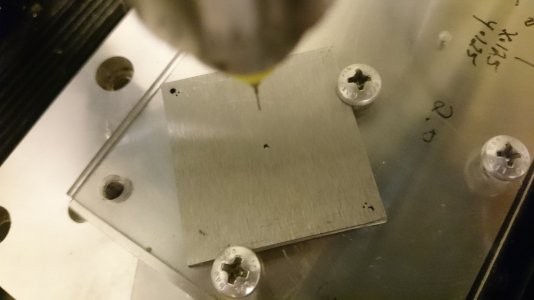
Here is a lifting device I made ages ago based on a design that appeared in Home Shop Machinist or maybe Live Steam ages ago. I've never found better. No force of a spring to overcome and while very light to start with, there is a counterbalance so you're not applying force to overcome gravity. The most sensitivity comes from trying to get to a zero force motion, this comes very close to that. I can't remember the designer, but kudos to you!
Very simple to make and it works really well. For fixturing, masking tape works well and I did make a mini v block that sits on top.
Last edited:
Does the table turn on that lifting rod? Is that an advantage or disadvantage?Yes, thanks. Brilliant idea imo using 3D printed parts as a mold like that. imo cement is a poor choice for the fill concrete, it never stops moving. Instead, why not do what best machine tool makers do and use epoxy granite concrete (epoxy + sand) (e.g. Harcrete by Hardinge)? Perfectly stable and vibrating damping that is 2x (or more) that of cast iron. Granted, epoxy is expensive, but that machine is a small volume.
Here is a lifting device I made ages ago based on a design that appeared in Home Shop Machinist or maybe Live Steam ages ago. I've never found better. No force of a spring to overcome and while very light to start with, there is a counterbalance so you're not applying force to overcome gravity. The most sensitivity comes from trying to get to a zero force motion, this comes very close to that. I can't remember the designer, but kudos to you!
Very simple to make and it works really well. For fixturing, masking tape works well and I did make a mini v block that sits on top.
View attachment 49361
View attachment 49364
View attachment 49363
Does the table turn on that lifting rod? Is that an advantage or disadvantage?
Yes, its not keyed, but I can't say I ever thought about it (although could be) There would be a slight bit of friction between the bottom of the post and roller stopping it from turning I guess. i use I've either taped the work to the table or hand held it like the little V block and look in two directions to centre things
Yes, thanks. Brilliant idea imo using 3D printed parts as a mold like that. imo cement is a poor choice for the fill concrete, it never stops moving. Instead, why not do what best machine tool makers do and use epoxy granite concrete (epoxy + sand) (e.g. Harcrete by Hardinge)? Perfectly stable and vibrating damping that is 2x (or more) that of cast iron. Granted, epoxy is expensive, but that machine is a small volume.
I agree with epoxy + sand recommendation. I've used it for mold tooling in the past. A few more thoughts. When applied to typical steel body frames, there is pretty good mechanical adhesion to the steel itself. We don't want filler to part ways with the membrane here & there otherwise its just a dead weight rattling around. Some designs have cross tie members to provide the the cured slurry matrix something to mechanically lock to (think re-bar). An ordinary 3DP cavity would not normally have these features but you could (and probably should) contemplate this. Plastic is kind of a slippery, self releasing material. Some people use 3DP parts to make rudimentary molds, popping parts off with no releasing agent. It also has higher thermal expansion/contraction coefficient. Maybe the easiest thing to do is have some tapped holes for cross tie rods. Or webs with holes in them so the slurry flows through them & locks everything together.
either or, or loctite. Can't remember how I did mine it was so long ago. I was probably more hung up on super accuracy in everything I did (now its just where it needs it) so probably was press fit .....today for sure it would loctite lol. Which ever way, afterward put the shaft in a collet and face the table top and it'll be perfectAnother table question, press fit or threaded on the lifting rod?
The brass counter weight is a nice touch.


